Showing posts with label Jacket. Show all posts

Sunday, 8 May 2016

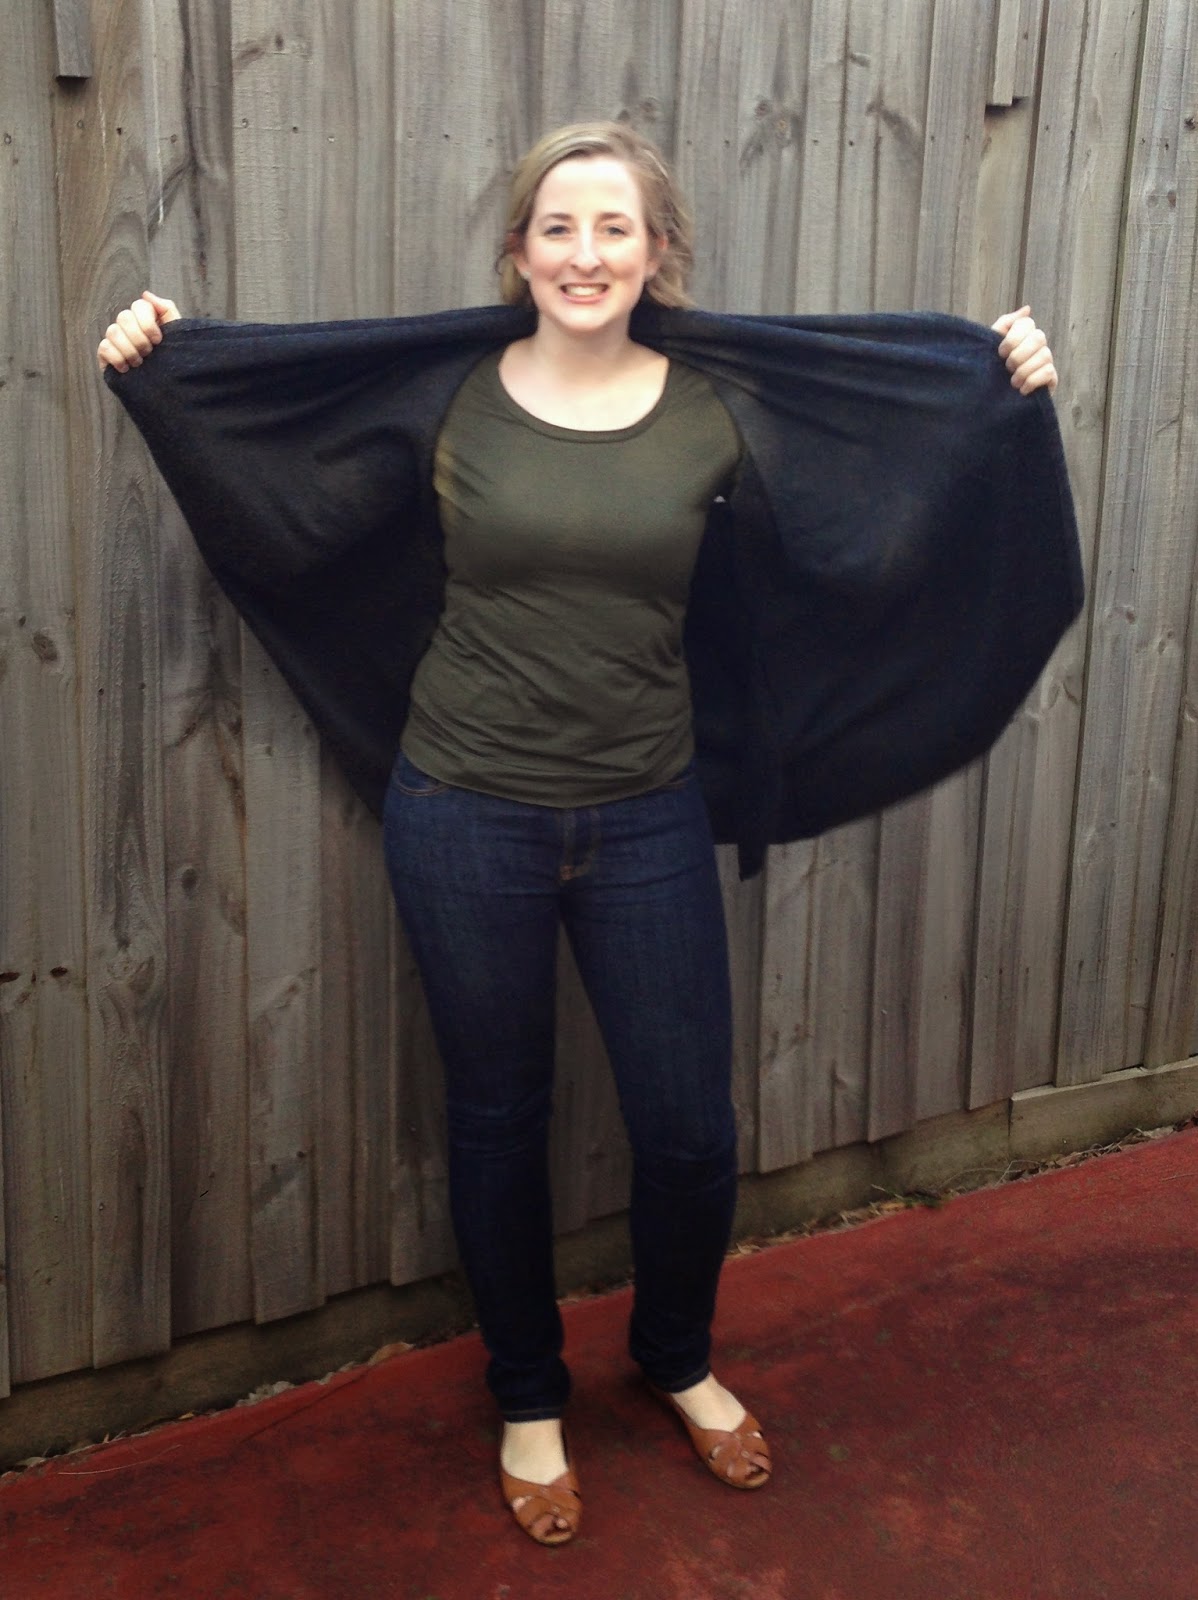
Not My Wedding Cape: Peppermint Winter Wool Cape

A couple of weeks ago Tim and I got hitched and it was perfect!


I had considered making my wedding dress and even bought a few patterns but ended up falling hard over a dress I tried on when inspiration shopping. I absolutely loved my dress. And I'm really glad I bought a dress as Tim and I had a short engagement and trying to decide on a style, find the right fabrics, muslin and sew a dress in that time frame would have been an added stress that I didn't need.


But, I wasn't too sure what to wear over my dress in case of cool weather. I had a second-hand jacket that would do the job, but I couldn't get the idea of a blue cropped cape out of my mind. I searched the internet for inspiration and loved the idea of somehting like this, but wasn't totally convinced it would go with my dress. I decided to just give it a go and cut out the free Peppermint Sewing School Winter Wool Cape pattern. I cut a size small in some beautiful blue wool blend and blush silk fabric from Tessuti.


I made the pattern up as instructed with the following changes: I understitched the silk edge to wool seam allowances to help it stay inside the cape a little better. If I made the cape again I'd cut the silk a couple of mm's smaller than the main fabric to help with this also. I attached the neckband the opposite way around to the instructions so that the hand sewing would be on the inside. I used a hook and eye rather than a button and loops.


I love that this pattern has shoulder seams and arm space, rather than being just a semi-circle. You can still use your arms! I love the cropped length and the style. But, it wasn't right for the wedding. My dress was fitted up top and having a boxy cape took away from the shape of my dress. Also, the blue and white reminded me of an old fashioned nurse's outfit. My sister took some photos of the cape over my wedding dress for me a few days before the wedding. Below is the ridiculous photo that sealed the deal: the cape was not quite right.


But it is a lovely little cape. So that leads to question, where and how do you wear a little bright blue cape?

Tuesday, 3 May 2016

A Belated Tessuti Sydney Jacket

A post that's been half written since last winter:
I love the Tessuti aesthetic. The designs are modern, minimalist and often offer comfort through oversized, boxy or flowy styles. There are a few bloggers on my feed who make just about all Tessuti patterns and they look stunning wearing them. I'm not so sure about these boxy, flowy, often lengthened garments on my body. I generally admire these patterns on others and avoid them for myself.


This was true of the Sydney Jacket initially. And then these amazing coats kept popping up all over my blog feed. I went to a Frocktails fabric shopping get-together last year and I saw four different ladies in four equally gorgeous coats in one morning! About an hour in to the day I was convinced I'd give it a go.

I bought my fabric (wool/poly blend) from The Fabric Store and cut a size S. Due to fabric wanting to fray a little I excluded the exposed pockets and cut the front piece along the selvage. I didn't both about pattern matching because the pattern is a little origami like at first and I didn't want to stuff around figuring out the perfect match only to get it wrong. Especially as I wasn't convinced I'd even wear the coat.

The sewing was pretty darn quick. I found it helpful to mark in chalk the overlapped seam lines on the fabric when lining up pattern pieces. I really like the look of the exposed seam lines but they can get a little messy if you're not careful. On the edges of the coat I sew a line of stitching parallel to the raw edges and then purposeless frayed the edges a little.

These photos are from last winter, wearing the coat over Jeans. But since, I've been more likley to wear it over another drapey long sleeve cardigan with a fitted skirt. I wouldn't say I feel totally myself in it and I think I look a bit like I'm just wearing a blanket, but it's very warm and comfortable. I've been considering making another version but can't decide between a colourful tartan I've been dyeing to cut into and a basic black or tan.  I wonder also if a slightly thicker fabric would give it more structure and remove some of the blanket look?

Sunday, 31 May 2015

Grainline Studio Cascade Duffle Coat

I love winter coats. I have four that I wear regularly (including my Jackie Coat), but my favourite is a threadbare black hip-length hooded duffle coat with two missing toggles. My mum bought it for me over 8 years ago and it's been a staple ever since. It's some sort of magic coat that goes with every outfit and some how fitted me perfectly across three different dress sizes during this time. I desperately needed a new perfect coat.


Enter the Grainline Studio Cascade Duffle Coat pattern, which I bought from Indie Stitches. View A is an almost perfect replica of my favorite coat except that it needed View B's hood.  I cut size 6, grading out the to 8 from the waist down. It took for freakin' ever to trace and cut out all 27 pieces required. There were a few pieces that I didn't trace because they weren't multi-size or could be folded.


It took some time to gather all the material. I used leftover black wool felting from my Jackie coat, and bought some gorgeous grey speckled wool from the cloth shop for the contrast. I couldn't find any premade toggles I liked so I purchased these from M Retch. The delivery was super quick, but I'd prefer a courier service that drops the product to the local post office if the recipient isn't home rather than having to reorganise a time with the courier for pick up. Searching for the leather was frustrating. I couldn't find any soft textured black leather in my local fabric stores. I hunted for leather handbags in opshops but didn't find anything quite right. In the end my sister gave me some scrap leather used to cover their kitchen chairs with - it was perfect.


I wanted the coat to be quite warm and thick so I interlined the bodice pieces with leftover PJ flanelette (pea pods and wolves). I did this by tracing the whole bodice pieces, without the yoke/bodice seam allowances, basting the main and interlining fabric together and treating them as one.


This Jacket was a labour of love. Every time it seemed close to being done I'd be shocked to see how many more steps there was in the instructions. Thankfully the instructions were really well written. The process of the sewing and attaching the lining can be a little confusing but a quick glance at the sewalong was all that was needed to confirm what you are doing.


My only complaints about the coat are the size of the pockets (not a big deal, but I'd make them smaller next time) and that the hood and hem lining wants to pull down and sit strangely. Because there is excess ease in the lining (to allow for movement) the hem facing and hood facing have the tendency to fall out of place (even after a good press). I fixed this by tacking the facings down. I simply stitched in the ditch of the side seam (hem) and centre seams (hood).


I love the style and fit of the coat. It definitely fills the hole of my old perfect coat. It is on the short side, but I'm short torsoed so it doesn't both me. I find the sleeves slightly too firm given the number of layers I'll be wearing under the coat, but hopefully the interlining will mean less layers. Overall, I'm incredibly happy with how my Cascade Duffle Coat turned out and I've promptly filled the (massive) pockets with tissues and spare gloves.  

Saturday, 6 September 2014

Colour Blocked Jackie Coat

Long time, no post. Would you believe I just haven't felt like sewing lately! I haven't been much inspired by any of my fabrics or patterns. I think this might have something to do with the changing seasons. None-the-less I have something pretty special to share. I bought the Jackie Coat pattern from Iconic Patterns so I could "sew-along" with the Janelle and Maria during July and August. Unfortunately I was a little late to sew-along but was thankful for their great posts explaining each step. 

Iconic Pattern Jackie Coat

I've had my eye on the colour blocked coat style for a while and had a heap of pins-piration to draw from. I ideally wanted a swing coat and originally thought about modifying the Albion Coat pattern as I'd already made it once for Tim. But why re-invent the wheel? The Jackie Coat had just the right amount of swing and I loved the idea of playing with the blocking placement and welt pockets. 

Iconic Pattern Jackie Coat

I cut a Size 10 grading out to a 12 from the waist down. In the end I probably could have dropped down a size but more room in a coat for extra layers never hurt. To enable the colour blocking I cut the front, back, and facing pieces in half 9cm below the lengthen/shorten lines. For the sleeves I made the cut at the top turning line (makes sense if you see the pattern). I then added 1/2" seams allowances. Because the Jackie Coat is asymmetrical most of it is cut on the single layer (not on the fold). This, along with having doubled the number of pieces to be cut meant that cutting out was rather a long process. 

Iconic Pattern Jackie Coat

For the fabrics I chose a black and cream flannel wool from AH outlet and The Cloth Shop respectively. The lining is a pink silk twill with printed polkadots for the Fabric Store. I love the pop of colour. I knew I wanted to keep the coat really simple on the front so I dropped the bound button holes for these beautiful snap fasteners from The Cloth Shop. They are quite big with a lovely cream speckled plastic component as well as the heavy duty metal inner.

Iconic Pattern Jackie Coat

Sewing up Jackie was surprisingly simple. Unlike usual I took my time and enjoyed the process. I catch stitched all the inner seams allowances down so they wouldn't shift and move once the lining was in. I added black/cream top stitching at all the colour blocked seams to help define the lines. The welts aren't perfect but they're good enough and I really like how the black welt pocket intersects through the cream fabric.

Iconic Pattern Jackie Coat

The Jackie Coat instructions are very good. The only time I got a little confused was bagging the lining. I've never done this on a coat before so that's no surprise. I somehow ended up sewing my sleeves in a continuous loop so that if I was wearing the coat it would have been more of a straight jacket - a really stylish one at that!

Iconic Pattern Jackie Coat

The pattern is designed to be worn with the sleeves turned up, but I really prefer the look and length of them down. The coat buttons right up (see below), but that's not really me. I'm more likely to wear it undone. I love how my Jackie Coat turned out and I could see myself giving the pattern another go next winter incorporating a symmetrical centre front opening like Janelle has done. I'm so glad I got my butt into gear and made up Jackie before the warm weather settles in. 

Iconic Pattern Jackie Coat

Wednesday, 6 August 2014

Scarf Neck Cardy For Mum

My Mum's birthday is the same day as Tim's and I also made her present: a Swoon Scarf Neck Cardigan. The same free pattern I used to make my own beige cardy last month. I wear that cardigan ALL the time and it is incredibly comfortable. It seems mum's style so I whipped one up for her too.
 
Swoon Scarf Neck Cardy 
 
I made her version out of a wool blend knit form the Cloth Shop. Its a gorgeous magenta purple colour. Tim took some super quick photos before I had to hand it over. I had a hard time taking it off and putting it in a gift bag. I may need to make another version just for myself. I didn't now I liked purple so much!

Swoon Scarf Neck Cardy

My mum is a little smaller than me so I cut the same size (S) but increased the seam allowances to 5/8" rather than 3/8" to create a slightly smaller fit. I also added some cuffs on the sleeves as I really like the finish, however I didn't take any length from the arms so its really nice to snuggle into.

Swoon Scarf Neck Cardy

I've been doing a bit of selfless sewing lately and I have more to get on with. I have been telling my younger sister I would make her a Cambie dress since Christmas, so that's a priority for this month! I also need to make Tim another Negroni shirt out of the "good fabric". To keep me interested I like to sew 1 or 2 things for myself between projects for others/ commitment sewing (because I'm selfish like that!) so I have a lot of sewing ahead of me this month. How's your month looking? Any fun sewing plans?

Swoon Scarf Neck Cardy

Friday, 4 July 2014

Draped Coat & Renfrew Top

I've had the Draped Coat pattern from Teach Me Fashion for some time and I finally got inspired to make it up after a trip to Tessuti with the lovely Deanna I picked up 2m of grey medium weight wool/poly blend, which I knew would be perfect for the coat. How did I know this? Well, it was the same colour as the one in the pattern cover photo - aren't I creative?!

Teach Me Fashion Draped Coat

First off, let me state that it was very windy today! My sister, Nat, took these photos and, while I know I could have waited for another day, I have a growing pile of unblogged clothes and I didn't want to add this coat to that pile. In the end we embraced the wind. See below photos  of coat billowing in the wind. 

Teach Me Fashion Draped Coat

Back to the Coat. This sleeveless shawl collared coat has just three pattern pieces: Front, back, pockets. Given this, and the unfitted nature of the coat it should be no surprise that this is a very simple sew! I whipped up the coat from start to finish in just over 2 hours. This time including cutting out the fabric and watching the pattern YouTube tutorial. Teach Me Fashion Instructions are brief and don't include diagrams, so the YouTube video provides a fantastic a visual guide. 

Teach Me Fashion Draped Coat

The only techniques used in the coat are stitching & finishing the pieces, hemming all around the coat & armholes, and creating one flat fell seam where the two font pieces meet at the centre back collar. Without a doubt this will be the simplest coat you ever make! The project is perfect for beginners.

Teach Me Fashion Draped Coat

I really like the finished product of the coat. I especially love the pockets! The coat is a little different to my usual style though. I generally don't like jackets to finish around my low thighs as I think they accentuate my bottoms/hips. The coat goes so well with jeans but I hardly ever where pants, and the style really wouldn't suit my fit and flare dresses or high waisted skirts. On the other hand. It's super comfortable, looks polished (when the wind stops blowing it around) and goes well over basic long sleeves. I think it would go well with knit pencil skirts, too! I may get more wear out of it then anticipated.
  
Teach Me Fashion Draped Coat

In these photos I'm wearing the coat with an Olive Merino Sewaholic Renfrew Top. It's so satisfying being able to make your own cardy's, t-shirts and other basics. Especially in the cold months! Every winter I go shopping for new long sleeve tops and they get worn so much, and the fabric quality is normally so poor, that by the next winter they need to be replaced. So, I bought the Renfrew Top pattern while the PDF copy was on sale. 

Teach Me Fashion Draped Coat

I was shocked at how many pages it was, but with 3 neckline and 3 sleeve variations I guess I shouldn't have been. Only one suggestion for improvement - the instructions helpfully tell you what pages you should print and put together for different the variations so you don't have to do it all at once. However, unhelpfully, there are no page numbers included on the PDF pages.

Sewaholic Renfree Top

I immediately made 5 versions (two black versions aren't pictured), all size 8, all version A (round neck long sleeves), except for one with 3/4 sleeves. The pattern recommends 1.6m of wide fabric to make version A. I managed to get most of these out of just 1m each. I made 2 from merino (black & olive) and 3 from various weight cottons (a sheer black, white, and a gold/brown). I followed the instructions precisely for the first Renfrew and the pieces came together perfectly. The only change I made was use the overlocker for construction rather than my sewing machine. The next four Renfrews came together in a quick afternoon.

Sewaholic Renfree Top

I think the fit is spot on for comfy layered long sleeves. I love the scoop neck but I will certainly be giving the cowl neckline a go soon. I absolutely adore cuffs and hem bands on knits as it means no hemming, i.e. no use of the sewing machine! However, I've found the extra thickness of the hem band under skirts and dresses a little annoying. I might make a few extra without the hem band by lengthening the bottom and hemming with a twin needle.

Sewaholic Renfree Top

I have more Renfrew's planned as well as some Deer and Doe Plantains. Sewing basics like these has allowed me to begin wearing fully me-made outfits, which  I love, and control the quality of fabric used. My yearly tradition of shopping for long sleeve tops will now be happily exchanged for fabric shopping and sewing.

*Teach Me Fashion generously gifted me the Draped Coat Pattern. Of cours
e, all opinions are my own.*

Tuesday, 24 June 2014

Outfitted In Knits: Moneta & Coppelia

When Colette Patterns released new knit patterns I thought they were lovely, but not for me. I have the Teach Me Fashion Draped Skirt (see here) which is easily modifiable, so no need for Mabel. The Moneta is a pretty, gathered skirt and fitted bodice, knit dress with some really cute collar options. I didn't jump on it either. I don't find knit dresses flattering on me (also the reason I haven't bought any other knit dress patterns). But the blogging world wore me down. There are only so many amazing Moneta's on women of all different shapes and sizes you can see before you have to give it a go, no?  I gave in and bought Moneta (and the Negroni shirt, eek!) from Indie Stitches.

Moneta Dress Coppelia Cardy

I bought this blush pink striped Alannah Hill knit from Clear it last week. It is beautiful, but I got it cheap and it's probably a bit pale for me so I was happy to use it for my first Moneta. For my first attempt I decided on Version 1 (lined) but without the pretty collar. The fabric recommendation for the main fabric is 2.5m, but I only bought 1m. It was a very tight squeeze and I had to include a centre back seam in the skirt. But, I made it fit! 

Moneta Dress

The fabric is sheer and very lightweight so lining was a must. I used cream cotton knit. Unfortunately I only had enough to line the bodice. The instruction booklet only explains how to join the bodice to the lining at the neckline for the collared version. Instead, I just sandwiched the two bodice pieces right sides facing and serged around the neckline, turned right sides out and pressed.

Moneta Dress

The instructions for sewing the lining and shell together at the arm holes were different to anything I've ever done before. Because of this I found them a little confusing. Thankfully Colette Patterns have a helpful video tutorial showing the steps clearly. It is a fiddly technique but works fine.

Moneta Dress

I cut a size small grading out to a medium at the waist. I made no fit adjustments on this version. I think the fit is ok. There is some draping at the centre front neckline which I could fold out of the pattern for any future version.While the fit is ok, I don't feel great in this version of Moneta. I will have to make another version in a thicker knit before I rule knit dress out of my wardrobe forever-more. 

Moneta Dress Coppelia Cardy

I recently set aside some sheer black knit for another Papercut patterns Coppelia Cardy. I thought the black wrap cardy would be the perfect accompaniment for Moneta during the winter months. I made this Coppelia exactly the same as my first, except that I cut a straight XS. The fabric is silky soft. Flattering or not, this outfit is darn comfy!

Moneta Dress Coppelia Cardy

I'm really happy with my investment in the slightly more expensive Papercut Patterns. Of the three patterns I own, I've made them all multiple times. The Coppelia and Ensis are great basic knit shapes and their patterns feel really 'me'. I will definitely be buying more and look forward to future pattern releases.

Moneta Dress Coppelia Cardy

Saturday, 14 June 2014

Sew Cheap June Free Pattern Review: Scarf Neck Cardy

This month my Sew Cheap free pattern make and review is a simple one: the Swoon Sewing Pattern Scarf Neck Cardigan for women. This is a four piece swing front knit cardigan with a scarf neck and angled hem line. There is a womens version (sizes s-xxl) and also a girls version (sizes 3-10). This makes for fantastic matchy matchy potential for some mummas and daughters out there. 


Swoon Scarf Neck Cardigan

Thanks to Oanh for drawing my attention to this freebie the week before Sewaway. I quickly put the PDF together (32 pages including instructions) thinking it might be a nice easy make to take with me for a weekend away sewing. It was to be after I found this speckled beige t-shirt knit at spotlight on sale for $3/metre. The fabric has poor recovery so it's ideal for a loose fitting cardigan (compared to leggings or a wrap cardigan for example). 

Swoon Scarf Neck Cardigan

I cut a size medium based on my waist  measurement thinking I'd like the cardy to be roomy. After finishing my round trip jacket I was keen to get into an easy make. Unfortunately, I only cut and packed one sleeve for the cardigan so it was left unfinished until I got home. Aside from this, the cardigan is a very easy make, especially if you have an overlocker. If you're like me then you might think your cardy looks more like a one armed poncho half way through sewing- I promise this is normal (well, not the one armed part). You just need attach the front collar to the back piece at the neckline. The front collar, hem and sleeves are all hemmed by simply turning over and stitching with a stretch stitch or zigzag.

Swoon Scarf Neck Cardigan

The instructions are brief but include a couple of diagrams to help you out. For those who don't have an overlocker there are also instructions included on french seaming. I've never french seamed a knit before. If I didn't have an overlocker I'd probably just sew the cardigan using the 3/8"S/A with a stretch stitch. This project is totally beginner friendly, especially as the final product is a reasonably loose fitting garment so fitting and choosing an appropriate knit fabric are not that important.  

Swoon Scarf Neck Cardigan

I made no changes to the pattern, or during construction. The fit is spot on, I think. It is roomy, but I like to be able to layer up singlets, long sleeves and cardy's in winter. The smallest size is a small and I think an XS lady might find it a little too roomy. I will absolutely make more versions. A black merino version is most definitely on my 'to sew' list. 

Swoon Scarf Neck Cardigan

This is a cardigan that fits effortlessly into my wardrobe, particularly my weekend wardrobe. Tim took these photo's out in south Melbourne today where we stuffed ourselves silly with what Tim thinks (and I don't disagree) is the best burger in Melb. I'm looking a little disheveled from the cold breeze but I'm counting myself lucky that I wasn't covered in mustard or burger grease. 


Swoon Scarf Neck Cardigan

If you like this post, check out my Sew Cheap: Top Tips Sew Cheap: Free Patterns and previous Sew Cheap posts. 

Wednesday, 11 June 2014

Simplicity 1419 Round Trip Jacket

I was the lucky winner of the Simplicity 1419 Round Trip Dress and Jacket Pattern being given away by the lovely Kestrel of KestrelMakes. I adore both the jacket and the dress and was stoked to win it as the pattern is not yet released in Australia. Check out Lucinda and Manju 's fantastic versions of the jacket and Erika's sweet deer version of the dress.

Round Trip Jacket SImplicity 1419

I wasn't too sure of what fabric to use for the jacket. In the end I decided on, with help from Lisa, an amazing Japanese cotton from Tessuti Fabrics. It's a lightweight black cotton with a grey sashiko embroidery pattern. The fabric was wonderful to sew with. I also bought beautiful Blue Bloom Japanese cotton for  a Round Trip Dress.

Round Trip Jacket SImplicity 1419

I made up a size 12 based on my chest measurement. I think the fit is perfect in the bodice, but the arms are a little firm. I'd like to make up this jacket again, perhaps in a cotton sateen, and I will sew the arm seams with smaller S/A around the biceps for some extra room. Fabric with a bit of give in it will also help. 


Round Trip Jacket SImplicity 1419

I didn't adapt the pattern at all. I wanted to do the lovely cotton justice as I know I'll be getting lots of wear out of it so I bound most of the seam allowances with black bias binding. The construction of the jacket was super simple and it came together in about 4 distracted hours at the Mill Rose Sewaway. Of the four garments I started, this was the only garment I finished. 

Round Trip Jacket SImplicity 1419

I love my new jacket and I can see more in my future, I might try the pattern without the ruffle as well. Stay tuned for my wearable muslin Roundtrip Dress.