Showing posts with label Colette Patterns. Show all posts

Friday, 25 September 2015

Tim's Birthday shirt 2015

It's been a couple months between posts. I haven't been sewing much and when I have been sewing I haven't felt like blogging. I've really enjoyed a break for Instagram, blog reading and my sewing-related social networking. But, with the weather warming up, I'm getting ready for some spring/summer sewing. In the meantime, some catch up posts with average (at best!) photos.


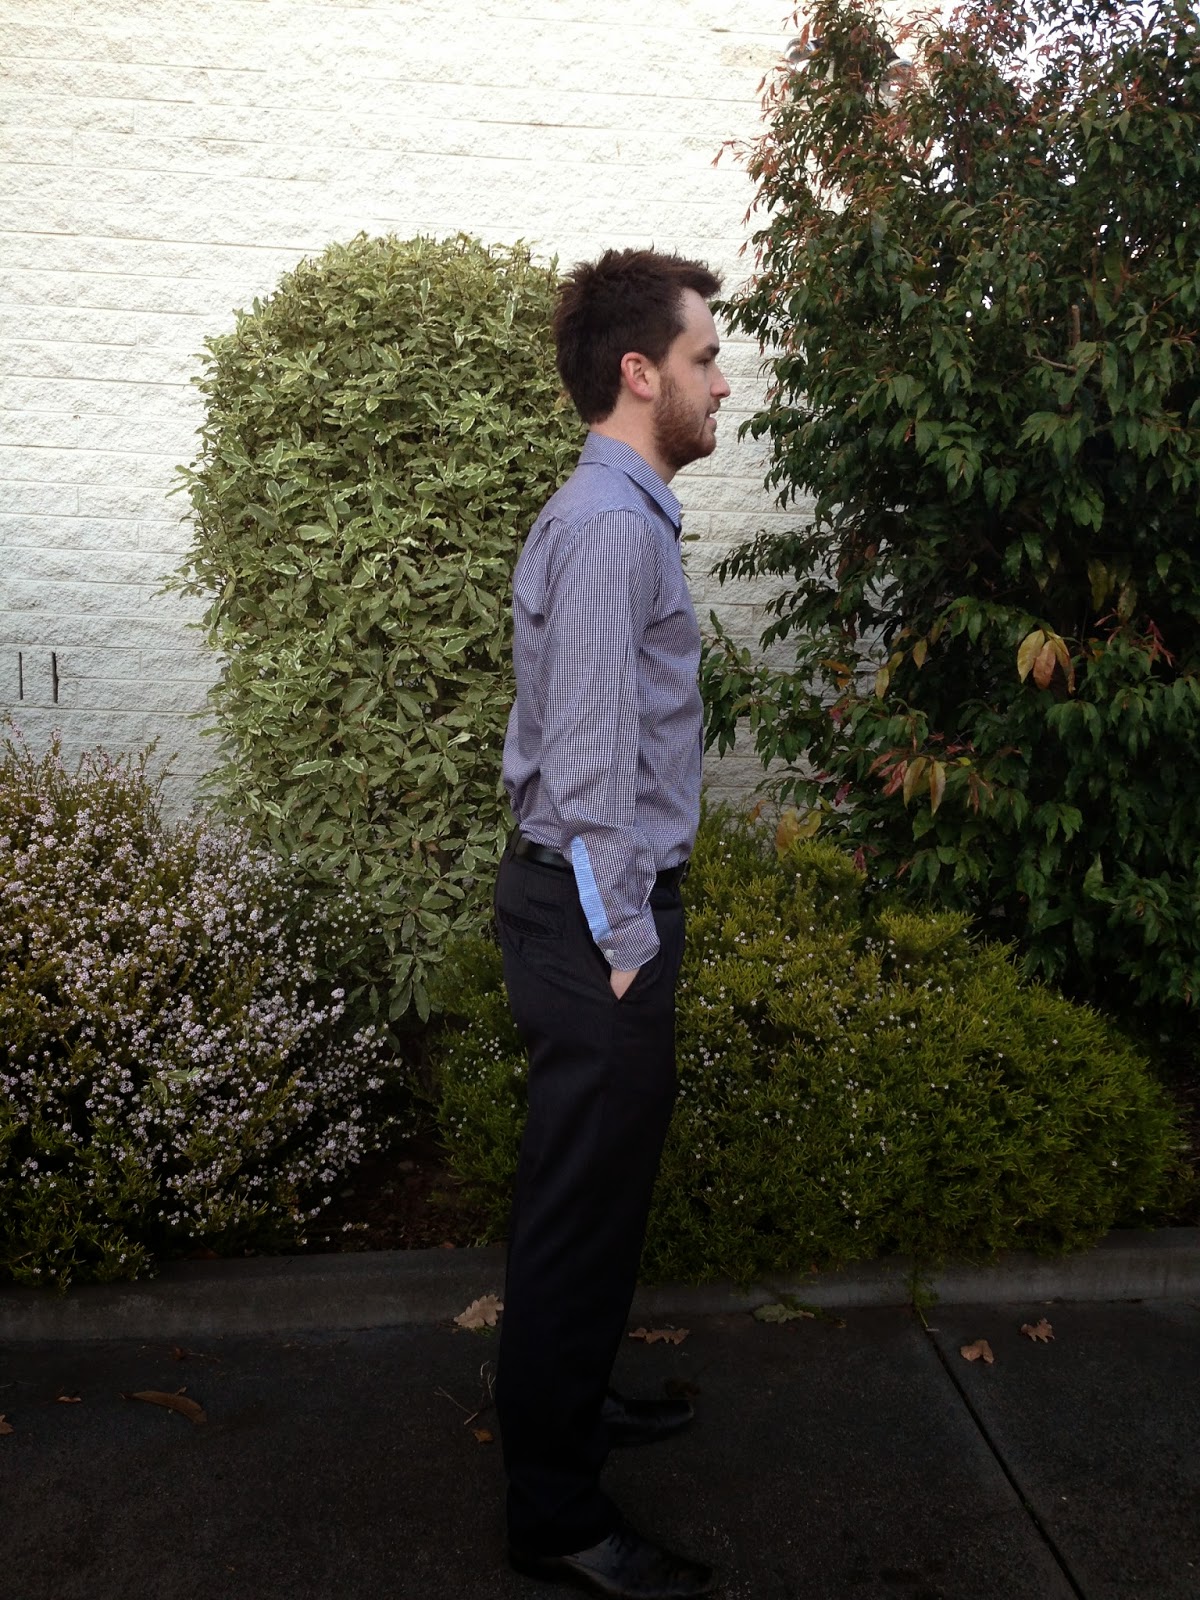
In August last year I made my first men's shirt for Tim's birthday; a Colette Patterns Negroni shirt. I made him another for his birthday this year, which marked the fifth shirt made in the last 12 months. All of his shirts are in high rotation and I love rushing out of the house each work morning realising we're both wearing clothes I've made us.


I bought this blue and white small gingham cotton shirting from Tessuti earlier in the year. I love the italian cotton shirting Tessuti have been stocking and look forward to buying more when they receive more stock. The fabric is soft with a slight sheen and it presses really well. For the contrasting sleeve plackets, under collar, and inner collar band I used salvageable fabric from one of Tim's worn out shirts. I also reused all the buttons of the old shirt.

Why yes, that is my finger at the bottom of the photo...

I was hoping to make a long sleeved version of the Simplicity 1544 I'd made Tim this summer, which has a nice traditional collar and button placket. However, Tim prefers the fit through the body of the Negroni shirt, which means I have to stick with my Negroni Archer Shirt pattern mash up to get all the shirt features his likes. For details on mash up process see my previous posts: 12.

Before I attached the buttons

I didn't do anything differently this time around. I double interfaced the collar to make it extra crisp. I overlocked the edges and sewed the S/A to one side to create faux flat fell seams. for some reason this verson seems a little tighter around Tims under arms, but it doesn't bother him.  The one main difference with this shirt is the amazing fabric which, I think, makes it look much more professional.


Tim loves his new shirt and wore it the day of his birthday. We started the day off well, filling our bellies with with nutella french brioche before heading off to work. Delicious! 


Thursday, 29 January 2015

Another Shirt For Tim: Negroni Archer Hack #2

Another shirt for Tim. I cut this one out ages ago after seeing a man on a tram wearing a similar black and white gingham contrast shirt.


I again used my hacked Negroni Archer pattern pieces. See this post for more details on that. I made one further mod by taking out a further 1/2"of fabric from the width of each sleeve and the fit is better in this shirt than the previous versions.


I made a few mistakes at the time of cutting out. I some how cut the front bodice pieces with a thinner centre front. To solve this issue I used tiny seam allowances and cut slightly wider button plackets. Thankfully, it doesnt seem to have affected the fit. 


When attaching the collar I found that the collar stand was a good half an inch larger than it should have been. I had absolutely no spare fabric so I eased those collar stands in like crazy. You can't really tell from the outside but the centre back inside is a mess! By this time I considered binning the shirt but Tim convinced me that some of his RTW shirts have wrinkly collar stands from excess fabric and that it really didn't look that bad.


I used the contrasting fabric for the back yoke, inner collar stand, button placket, cuff placket and cuff facings. Because this shirt was looking to be on the dodgy side I simply faux felled the seams by sewing the seam allowance, overlocking the edges and top stitching them to one side at the side and sleeve seams.  I don't regret this, it still looks nice inside and out. 


The final shirt fit great and you can't see any of my terrible mistakes. The fabric contrast is really fun but still professional enough for work.


The Negroni bodice really fits Tim very well but I'm keen to try other shirt patterns that don't require as much hacking to get the look he's after. Next up is a Simplicity 1544 with short sleeves. I've even gone to the effort of making a muslin. I have some gorgeous Tessuti shirting I'm going to use for the real thing and after that I might take a little break from men's shirt making.

Saturday, 3 January 2015

Floral Colette Iris Shorts

Last Summer I made my butcher Orange Iris Shorts. The fit wasn't perfect but what annoyed me more was that the linen rayon stretched strangely and wrinkled badly. I cut another pair at the time, then came 9 months of cool weather in Melbourne. I finally made up that second pair.


Again, I made version 1, cutting a size 8 but with the length extended to a size 18. The only change I made was to exclude the front in seam pockets as I found them really annoyingly positioned. The fabric is a Darn Cheap Fabrics cotton sateen. When cutting out the pieces last summer I went to the effort to pattern match the front leg seam - see below. Pretty happy with my efforts! 


The fit is slightly better in this sturdy fabric without the front pockets. I sewed the crotch with a smaller seam allowance and that also helped to improve the fit. The crotch on my last pair was well too high. This pair is passable - just. But I find the waist band sits at an uncomfortable level for me. It's not on my hips or at my waist. It sits right across by stomach / food baby. For highwaisted shorts I'd prefer the K & L Tap shorts which sits comfortable on my natural waist. 


Tim really likes these shorts but I was worried the dark floral looked more like PJ shorts. I took the vote to Instagram and was convinced otherwise, thanks friends! 


I will wear these shorts this summer and I do think they are fun but I don't know that I'll be sewing up the Iris Shorts pattern again. Summer shorts need to be comfy and the mid waist rise just isn't. I think I'll go on a short sewing bender this summer. I've just sewn up another pair of K & L Tap shorts and I really want to try the Grainline Studio Maritime Shorts for a low rise short pattern. Does anyone have any other favourite Short patterns they'd recommend?

Saturday, 27 September 2014

Negroni 2: A Pattern Hack

Last month I made Tim a muslin Colette Patterns Negroni Shirt for his birthday with the promise of making more in the future. He wears his shirt to work regularly but had a few suggestions for improvements. Tim requested: slimmer cut sleeves; a traditional button band and placket rather than shirt front facings; a stiffer collar with a collar stand.

Negroni Archer shirt hack

I could have tried a different pattern, but they often lacked other must haves (e.g. back yoke, contrasting cuff placket, slim fit). So, in attempts to get the best of all worlds I spliced together the Negroni Pattern with my beloved Archer shirt pattern (made here and here). On comparing the sizing of the Tim's store bought shirts with my Archers I found that the width of the collar and collar stand was pretty much the same, but the length of the collar/stand/neckline would need to be increased. Same goes for the button plackets. 

Negroni Archer shirt hack

Note: Peter has done some tutorials on adapting the Negroni pattern for a traditional placket and collar, but of course I didn't realise until after making the shirt.
So, here what I did:
- Photo copied Archer collar and stand patterns. Added about 1/2" to each piece at the fold/centre line. Thus providing 1" more neck room.
- The Archer pattern has 1/2" seams allowances, Negroni has 5/8". Before attaching the collar stand I trimmed down the Negroni neckline by 1/8".
- I interfaced both sides of the collar and collar stand for a stiffer collar. Although I really need to buy some shirt crisp interfacing.
- I compared the Negroni shirt front to the archer shirt front. If you line up the button placement line on either pattern it's easy to see where you should add width for the right side (where the button placket is folded over) and remove width for the left side ( where you attach the button placket). It's important to consider: 1) women's shirts button up the opposite way to men's; 2) remember to use 1/2" seams allowances or add 1/8"to the right side of the shirt and the contrasting button placket; 3) add length to the button placket pieces as the shirt is much longer than the archer pattern.
- Trimmed down sleeves by 1/2". I cut and overlapped the pattern by 1/4" in two places on each sleeve. I also decreased the width of the cuffs pleat to allow for this.

Negroni Archer shirt hack

The changes worked out even better than I expected (it was a gamble cutting straight into the 'good' fabirc). I particularly prefer the crispness of the button placket on this version compared to the Negroni pattern. Next time I will take more width out of the sleeves as they are still baggy. Luckily this is a casual shirt, so Tim will wear it most often with the sleeves rolled up anyway. I'd also shorten the shirt slightly. Unfortunately I didn't notice on the first version as it's always tucked into work pants.

Negroni Archer shirt hack

I made Tim's shirt out of two gorgeous linens from Tessuti. The check is Heart On Sleeve and the solid is Indigo flip (I think). The fabric was amazing to sew with and I was pleased with my pattern matching efforts on the side seams and centre front. Sadly, I only have a small amount of the check left so I wont be able to make a matching top for myself. 

Negroni Archer shirt hack


Monday, 4 August 2014

Tim's Birthday Negroni Shirt & Moose PJs

For Tim's birthday I offered to make him a shirt. I liked the idea of making a Colette Patterns Negroni as I knew the instructions would be beginner friendly for my first men's shirt attempt. I bought the pattern from Indie Stitches.
 
Colette Negroni Shirt
 
My biggest issue was finding suitable fabric. Tim has a lot of checked and striped shirts so I wanted something a little different to that. Finding shirting fabric for men that isn't just white or pastel stripes is difficult, imo. In the end we decided I'd make one out of Robert Kaufman spotted chambray in indigo. Of course, I couldn't find a supplier with any stock left so we are waiting for more fabric to come instock.

Colette Negroni Shirt

In the mean time I made a wearable muslin out of same navy and white cotton I used for my sleeveless Archer. Yep, we have matching shirts! I used a light blue and white cotton for the contrasting inner yoke, cuffs, under collar and cuff plackets. I got this fabric and the white shirt buttons from an older shirt of Tim's that had worn thin at the collar.


I cut a size Small in Version A and decided against the pockets and the collar button loop. All exposed seams are French and/or foe fell seamed. I followed the instructions exactly and made no changes to the pattern.

Colette Negroni Shirt

Making Archers shirts (1, 2)  put my in good stead for the Negroni, but there were a few major differences in construction/pattern. The Negroni Shirt has a fantastic cuff button placket! The pattern piece is rather scary but well labelled and surprisingly easy to transform into the gorgeous top stitched button placket. The other major difference between this pattern and Archer is that the Negroni has no collar stand and the entire neckline and shirt opening is faced rather then making button plackets. I think this makes for an even easier/quicker sew. However, I think I prefer the look of a structured crisp collar stand and button plackets. I would like to try a few other men's shirt pattern eventually (e.g. Vogue8759).

Colette Negroni Shirt

The fit is pretty good through the body, narrow but with room to eat. The only change I will make for the real thing (patiently awaiting the fabric...) is to take some width out the sleeves and maybe a 1/2" of length.

Colette Negroni Shirt

In addition to the shirt I made Tim another pair of Simplicity PJs Pants. This pair are made from some lovely flannelette I picked up at the Cloth Shop. I sewed this pair identical to the last.

Simplicity Pj Pants

Work shirts and Moose PJ's  - what a well rounded man of 26 years.  Happy birthday Tim!

Tuesday, 24 June 2014

Outfitted In Knits: Moneta & Coppelia

When Colette Patterns released new knit patterns I thought they were lovely, but not for me. I have the Teach Me Fashion Draped Skirt (see here) which is easily modifiable, so no need for Mabel. The Moneta is a pretty, gathered skirt and fitted bodice, knit dress with some really cute collar options. I didn't jump on it either. I don't find knit dresses flattering on me (also the reason I haven't bought any other knit dress patterns). But the blogging world wore me down. There are only so many amazing Moneta's on women of all different shapes and sizes you can see before you have to give it a go, no?  I gave in and bought Moneta (and the Negroni shirt, eek!) from Indie Stitches.

Moneta Dress Coppelia Cardy

I bought this blush pink striped Alannah Hill knit from Clear it last week. It is beautiful, but I got it cheap and it's probably a bit pale for me so I was happy to use it for my first Moneta. For my first attempt I decided on Version 1 (lined) but without the pretty collar. The fabric recommendation for the main fabric is 2.5m, but I only bought 1m. It was a very tight squeeze and I had to include a centre back seam in the skirt. But, I made it fit! 

Moneta Dress

The fabric is sheer and very lightweight so lining was a must. I used cream cotton knit. Unfortunately I only had enough to line the bodice. The instruction booklet only explains how to join the bodice to the lining at the neckline for the collared version. Instead, I just sandwiched the two bodice pieces right sides facing and serged around the neckline, turned right sides out and pressed.

Moneta Dress

The instructions for sewing the lining and shell together at the arm holes were different to anything I've ever done before. Because of this I found them a little confusing. Thankfully Colette Patterns have a helpful video tutorial showing the steps clearly. It is a fiddly technique but works fine.

Moneta Dress

I cut a size small grading out to a medium at the waist. I made no fit adjustments on this version. I think the fit is ok. There is some draping at the centre front neckline which I could fold out of the pattern for any future version.While the fit is ok, I don't feel great in this version of Moneta. I will have to make another version in a thicker knit before I rule knit dress out of my wardrobe forever-more. 

Moneta Dress Coppelia Cardy

I recently set aside some sheer black knit for another Papercut patterns Coppelia Cardy. I thought the black wrap cardy would be the perfect accompaniment for Moneta during the winter months. I made this Coppelia exactly the same as my first, except that I cut a straight XS. The fabric is silky soft. Flattering or not, this outfit is darn comfy!

Moneta Dress Coppelia Cardy

I'm really happy with my investment in the slightly more expensive Papercut Patterns. Of the three patterns I own, I've made them all multiple times. The Coppelia and Ensis are great basic knit shapes and their patterns feel really 'me'. I will definitely be buying more and look forward to future pattern releases.

Moneta Dress Coppelia Cardy

Wednesday, 2 April 2014

Sewing Tid Bits

The last couple of weeks I've been sewing lots of small pieces off and on so I thought I might share a few photo's. I know this isn't the most interesting of posts but I like to record most of my creations as a bit of a sewing diary.

Sorbetto PJ Top

1. I made a wonderful friend a Sorbetto top and Madeleine bloomers PJ set. I wasn't sure about what to make her and finally decided the night before her birthday that PJ's were on the agenda. The next day I sewed like crazy and even threaded the leg opening ribbon on the train on the way to birthday dinner. I only managed to get a photo of the top. I made them out of a Rayon fabric which I love! Might have to buy some more for myself. Check out the post on my own PJs.

2. I've been getting into pattern testing quite a bit lately. I really enjoy the small insight you get into the pattern development process and stages. I'll share more about what I've been sewing and the new patterns soon.

Schoolboy Vest Pig dress ups

3. My sister made a last minute request for a pig costume for my nephew J's fairy tale dress up at school. He went as the big bad pig. I used the School Boy Vest by Sew Much Ado. I omitted anything fancy (back ties, pockets) and extended the back to have 'tux tails' and a sewed on a piggy tail. My sister bought me a fat pipe-cleaner for the tail which I encased in fabric, sewed on, and twirled. For more info on the Schoolboy Vest check out my full post.

Schoolboy Vest Pig dress ups

4. I've also been sewing more Measure Twice Cut Once Georgiana Knickers. I've even started using some pretty trim! I made these knickers from Anna's Rigel (will post soon) and my Alma blouse left overs. I think that's enough knickers until I buy and try out the Charlotte Knickers (fuller brief).

Georgiana Knickers

And that's about it for now. Next up I'd like to try the New York Cape and a Gertie Blouse.

Sunday, 30 March 2014

My Full O' Heart Emery

After making my first Emery I knew I'd be making another version up in the near future, especially as it's the perfect dress for the #SewDollyClackett sew-along! All I needed was a quirky print. A few weeks ago, on a lovely lunch and fabric shopping date with Oanh of Unique Shmuck, I found this fantastic heart print in Clear It (e.g. the Alannah Hill outlet). I'm not entirely sure what it is but I suspect some sort of poly blend. We each bought 2m at $5m (score!).

Heart Emery Dress

My first dress has some excess room in the neckline which the ladies at Social Sewing helped me pin out. We decided that an easy fix would be to take in the shoulder seams 1/2". So, like my first attempt, I cut a waist chest 6/waist 8 with no further alterations.

Heart Emery Dress

I changed my mind about this dress quite a few time as I sewed. First I cut a collar in the self fabric and planed to use piping for some visual interest. I sewed the piping and tried adding the collar but it was just too much. The print was OTT enough without adding cutesy details. This reminded me that Roisin always nails to balance OTT prints with simple lines.

Heart Emery Dress

I had planned on using bias binding for the finishings instead of a lining. I changed my mind about this too. The fabric doesn't breath well so I added a spotty cotton lining. Unfortunately I didn't decide to do this until I'd sewn in the back zipper and centre back seams. I couldn't figure out how to add the lining as usual without unpicking which I wasn't up for. I ended up adding the lining to the neckline and center back as usual but binding the arm holes. Other than  issues caused by my indecisiveness the dress sewed up as well and as quickly as my first attempt. 

Heart Emery Dress

The fit is a little better around my neckline but there is still some gape at the back of the neckline. If I sew the dress again I might just  increase the SA at the neckline Centre back easing into the 5/8"as I go down. I know this isn't a technical fix, but I'm a home-sewer and can do as I please. 

Heart Emery Dress

Now, while the fabric is amazing, it's also quite thick! Thick fabric and gathering aren't the best of friends. Where as the skirt on Emery number 1 just hangs, my Full O'Heart Emery skirt is incredibly fru-fru! So poofy that I considered not bothering finishing it. After some instagram encouragement I finished the dress and wore it out that same night where I received many lovely comments on it. The fabric while thick presses quite well. It would have been well suited to an Elisalex and can you imagine this fabric for a Robinson Trench coat?!

Heart Emery Dress

Overall, I 'heart' this dress, and I'm dotty for the lining! Too much? I'm so glad this fabric popped up for the #SewDollyClackett sewalong. Are you planning on joining in? If so, are you planning more than one dress? Roisin has such great dress, shoe, cardy combo's. This sew-along has definitely made me rethink my very small shoe collection so I popped on a bright jumper to make up for my lacking shoe department. You can grab your copy of the Emery Dress pattern here.


Friday, 21 March 2014

Sew Cheap March Free Pattern Review: Madeleine Mini Bloomers

Given the amount I've been sewing and posting lately you're probably thinking "does this girl have a life?". The answer being "no, not really" at the moment. So lets get on with it. For this month's Sew Cheap: Free Pattern make and review I chose the to make some PJ's! I made up a matching pair of Colette Patterns Madeleine Mini Bloomers and Sorbetto Top. These are both free multi-size patterns which pair perfectly for sleep wear.

Colette Sorbetto and Madeleine Bloomers

I made them up in a lovely viscose from Darn Cheap Fabrics which has me thinking about Easter just a little too early. I've made the Sorbetto previously (oh, about seven times, six of which are posted here). I've noticed my previous tops are a little loose now so I made up a size 4 this time, as usual extending the length to a size 18. I can whip up a Sorbetto in just over an hour now. I used premade mauve bias binding on the neckline and armholes. I love how it turned out and might be tempted to pair it with jeans and wear it as a top. The Sorbetto is a great beginner pattern IMO - no closures and just two darts. 

Colette Sorbetto Bloomers

Now to the bloomers. I'd seen that the bloomers were Very short on others in the blogosphere and also quite lowcut. Before cutting out a size medium I added 1"to the top and 2"to the bottom of the back and front pieces. I french seamed all seams in the bloomers and the top for a neater finish. Otherwise I followed the instructions. I had some trouble inserting button holes into this fine fabric (where the ribbons tighten the leg openings), and even more trouble unpicking them. After applying some interfacing everything turned out peachy. 

Colette Madeleine Bloomers

I love the look of the bloomers! The gathered effect on the waist and leg openings is super cute! I have a couple of complaints though. 1) Even with the added 1"at the waist I still feel that the crotch rides ever so slightly high. It's not problematic I just like a lower crotch curve on PJ's. 2) as much as I love the look of the double elastic at the waistline the elastic keeps rolling over in the casing and becoming twisted. I might have to go back and stitch on top of the elastic with a long stitch to stop it from doing this. 

Colette Madeleine Bloomers

The bloomers are labelled as a beginner pattern. It's a simple pattern with good instructions but I think a true beginner would have some trouble with the button holes (four in total) and the need for precise stitching along the waistband and leg openings. 

Colette Madeleine Bloomers

As you can see I decided against modelling my new favourite PJ's. But suffice to say the bunnies look fantastic on! You'll just have to take my word for it :) 
If you like this post, check out my Sew Cheap: Top Tips Sew Cheap: Free Patterns and previous Sew Cheap posts.