I bought my Sewaholic Hollyburn skirt pattern in October last year from Indie Stitches. The skirt is a simple design and much loved by the sewing/blogging community.
I made up the Hollyburn pretty much straight away in a fabric which I was drawn to in a pop up fabric store. I couldn't decide whether I was drawn to the fabric because I absolutely loved it or hated it. Turns out, I hated it! Off to the opshop this pink, white, and brown flower Hollyburn goes.
I finally got the nerve up to try the pattern again with some herringbone woven thick grey wool for a winter skirt. I cut a size 10, version C with added waistband tabs from version B. I made a simple change to the pocket piece: I cut the pocket pieces along the fold line (with added S/A) and cut the facing part in a contrasting pink patterned rayon and the other half out of the shell wool. I sewed these pieces together down the 'fold line' and then treated them as a single piece. I love the flash of pink in the pockets of an otherwise plain skirt.
The construction of the skirt was simple. I overlocked all the edges to finish and inserted an invisible zip instead of a regular. The wool is very thick so I changed two aspects of construction to avoid sewing through multiple thick layers. 1) I hemmed the skirt with pink bias binding so that I didn't have to fold the hem over twice and create excess bulk. 2) I sewed the waistband tabs on to the waistband before folding under the facing. This made it easier going on my sewing machine. I added some pearlescent white buttons to the tabs.
I really like how this Hollyburn turned out! It's one of my rare non-patterned makes so it goes with heaps of my wardrobe, while still being a bit special with the flash of pink in the pockets and on the hem. The fit is spot on. I'd usually make a size 8 in Sewaholic patterns but with such a thick wool, and a skirt which only will be worn in winter (I'm talking winter weight here!), I thought the 10 would be a safer option.
Here, I'm wearing the Hollyburn with a my white Renfrew top and pink Coppelia Cardigan. I'll be sure to make more hollyburn's in the future. Especially in winter medium weight fabrics. I like the idea of trying the longer variations but don't think they'd suit me. I think my next version might be a lightweight dark denim with belt loops.
Showing posts with label Hand Made 2013. Show all posts
Monday, 7 July 2014
Wednesday, 19 March 2014
Modified Saltspring Dress: A Saltspring Top
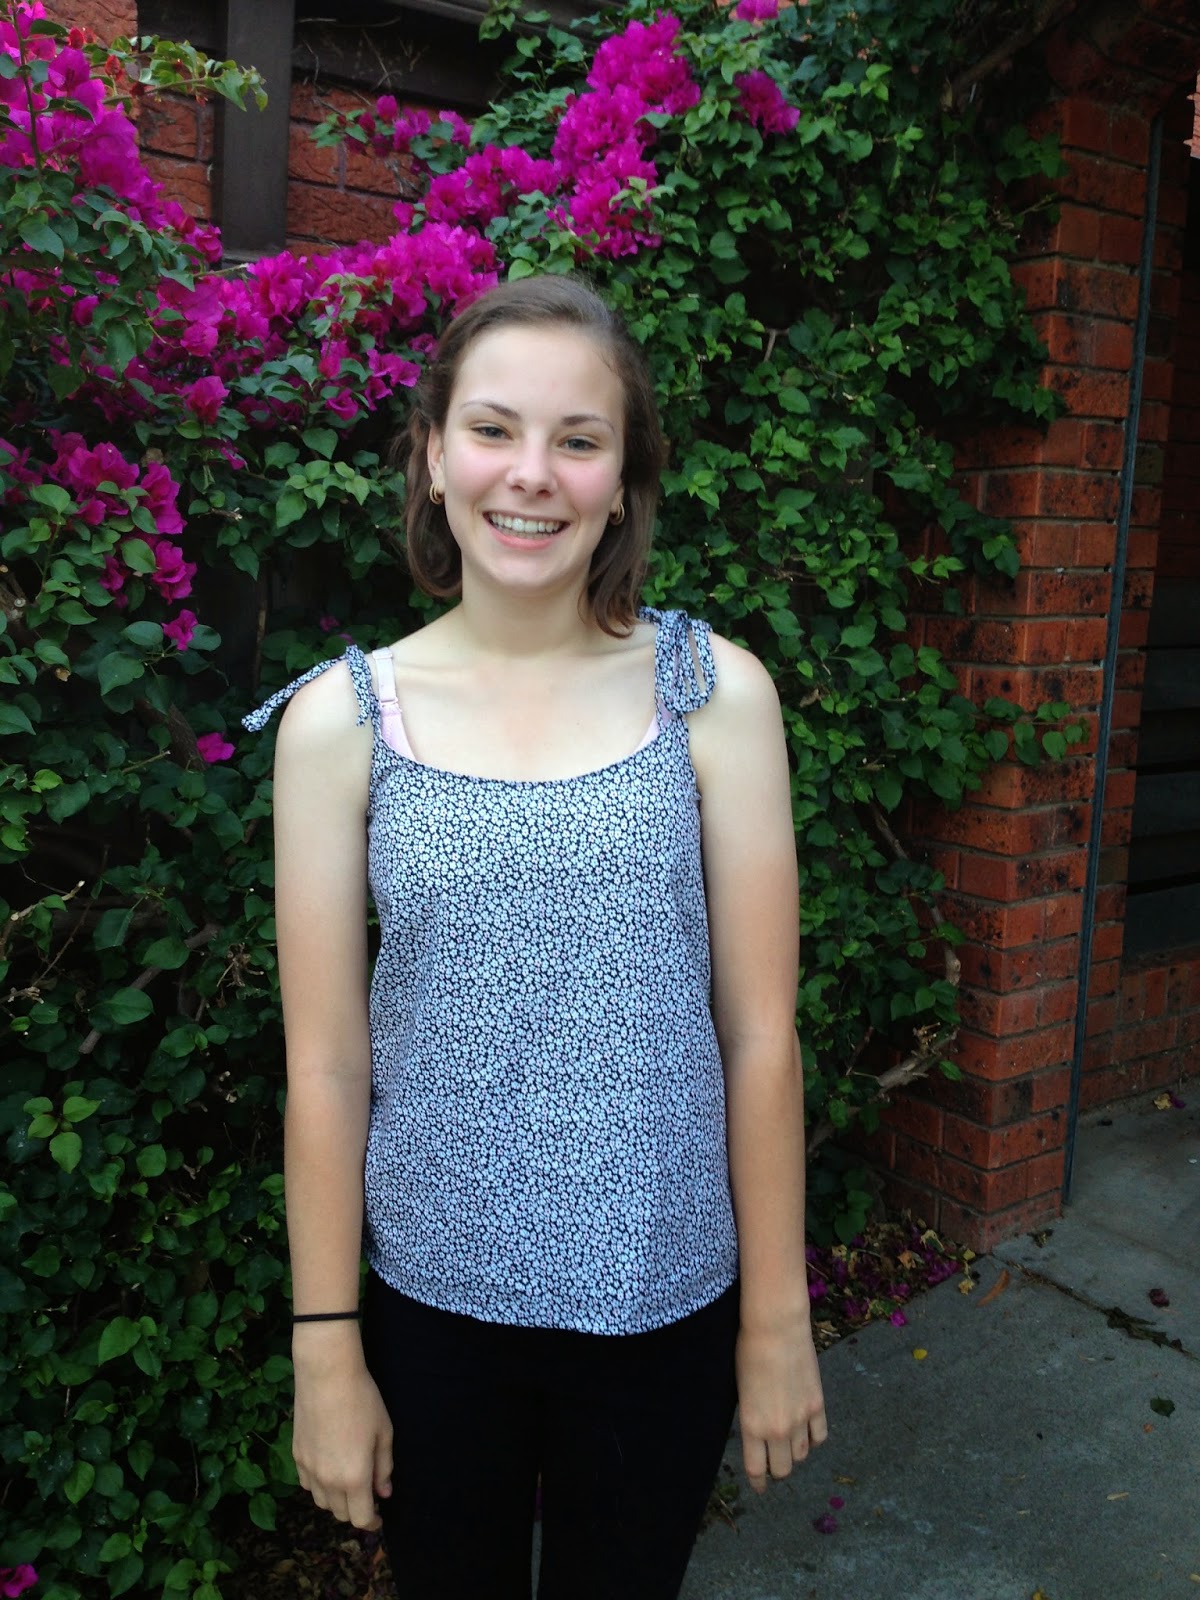
Last year I whipped up a top for my little sister to form part of her birthday present. At that time I didn't have many patterns or much of a fabric stash so I modified the Sewaholic Saltspring Dress to become a top, like Caroline did here. Tim and I had dinner at my parents last night and Gen was wearing her top so I took the opportunity for some photos.
All you need to do is trace of the Saltspring bodice lining pieces off and extend them to the desired length widening as you go. As there is no zip required you can cut both pieces on the fold (don't forget to remove the S/A from the back piece).
I made Gen's top out of left over fabric from my original Saltspring dress and lined it with some white cotton lawn. There are no closures so it was super quick to whip up and it's a nice summer throw on top.
I think the top looks super cute on Gen and I'm glad to see it fits and she wears it. I think I might make myself a version next summer.
Wednesday, 22 January 2014
Scarf Turned Laurel Dress
This dress is my last make of 2013. I had my eyes on the Colette Laurel Dress for some time before my sister and brother in law gifted it to for my birthday (Thanks Nat and Ben!). I was ready for a quick sew at the time and I thought the simple sleeveless shift dress would do the trick and that I might even be able to wear it on Christmas day. How wrong I was.
I chose to sew it up using a silk Country Road Scarf that was just a bit too big and bold for around my neck but had a BEAUTIFUL pattern. This was my first mistake. I knew I would need to underline the dress as the scarf was very sheer. As soon as I started cutting into the scarf, it started to fray. I was quick to underline all the pieces to prevent further fraying. I also used french seams to enclose the ratty frayed seam allowances.
| When the dress was a scarf |
Eventually, I took the side seams in about 1.5 cm from the waist down and for the armholes I took 1cm from the shoulders grading it out to 2cm under my arm. That's just a guess though. I was being more methodological in my trimming to begin with but sometimes hacking just works better (or, at least as well as)! I had intended on hand sewing the bias finishing and hem but wasn't as motivated after the fitting issues. I sewed up the centre back seam leaving about 6" for a back slit to easily pop the dress over my head. but, as you can see, it gapes and I will have to remove some excess fabric from the centre back neck next time. I hemmed the dress by machine using contrasting red thread with a wide hem.

The final fit is a still a little loose around my hips, but I really like length and I think this scarf is much more wearable now. The fabric and the length feel just that little bit fancy, which I love. I will definitely sew up another Laurel dress and perhaps a blouse too. I would like a simple cotton summer dress and also a sleeved version for winter layering. Overall, I like Laurel very much. But, I do have a few fitting issues to keep in mind next time.
Wednesday, 1 January 2014
2013: The Year That Was
What I've Sewn
Since beginning sewing late last year I've sewn 43 pieces of clothing. I'm pretty proud of that given I had to teach myself how to sew and I started with absolutely no fabric, sewing supplies, patterns or anything else other than my wonderful sewing machine gifted to me by my wonderful man. So, what's the break down?
I made 18 items for myself:
- Two Miette Skirts
- Five Colette Sorbetto tops
- Grainline Moss Skirt (unblogged)
- Two Wiksten Tanks (unblogged)
- Two Sewaholic Saltspring dresses
- Self-drafted PJ shorts
- Sewaholic Hollyburn Skirt (unblogged)
- By Hand London Polly Top
- Sewaholic Alma Blouse
- Skirt As Top Knit Scoop Top
- Colette Laurel Dress (unblogged)
- One Miette Skirt for sister
- Two Colette Sorbetto tops for sister
- Reversible Pinafore (unblogged) for niece
- MADE Diaper Cover (unblogged)
- Grainline Moss Skirt (unblogged) for sister
- Flannel Simplicity PJ bottoms for Tim (unblogged)
- Sewaholic Saltspring top variation for sister (unblogged)
- Twelve pairs of MADE Kid Shorts for nieces and nephews
- By Hand London Polly Top for sister
- Thread Theory Jedediah Shorts for Tim
- Skirt with built in diaper cover for niece
- CINO Wraparound Reversible Tie Top for niece
- See Kate Sew Envelope Clutch for friend
- Flannel pj pants for nephew
Highlights Of 2013
My most worn item was my blue and white gingham Sorbetto top. Its comfy, can be layered, and work appropriate so it's on weekly rotation.
| Tim in Jedediah Shorts |
| Beautiful sewing space |
Reflections & Goals
I'm always in a rush and I like to do things the quickest way possible. Sewing has slowed me down and taught me some patience (although I don't know that it extends beyond sewing). But I'm not patient about every aspect of sewing. For example, I'm more than happy to be the last person in the world to buy the new pattern so that I can see others versions, but I hate making muslin's. I'm happy to put a project on hold if I'm not 'feeling it', but I hate hand sewing. In 2014 I'm going to try to work on taking it slow and enjoying each stage of sewing projects. I hope that as my sewing skills develop I will begin to enjoy other aspect of sewing too (e.g. the fitting process).
![]() |
| Source link |
My final goals for 2014 are to sew more often and take part in Me-Made-May. First up for 2014 the Colette Truffle Dress (check out Instagram for a sneak peak).
Thursday, 26 December 2013
Merry Christmas & More Hand-Made Gifts
Merry Christmas! Yesterday I celebrated Christmas with Tim and my side of the family for lunch and his side of the family for dinner. It was a lovely day of family, food, spoils, and more food!
For two of my nephews (J and R) I made 2 pairs of shorts each, all in size 7. On three of the pairs I inserted zips as there had been a special request for shorts with zipper pockets to keep precious treasures in. I used the Ikat Bag tutorial to insert zipper welt pockets. The pockets aren't perfect but they'll do fine for the life of the shorts. For J, I made one pair up in left-over fabric from Tim's Thread Theory Jedediah shorts. This pair has a side zip pocket on the front and a back pocket (no zip). I also made J a pair shorts in army-man fabric with front pockets and a zipper pocket on the bum. I made R a matching pair of army-man shorts. They are a very similar size so two pairs mean there wont be any arguing over who gets to wear them. I also made R a light summery pair made from an old work shirt of the J and R's father (my BIL). I cut the back shorts piece where the shirt pocket was to act as the back pocket.
I made my youngest niece, V, two pairs of flat front MADE shorts, size 18 months. I lengthened both pairs about an 1" as her previous pair showed a little two much leg and looked more like bloomers than shorts. The lemon (or are they limes?) pair has front pockets. The second pair was made from a thin soft polka dot fabric (don't remember the exact type). I underlined the fabric with another one of my BIL's old shirts which my sister said was actually his wedding shirt!
I also made V a matching reversible wrap around top using the CINO tutorial and free pattern which is posted on Birch Organic Fabrics. The top turned out really great. The written tutorial was quite brief but the photos filled in the gaps. The pattern in available in a few different sizes so I imagine I'll sew it up again in the future.
I made two of my older nieces (A and A) a pair of shorts each using the flat front variation to go with a small gift I'd purchased at a recent crafts market. I used opposing fabrics for tags and to line the inside of their pockets so their shorts match just a little bit.
| Eight pairs of MADE kid Shorts |
This year I decided to make some Christmas gifts for my youngest nieces and nephews. In total I made eight pairs of MADE Kid shorts in a few variations and one Craftiness Is Not Optional reversible wrap-around top. I'd successfully sewn up the shorts pattern three times before for my niece but hadn't previously used the CINO top tutorial.
| Js Jedediah &Army Shorts |
| R's Army & Work Shirt Shorts |
| V's Polka-dot & Lemon Shorts |
![]() |
| Matching Shorts & Wrap-Around Top |
I made two of my older nieces (A and A) a pair of shorts each using the flat front variation to go with a small gift I'd purchased at a recent crafts market. I used opposing fabrics for tags and to line the inside of their pockets so their shorts match just a little bit.
I can't recommend the MADE Kid Shorts pattern and tutorials enough! The size range is huge (1-10 years, boys and girls) with flat front and racer variations. It's also a really quick sew. I'm sure its a pattern I'll use time and time again. It would be great to make up as board-shorts or even summer PJ boxers/shorts.
The nieces and nephews seemed quite pleased with their gifts which is especially nice when you give young kids clothes!
I'm now ready for more selfish sewing! Speaking of which many thanks to my Mum for buying one of the items on my wishlist, the Colette Sewing Handbook. And thanks to all my family for gifting Tim and I some really special gifts and spending such as lovely day and evening with us.
I got this cute mini measuring tape in a Christmas bonbon. Well, actually, Tim won it, but he generously swapped it for the shoe horn I won... Merry Christmas!
The nieces and nephews seemed quite pleased with their gifts which is especially nice when you give young kids clothes!
I'm now ready for more selfish sewing! Speaking of which many thanks to my Mum for buying one of the items on my wishlist, the Colette Sewing Handbook. And thanks to all my family for gifting Tim and I some really special gifts and spending such as lovely day and evening with us.
| Mini Measuring Tape |
Saturday, 21 December 2013
Hand-Made Gift: Envelope Clutch
Lately, I have been generously gifted sheets, clothes and other items that I might be able to turn in to something special. It's lovely to know that family, friends and colleagues are keen to support my hobby, and think of me before turfing something out. Thanks!
One such lovely friend and colleague gifted me an old cushion cover made out of some fun floral fabric. I'd been searching tutorials for Chrissie gifts and saw Kate's (from See Kate Sew) great Envelope Clutch tutorial and free pattern. Immediately I thought of up-cycling the cushion cover into a clutch for my generous friend.
To begin with I made the clutch according to the instructions but added additional interfacing (one layer for both the lining and outer fabric).The clutch is very easy and super quick to make. It would make a great last minute Christmas gift to sew up! Also, it can be made out of very little fabric. A great stash buster!
Unfortunately the clutch was incredibly floppy-so floppy you could scrunch it up or use it as a hankie! After consulting Instagram and the gift recipient I decided to reinforce the bag shape by adding a strap which went 3/4 down the sides of the bag. I also added this thin strap to the inside of the bag at the bottom and across where the 'envelope' folds.
The clutch is still soft but the reinforcement definitely helped! The pattern makes up quite a big clutch so the strap is actually quite hand, I think. In the future I might try this pattern out with a sturdier fabric such as leather, vinyl, or oil cloth.The gift was well-received and I was very happy to be making something special for someone for no other reason than why not?
Monday, 9 December 2013
Skirt As Top's Free Scoop Tee Pattern
I'll keep it brief as I'm once again so darn late to this pattern party.
A few weeks ago I whipped up Skirt As Top's free Scoop Tee Pattern. The pattern is available as a one size PDF which I think fits me reasonably well without adjustments. Its intended to be a small to medium. It has a longer hem at the back, which keeps you in-check when leaning over, and kimono sleeves, which makes for an easy sew.
Hope you liked my action shots. Doing the laundry is so glamorous ;)
A few weeks ago I whipped up Skirt As Top's free Scoop Tee Pattern. The pattern is available as a one size PDF which I think fits me reasonably well without adjustments. Its intended to be a small to medium. It has a longer hem at the back, which keeps you in-check when leaning over, and kimono sleeves, which makes for an easy sew.
This tee was my first attempt (and last, so far) at sewing knits and I was very nervous! I'd been thinking about giving it a go for some time but freaked over not owning a serger, a cover stitcher, a double needle attachment or any other helpful expensive tools (BTW: any advice on what I should invest in first?). I took the plunge and bought some thin, soft, slippery, stretchy fabric from Darn Cheap Fabric which wrinkles like crazy. I don't know what it is as I'm not up to speed on knit fabrics, and I took no notice at the time.
So how did I do for my first knit? Well, for starters I sewed the neckband on inside out so that the seam allowance showed! Luckily, that was easily solved. Secondly, my hem is all sorts of crazy! I zigzaged the side seems and neck band but straight stitched the hem; it's less than optimal. Take a look for yourself. I even decided to leave the sleeves unhemmed given this mess. Is that 'allowed'?
So above were my challenges, but I can triumphantly say this top is super comfy and a great wardrobe filler for around the house/weekend/casual stuff. If I can improve my knit sewing skills then I will definitely make this tops up again! What's not to love: it's a PDF, it's a great fit, it's a super quick and easy, and did I mention it's FREE? Thanks to Skirt As Top's Kristin for providing the pattern and easy to follow instructions for us noobs (or am I the only one!).
Hope you liked my action shots. Doing the laundry is so glamorous ;)
Sunday, 24 November 2013
Skirt with built in bloomers
My nieces 1st birthday is in a few days. My sister had been requesting I make her a skirt for some time, preferably with a built in nappy cover/bloomers and I had some great fabric (bought by my sister probably 6 months ago, whoops).
I didn't have a pattern handy so I improvised. I used two fantastic tutorials from MADE to create the skirt (Dana is an authoritative on all things sewing for children!).
First I downloaded the FREE diaper cover pattern and made up bloomers but left out the waistband elastic. I then followed the Simple Skirt tutorial, being careful to cut the skirt fabric to pattern match with the bloomers. I made up the skirt completely apart from the waistband. Rather than creating a waistband on the skirt I created a tiny top hem (to cover the raw edges) and then gathered the skirt making sure the width of the skirt waist and bloomers matched. I fitted the skirt about 5/8th below the top of the bloomers and attached the skirt around 1/2 inch below the top of the skirt. When this was complete I inserted the elastic into the bloomers waistband and you're done!
It's great to be able to find, use and adapt amazing online patterns and tutorials to create something just right AND for free.
I didn't have a pattern handy so I improvised. I used two fantastic tutorials from MADE to create the skirt (Dana is an authoritative on all things sewing for children!).
The Skirt is is a little too big as I made a size 18 months - 2 years for room to grow. I look forward to seeing Violet in this skirt for many months to come! Today we came together with family and friends for a joint birthday afternoon tea. My sister is turning 30-something the week after next, I turn 25 on Friday and my niece will be 1 Tuesday. I'm really happy with how the skirt turned out and so seems Violet.
Happy Birthday Nat and Violet!
Sunday, 17 November 2013
Saltspring Dress Times Two
Like everyone else, I assume (?!), I am in complete awe of the endless supply of dresses to be conjured and sewn up by Rosin of But it can't be from Dolly Clackett. She gave me an Easter egg! and many other prolific bloggers. My day-to-day uniform generally consists of skirts and dresses. But my me-made-items have involved mostly very simple blouses, tanks and PJ's.
I thought that Sewaholic's Saltspring Dress would be a nice-and-easy transition into sewing dresses. I made up my first Saltspring around the time of the sew-along but I wasn't blogging. Not too long after that I made a second Saltspring. So, here they are, better late than never...?
For both versions of my Saltspring I used cotton lawn from spotlight. The fabric probably isn't as drapey as is recommended for the dress. This might be why I was so unsatisfied with how my first dress turned out. When I finished it I thought it looked beautiful. That is to say, it looked beautiful on the coat hanger. When I'm wearing the dress I find the blouseyness just too much! It's unflattering on me. Another factor might be that I'm quite short torsoed. Also, I didn't line the skirt and I wonder whether this adds to the heavy-up-top look of the dress on me. Like others, I also noticed that I could get the dress on and off without using the zipper.
So, obviously, I needed to make another version!
Sewaholic's Saltspring was a great introduction to dresses for me. The pattern instructions are very clear and the pattern was simple enough for me to feel confident in adapting it ever so slightly. Not sure if I'll make a third version, but if I do I will probably do a copycat of this divine black silk maxi version sewn by Reves Mecanique.
I thought that Sewaholic's Saltspring Dress would be a nice-and-easy transition into sewing dresses. I made up my first Saltspring around the time of the sew-along but I wasn't blogging. Not too long after that I made a second Saltspring. So, here they are, better late than never...?
For my first version I followed the instructions exactly. The dress came together quickly with no major hassles along the way. One of the great things about this dress is the lack of fitting requirements. The dress is loose fitting, blousey, cinched in at the waist with elastic, and the straps are tied. If you cut your approximate size and alter the elastic and shoulders ties accordingly it should fit reasonably well.
For both versions of my Saltspring I used cotton lawn from spotlight. The fabric probably isn't as drapey as is recommended for the dress. This might be why I was so unsatisfied with how my first dress turned out. When I finished it I thought it looked beautiful. That is to say, it looked beautiful on the coat hanger. When I'm wearing the dress I find the blouseyness just too much! It's unflattering on me. Another factor might be that I'm quite short torsoed. Also, I didn't line the skirt and I wonder whether this adds to the heavy-up-top look of the dress on me. Like others, I also noticed that I could get the dress on and off without using the zipper.
So, obviously, I needed to make another version!
For my second version I removed the zipper and the centre back seams, added a lining to the skirt, and used the bodice lining pieces for the bodice and the lining. Also, this version has tiny rabbits on it! I think this version suits me much more.
I'm looking forward to wearing both my Saltsprings this summer but in the meantime they are being paired with tights, cardigans and scarves. It's been very chilly in Melbourne the last couple of weeks. I think the colours in my second dress are particularly versatile and will be great in autumn 2014.
You will notice I ventured outside the house for these photos! There is a beautiful mural on the wall of IGA in my local tiny shopping strip depicting the old-fashion village shops. Obviously, I said hello to the horsey.
Sunday, 10 November 2013
Sewing for the man: Jedediah Shorts
I've been promising Tim a few hand-made items for some time. I made him some flannel PJs for his birthday, which he loves, but something more day-time-appropriate was requested. I trawled the web for men's patterns. The patterns I liked looked way too complex for my first non-bed-related men's clothing item (for example this beautiful coat ). Others made me laugh...
From this time it took me about a month to make the shorts from pattern printing to hemming. This was because a)the pattern includes more complex components than I've tackled before; b) I was distracted by selfish sewing; and, c) when sewing for others I am much more careful than I would be otherwise.
Now I've made the pair once I'm sure I could whip them up a second time much quicker.
Tim loves the shorts and it was such a pain that the weather turned this weekend and he wasn't able to give them a wear. We both agree that they look almost as good as store bought shorts and that's all because Morgan, from Thread Theory, designed such an amazing and detailed pair of shorts. Above is the Jedediah shorts and a store bought pair which are very similar! No doubt I'll be making this pattern again.
On a side note, what do you think of our art? It's a self-portrait Tim painted in Prep which won first prize at the Whittlesea Show Art Competition (portrait category). I love the painting and it's a real conversation starter with visitors. FYI, that's a nose not a mustache!
Subscribe to:
Posts (Atom)