Saturday 28 December 2013

My New Sewing Station

Late last year, when I began sewing, I sat at the kitchen table. My sister had been hoarding an inherited sewing table in my parents garage and luckily enough she offered it to me. So, my small stash of sewing gear moved into the spare room of our apartment. This small stash quickly multiplied and began to spread. The sewing table was fantastic but that one small cupboard just wouldn't contain all my fabric or bits and bobs. Particularly as I constantly threw everything on to the floor trying to find whatever it was I was trying to find. I didn't have any space to keep my patterns either, so they ended up in a another pile on the floor. Also, as there was no space on the table to iron or cut out my fabric or patterns I constantly draped my projects in and out of the the lounge and kitchen leaving a trail of thread behind me. And finally, the table was just too low for my back! As you can imagine Tim avoided the spare room as much as possible, but this room is also where we keep the bookcase, tool box, bikes, clothesline and Tim's Guitars. Here are a few photos of what I was dealing with. Don't judge me...

Messy sewing room
A mess!
Messy sewing room fabrics
Fabric Mountain
So, here's the part of the story where the hero saves the damsel in 'dis mess'. Tim and I agreed the current state of affairs just wouldn't do! We thought about what my ideal sewing space needs and how that can be incorporated into our ideal spare room (e.g. leave enough space to fit the crap that doesn't fit anywhere else in our apartment). Our aims were the following: 1) storage for fabric, patterns, tools, notions etcs; 2) a table long enough to cut, iron, sew and still have room for a future overlocker; 3) height!I slouch and get sore lower back and shoulders so a table top with height was crucial; 4) compact, but with room to grow.

New sewing space
Sewing Station!
New sewing space
Even Somewhere To Hang My WIPs!
New sewing space
New sewing space
Fabric Draws & Maxwell The Pincushion Cat
New sewing space
A Place For Everything!
I think we achieved those aims! We bought everything from Ikea. The table top is a Linnmon 2m long with Vika Kaj extender legs (they extend to 90cm). We bought Alexs draws for under the table and 1m high Algot wire mesh draws to keep my fabric. We also purchased some magazine holders to keep my tissue patterns and the mini ironing board so that I can iron my fabric/seams etc while I sew. The only major thing left to purchase is a giant (approx 90cm-60cm) self-healing mat to go under the ironing board for cutting out fabric. While my new sewing station is bigger than what I had previously it actually uses less floor space as all my crap has a place and even some of our regular house crap fits under the new sewing table. Also, there is room to grow! I have a few spare draws in my under desk draws and so much table top space to hopefully share with an overlocker in the future.

So pleased with my new space, and thankful to Tim for being so incredibly supportive of my hobby. Also for helping me set up Ikea furniture - we kick but at self-assembly!

Thursday 26 December 2013

Merry Christmas & More Hand-Made Gifts

Merry Christmas! Yesterday I celebrated Christmas with Tim and my side of the family for lunch and his side of the family for dinner. It was a lovely day of family, food, spoils, and more food!

MADE Kid Shorts
Eight pairs of MADE kid Shorts
This year I decided to make some Christmas gifts for my youngest nieces and nephews. In total I made eight pairs of MADE Kid shorts in a few variations and one Craftiness Is Not Optional reversible wrap-around top. I'd successfully sewn up the shorts pattern three times before for my niece but hadn't previously used the CINO top tutorial. 

MADE Kid Shorts
Js Jedediah &Army Shorts

For two of my nephews (J and R) I made 2 pairs of shorts each, all in size 7. On three of the pairs I inserted zips as there had been a special request for shorts with zipper pockets to keep precious treasures in. I used the Ikat Bag tutorial to insert zipper welt pockets. The pockets aren't perfect but they'll do fine for the life of the shorts. For J, I made one pair up in left-over fabric from Tim's Thread Theory Jedediah shorts. This pair has a side zip pocket on the front and a back pocket (no zip). I also made J a pair shorts in army-man fabric with front pockets and a zipper pocket on the bum. I made R a matching pair of army-man shorts. They are a very similar size so two pairs mean there wont be any arguing over who gets to wear them. I also made R a light summery pair made from an old work shirt of the J and R's father (my BIL). I cut the back shorts piece where the shirt pocket was to act as the back pocket.

MADE Kid Shorts
R's Army & Work Shirt Shorts
I made my youngest niece, V, two pairs of flat front MADE shorts, size 18 months. I lengthened both pairs about an 1" as her previous pair showed a little two much leg and looked more like bloomers than shorts. The lemon (or are they limes?) pair has front pockets. The second pair was made from a thin soft polka dot fabric (don't remember the exact type). I underlined the fabric with another one of my BIL's old shirts which my sister said was actually his wedding shirt!  


MADE Kid Shorts
V's Polka-dot & Lemon Shorts
I also made V a matching reversible wrap around top using the CINO tutorial and free pattern which is posted on Birch Organic Fabrics. The top turned out really great. The written tutorial was quite brief but the photos filled in the gaps. The pattern in available in a few different sizes so I imagine I'll sew it up again in the future. 
MADE Kid Shorts & Reversible Wrap Around Top
Matching Shorts & Wrap-Around Top

I made two of my older nieces (A and A) a pair of shorts each using the flat front variation to go with a small gift I'd purchased at a recent crafts market. I used opposing fabrics for tags and to line the inside of their pockets so their shorts match just a little bit.

MADE Kid Shorts

I can't recommend the MADE Kid Shorts pattern and tutorials enough! The size range is huge (1-10 years, boys and girls) with flat front and racer variations. It's also a really quick sew. I'm sure its a pattern I'll use time and time again. It would be great to make up as board-shorts or even summer PJ boxers/shorts.
The nieces and nephews seemed quite pleased with their gifts which is especially nice when you give young kids clothes!

I'm now ready for more selfish sewing! Speaking of which many thanks to my Mum for buying one of the items on my wishlist, the Colette Sewing Handbook. And thanks to all my family for gifting Tim and I some really special gifts and spending such as lovely day and evening with us.
Mini Measuring Tape
Mini Measuring Tape
I got this cute mini measuring tape in a Christmas bonbon. Well, actually, Tim won it, but he generously swapped it for the shoe horn I won... Merry Christmas!

Saturday 21 December 2013

Hand-Made Gift: Envelope Clutch

Lately, I have been generously gifted sheets, clothes and other items that I might be able to turn in to something special. It's lovely to know that family, friends and colleagues are keen to support my hobby, and think of me before turfing something out. Thanks!


One such lovely friend and colleague gifted me an old cushion cover made out of some fun floral fabric. I'd been searching tutorials for Chrissie gifts and saw Kate's (from See Kate Sew) great Envelope Clutch tutorial and free pattern. Immediately I thought of up-cycling the cushion cover into a clutch for my generous friend.


To begin with I made the clutch according to the instructions but added additional interfacing (one layer for both the lining and outer fabric).The clutch is very easy and super quick to make. It would make a great last minute Christmas gift to sew up! Also, it can be made out of very little fabric. A great stash buster!


Unfortunately the clutch was incredibly floppy-so floppy you could scrunch it up or use it as a hankie! After consulting Instagram and the gift recipient I decided to reinforce the bag shape by adding a strap which went 3/4 down the sides of the bag. I also added this thin strap to the inside of the bag at the bottom and across where the 'envelope' folds.


The clutch is still soft but the reinforcement definitely helped! The pattern makes up quite a big clutch so the strap is actually quite hand, I think. In the future I might try this pattern out with a sturdier fabric such as leather, vinyl, or oil cloth.The gift was well-received and I was very happy to be making something special for someone for no other reason than why not?

Monday 9 December 2013

Skirt As Top's Free Scoop Tee Pattern

I'll keep it brief as I'm once again so darn late to this pattern party.

Scoop Tee

A few weeks ago I whipped up Skirt As Top's free Scoop Tee Pattern. The pattern is available as a one size PDF which I think fits me reasonably well without adjustments. Its intended to be a small to medium. It has a longer hem at the back, which keeps you in-check when leaning over, and kimono sleeves, which makes for an easy sew.

Scoop Tee

This tee was my first attempt (and last, so far) at sewing knits and I was very nervous! I'd been thinking about giving it a go for some time but freaked over not owning a serger, a cover stitcher, a double needle attachment or any other helpful expensive tools (BTW: any advice on what I should invest in first?).  I took the plunge and bought some thin, soft, slippery, stretchy fabric from Darn Cheap Fabric which wrinkles like crazy. I don't know what it is as I'm not up to speed on knit fabrics, and I took no notice at the time. 
Scoop Tee back view

So  how did I do for my first knit? Well, for starters I sewed the neckband on inside out so that the seam allowance showed! Luckily, that was easily solved. Secondly, my hem is all sorts of crazy! I zigzaged the side seems and neck band but straight stitched the hem; it's less than optimal. Take a look for yourself. I even decided to leave the sleeves unhemmed given this mess. Is that 'allowed'? 

Scoop Tee- wonky stiches

So above were my challenges, but I can triumphantly say this top is super comfy and a great wardrobe filler for around the house/weekend/casual stuff. If I can improve my knit sewing skills then I will definitely make this tops up again! What's not to love: it's a PDF,  it's a great fit, it's a super quick and easy, and did I mention it's FREE? Thanks to Skirt As Top's Kristin for providing the pattern and easy to follow instructions for us noobs (or am I the only one!).

Scoop Tee- doing the laundry

Hope you liked my action shots. Doing the laundry is so glamorous ;)

Monday 2 December 2013

My Birthday or Birth-month!

Checking in with a quick post about the past few and future few weeks, mostly non-sewing related.

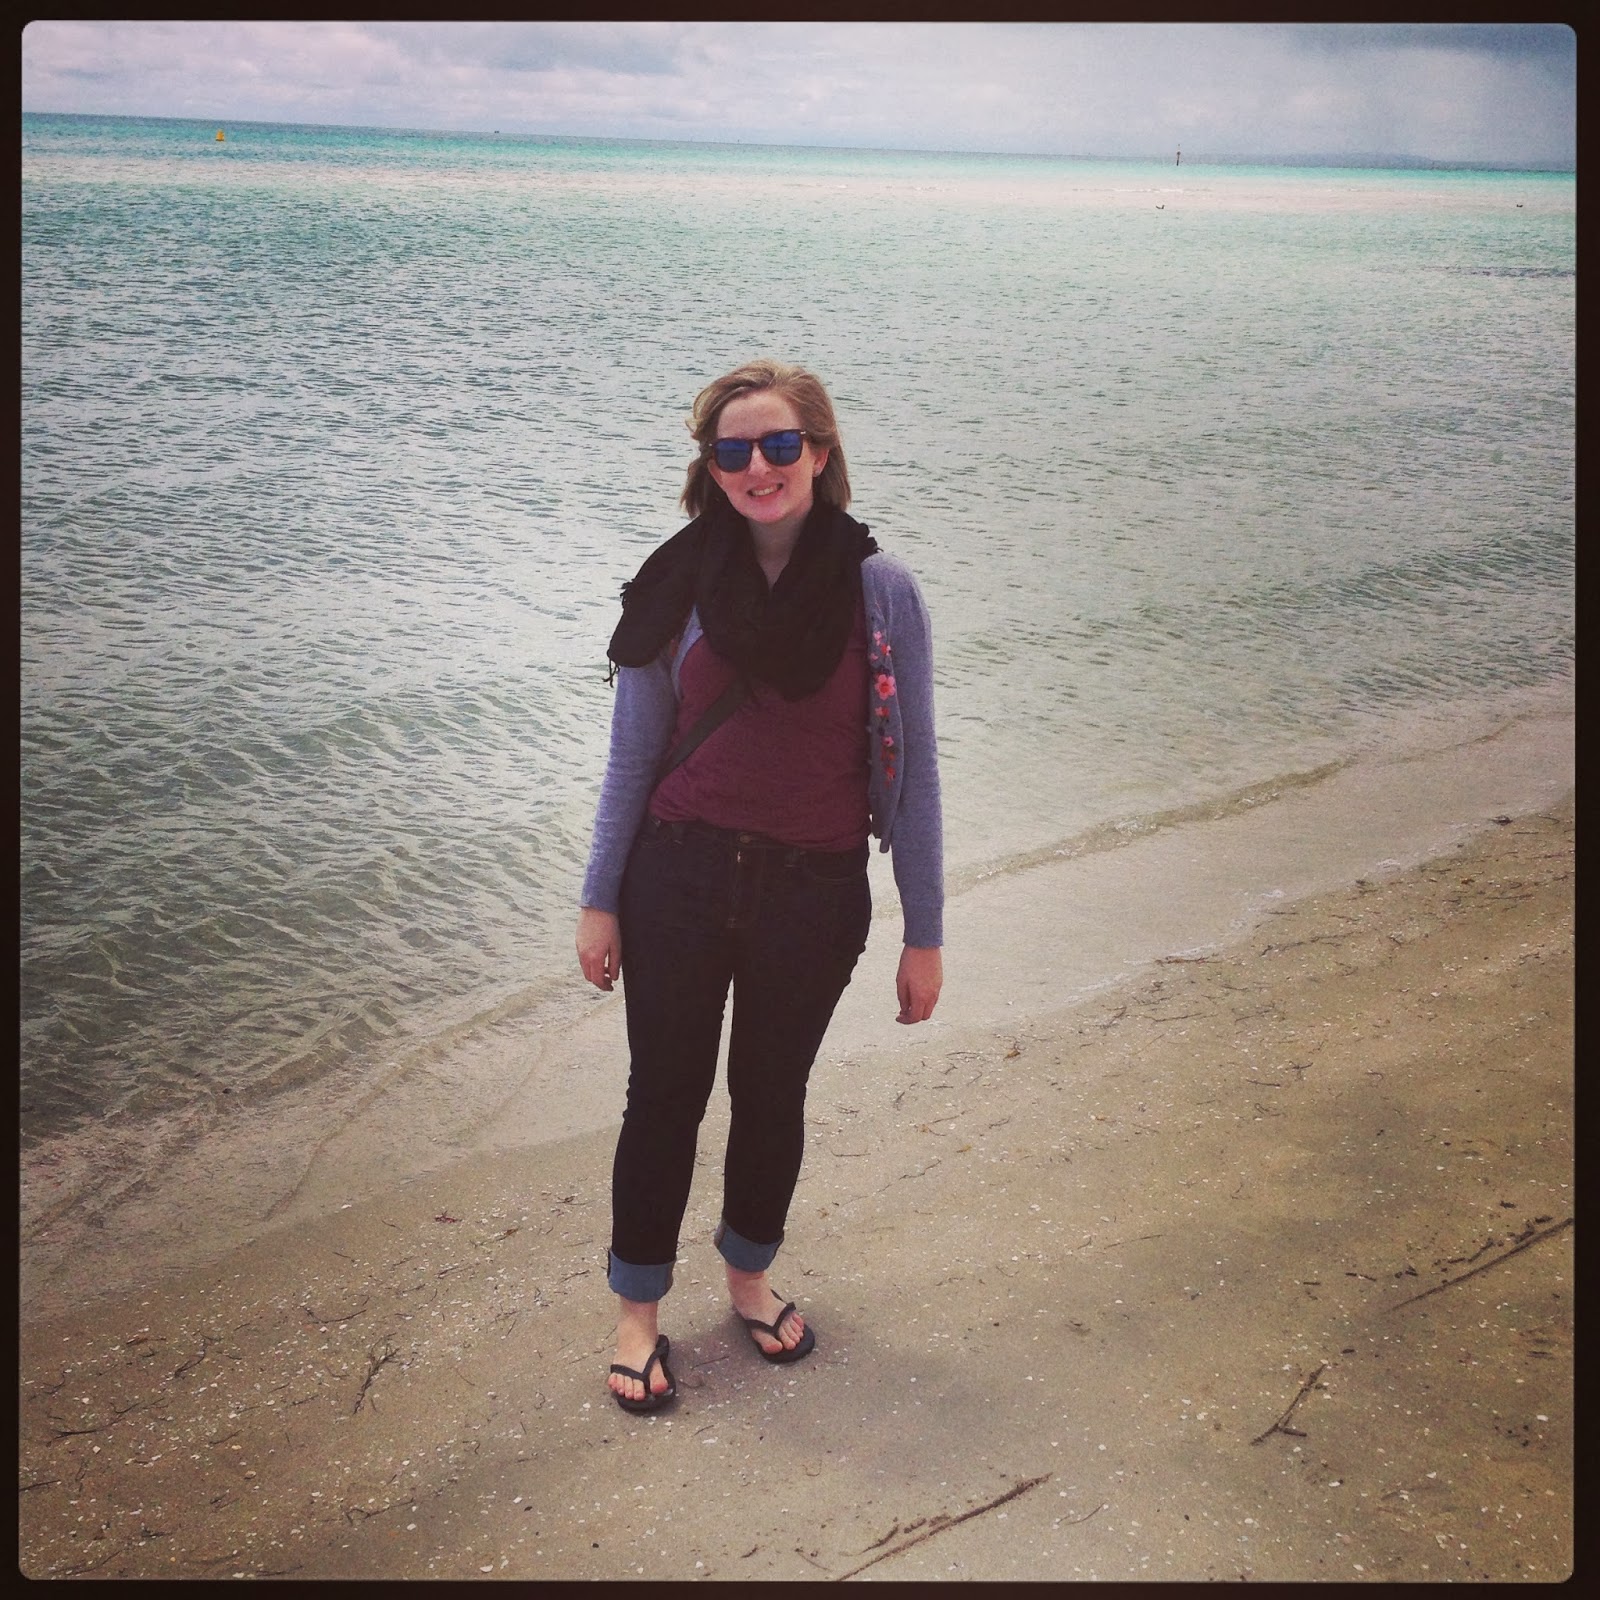
Last Friday was my birthday and I felt beyond sufficiently spoilt by Tim, family and colleagues! Tim took me for a beautiful day out to Rye the Saturday prior. This included a walk along the beach, an afternoon in the Peninsula hot springs and a full-body massage, followed by a delicious dinner at Steam. What a fricken' fantastic boyfriend, am I right? FYI, I recommend all of the above for a great day out.


The following day, my family put on a wonderful joint birthday afternoon tea extravaganza for my sister, my niece and I. Unfortunately, I didn't get any photos. Thank you to my family (including my own and Tim's immediate family) for helping me celebrate my birthday and for spoiling me with beautiful gifts, including very useful vouchers (Ikea and spotlight! yay!). I absolutely love ALL of my gifts (and all of my family for that matter!). Here are just a few that are particularly pretty or relevant to this blog.  


My little sister, Gen, bought me these sweet fabric covered earrings. Thanks Gen!


Tim's family gifted me this beautiful bowl, as well as an awesome tea cup and some green tea. I am lacking any fancy and practical bowls, platters, plates so this is a really useful gift as well as being rather pretty. I also had a special birthday dinner at Tim's families house which was lovely. I look forward to ANOTHER special dinner with my own immediate family in the coming days (I think this may be the most celebrated birthday I have EVER had, lets call it a birth-month!)

My sister, Nat, got me some beautiful cotton sateen fabric and two Colette Patterns I've been wishing for: the Laurel and the Hawthorne dress. Thanks Nat! Looking forward to the holidays to get into these patterns!


On my actual birthday (Friday) and the following day my work place was hosting a symposium so the office/conference centre was humming. None the less all my colleagues made me feel really special and made sure I wasn't forgotten. Thanks team! 


After a crazy last few days, Sunday (1st of December) was a lovely rest/fun day. Tim and I went on a long walk, Summer arrived, I got burnt and we put up the Christmas tree! For my birthday, Tim gave me tickets to see Architecture in Helsinki that evening (as if a day in Rye wasn't enough!). We ate delicious burgers in Richmond, followed by the show.


Tim also gifted me this ridiculously cute pincushion cat made by Fat Cat Crafts! I absolutely love him! His name is Maxwell and he is now filled with pins.


So, it would be fair to say I am exhausted from birthday celebrations and I am super-duper lucky to have so many wonderful, generous people in my life. Thanks to everyone who has helped me celebrate my birthday over the last few weeks (because one day just isn't enough!) 


Sunday 24 November 2013

Skirt with built in bloomers

My nieces 1st birthday is in a few days. My sister had been requesting I make her a skirt for some time, preferably with a built in nappy cover/bloomers and I had some great fabric (bought by my sister probably 6 months ago, whoops).


I didn't have a pattern handy so I improvised. I used two fantastic tutorials from MADE to create the skirt (Dana is an authoritative on all things sewing for children!). 


First I downloaded the FREE diaper cover pattern and made up bloomers but left out the waistband elastic. I then followed the Simple Skirt tutorial, being careful to cut the skirt fabric to pattern match with the bloomers. I made up the skirt completely apart from the waistband. Rather than creating a waistband on the skirt I created a tiny top hem (to cover the raw edges) and then gathered the skirt making sure the width of the skirt waist and bloomers matched. I fitted the skirt about 5/8th below the top of the bloomers and attached the skirt around 1/2 inch below the top of the skirt. When this was complete I inserted the elastic into the bloomers waistband and you're done!


The Skirt is is a little too big as I made a size 18 months - 2 years for room to grow. I look forward to seeing Violet in this skirt for many months to come! Today we came together with family and friends for a joint birthday afternoon tea. My sister is turning 30-something the week after next, I turn 25 on Friday and my niece will be 1 Tuesday. I'm really happy with how the skirt turned out and so seems Violet. 


It's great to be able to find, use and adapt amazing online patterns and tutorials to create something just right AND for free.


Now Violet can flash away whilst maintaining her modesty. She gave it a try!


Happy Birthday Nat and Violet!

Sunday 17 November 2013

Saltspring Dress Times Two

Like everyone else, I assume (?!), I am in complete awe of the endless supply of dresses to be conjured and sewn up by Rosin of But it can't be from Dolly Clackett. She gave me an Easter egg! and many other prolific bloggers. My day-to-day uniform generally consists of skirts and dresses. But my me-made-items have involved mostly very simple blouses, tanks and PJ's.

I thought that Sewaholic's Saltspring Dress would be a nice-and-easy transition into sewing dresses. I made up my first Saltspring around the time of the sew-along but I wasn't blogging. Not too long after that I made a second Saltspring. So, here they are, better late than never...?

Blue cotton saltspring dress


For my first version I followed the instructions exactly. The dress came together quickly with no major hassles along the way. One of the great things about this dress is the lack of fitting requirements. The dress is loose fitting, blousey, cinched in at the waist with elastic, and the straps are tied. If you cut your approximate size and alter the elastic and shoulders ties accordingly it should fit reasonably well.  

Blue cotton saltspring dress

For both versions of my Saltspring I used cotton lawn from spotlight. The fabric probably isn't as drapey as is recommended for the dress. This might be why I was so unsatisfied with how my first dress turned out. When I finished it I thought it looked beautiful. That is to say, it looked beautiful on the coat hanger. When I'm wearing the dress I find the blouseyness just too much! It's unflattering on me. Another factor might be that I'm quite short torsoed. Also, I didn't line the skirt and I wonder whether this adds to the heavy-up-top look of the dress on me. Like others, I also noticed that I could get the dress on and off without using the zipper.

 So, obviously, I needed to make another version!
Saltspring times 2
For my second version I removed the zipper and the centre back seams, added a lining to the skirt, and used the bodice lining pieces for the bodice and the lining. Also, this version has tiny rabbits on it! I think this version suits me much more. 

Autumn colours saltspring dress

I'm looking forward to wearing both my Saltsprings this summer but in the meantime they are being paired with tights, cardigans and scarves. It's been very chilly in Melbourne the last couple of weeks. I think the colours in my second dress are particularly versatile and will be great in autumn 2014. 

Autumn colours saltspring dress


Sewaholic's Saltspring was a great introduction to dresses for me. The pattern instructions are very clear and the pattern was simple enough for me to feel confident in adapting it ever so slightly. Not sure if I'll make a third version, but if I do I will probably do a copycat of this divine black silk maxi version sewn by Reves Mecanique.

Blue saltspring dress and a horsey

You will notice I ventured outside the house for these photos! There is a beautiful mural on the wall of IGA in my local tiny shopping strip depicting the old-fashion village shops. Obviously, I said hello to the horsey. 


Sunday 10 November 2013

Sewing for the man: Jedediah Shorts

I've been promising Tim a few hand-made items for some time. I made him some flannel PJs for his birthday, which he loves, but something more day-time-appropriate was requested. I trawled the web for men's patterns. The patterns I liked looked way too complex for my first non-bed-related men's clothing item (for example this beautiful coat ). Others made me laugh...   
Thread Theory Jedediah shorts


When I found Thread Theory Designs I knew I'd have more luck. I showed Tim the Jedediah Pants pattern and we were both impressed. Jedediah looked to be exactly Tim's style. A week or two later I dragged Tim along to a small crafts market put on by Thread den (I think?) where fabric off cuts, zippers, patterns etc were being sold. It backfired, Tim saw this red and black tiny hounds-tooth fabric and requested the shorts!

Thread theory Jedediah shorts

From this time it took me about a month to make the shorts from pattern printing to hemming. This was because a)the pattern includes more complex components than I've tackled before; b) I was distracted by selfish sewing; and, c) when sewing for others I am much more careful than I would be otherwise.
Now I've made the pair once I'm sure I could whip them up a second time much quicker.  

Thread theory Jedediah shorts

I followed the pattern instructions and used the sew-along tutorials  when I was unsure of a step. The tutorials were really helpful! The only change I made from the pattern was to omit the bias bound seams. This pair of shorts was my test/wearable muslin pair and I didn't want to invest so much time making and sewing bias binding if the shorts didn't end up fitting. I made Tim a size 32 and they fit like a dream! Very satisfying after such a time consuming make!


Thread theory Jedediah shorts

Tim loves the shorts and it was such a pain that the weather turned this weekend and he wasn't able to give them a wear. We both agree that they look almost as good as store bought shorts and that's all because Morgan, from Thread Theory, designed such an amazing and detailed pair of shorts. Above is the Jedediah shorts and a store bought pair which are very similar! No doubt I'll be making this pattern again.

Thread theory Jedediah shorts

On a side note, what do you think of our art? It's a self-portrait Tim painted in Prep which won first prize at the Whittlesea Show Art Competition (portrait category). I love the painting and it's a real conversation starter with visitors. FYI, that's a nose not a mustache! 

Saturday 2 November 2013

Six Scoops: Colette Sorbetto Top

One of the first patterns I made when I began sewing was Colette Patterns Sorbetto Top. It's a fantastic beginner project, it's FREE and it doesn't take a lot of fabric. It's a winner in my books. So, obviously, I made six versions. 


Colette Sorbetto


There's not much to say about the pattern that hasn't already been said. I'm about two years late to the Sorbetto party. So, here's a summary of my Sorbetto's 1 to 6. 

Sorbetto 1. 
My first Sorbetto was made out of some thin soft gingham I found in Savers, a local op-shop. The first top came together very quickly and I fell in love with it immediately. Even after all my subsequent Sorbetto's  this one is on high wardrobe rotation.

Colette Sorbetto

Sorbetto 2. 
Here's another one made from Savers fabric scraps. The fabric is a bit stiff and was probably intended for quilting or decor. But the important thing is how damn cute it is!

Colette Sorbetto

I loved this fabric so much I thought it would be awesome to have some PJs/lounge shorts in it too. Great idea right? Well, the problem is that now I associate the top with the shorts and when I wear the top I wonder whether it looks like I'm wearing PJs. What do you think, is the top better with jeans or as a PJ set?

Colette Sorbetto and shorts

Sorbetto 3. 

Colette Sorbetto

This Sorbetto is a little different. I added sleeves using the PDF pattern on Sew Indecently. I also left the bottom half of the front pleat unsewn so it would ease out. This is my least favorite version. The Sorbetto is quite short and the length doesn't work in this roomier version. Perhaps I will sew the pleat all the way down after-all. 


Colette Sorbetto

Sorbetto 4. 
This version was intended for my sister. She bought the fabric and requested that it have sleeves and a longer curved hem. I used the Wiksten tank as a template for extending and curving the hem.  My sister is a few sizes smaller than me but likes to wear clothes with  A LOT of ease. I tried to get her measurements, but she was convinced my tops fitted her just right. Long story short, I have another version in my cupboard and she bought more material for me to make her a smaller size.  
Colette SorbettoColette Sorbetto

Sorbetto 5. 
This little number is a favourite! I refashioned it out of a dress I bought from Dangerfield as a 2012 conference dress. The dress was now way too big for me but I always loved the fabric. 

Colette Sorbetto

I made two changes to the pattern, I removed the center pleat and created a key hole in the back. I used the key hole pattern piece from the Laurel Extras download from Colette Patterns. It turned out really neat, I think! 

Colette Sorbetto

Sorbetto 6. 
Last but not least, another refashioned Sorbetto. This one I made out of a light pink drappey shirt from Sports Girl. Again, now too big. In this version I removed the front pleat and kept the original shirts curved hem.
Colette Sorbetto

I really liked the idea of using the front of the shirt for the back of the Sorbetto, using the buttons as a details. It didn't turn out nearly as nice as I'd envisaged. The buttons pull and the top wrinkles like crazy.


Colette Sorbetto

There we have it, all six versions thus far. The Sorbetto Top is a fantastic summer wardrobe filler. It's a fun easy pattern that you can whip up quick smart when you need a break from more challenging sewing.  

Thanks to Tim (the bf) for taking these photos, x