Showing posts with label Bluegingerdoll. Show all posts

Sunday, 10 May 2015

Refashioned Merino Bonnie Jumper

Tim wears these Country Road Merino jumpers over work shirts in various neutral colours. He has a stack of them and I regularly sew up holes in the elbows for him. The fabric is great quality but quite thin. His dark grey jumper had a hole in the elbow but also around the neckline so he decided to replace it and I claimed the holey jumper for myself!


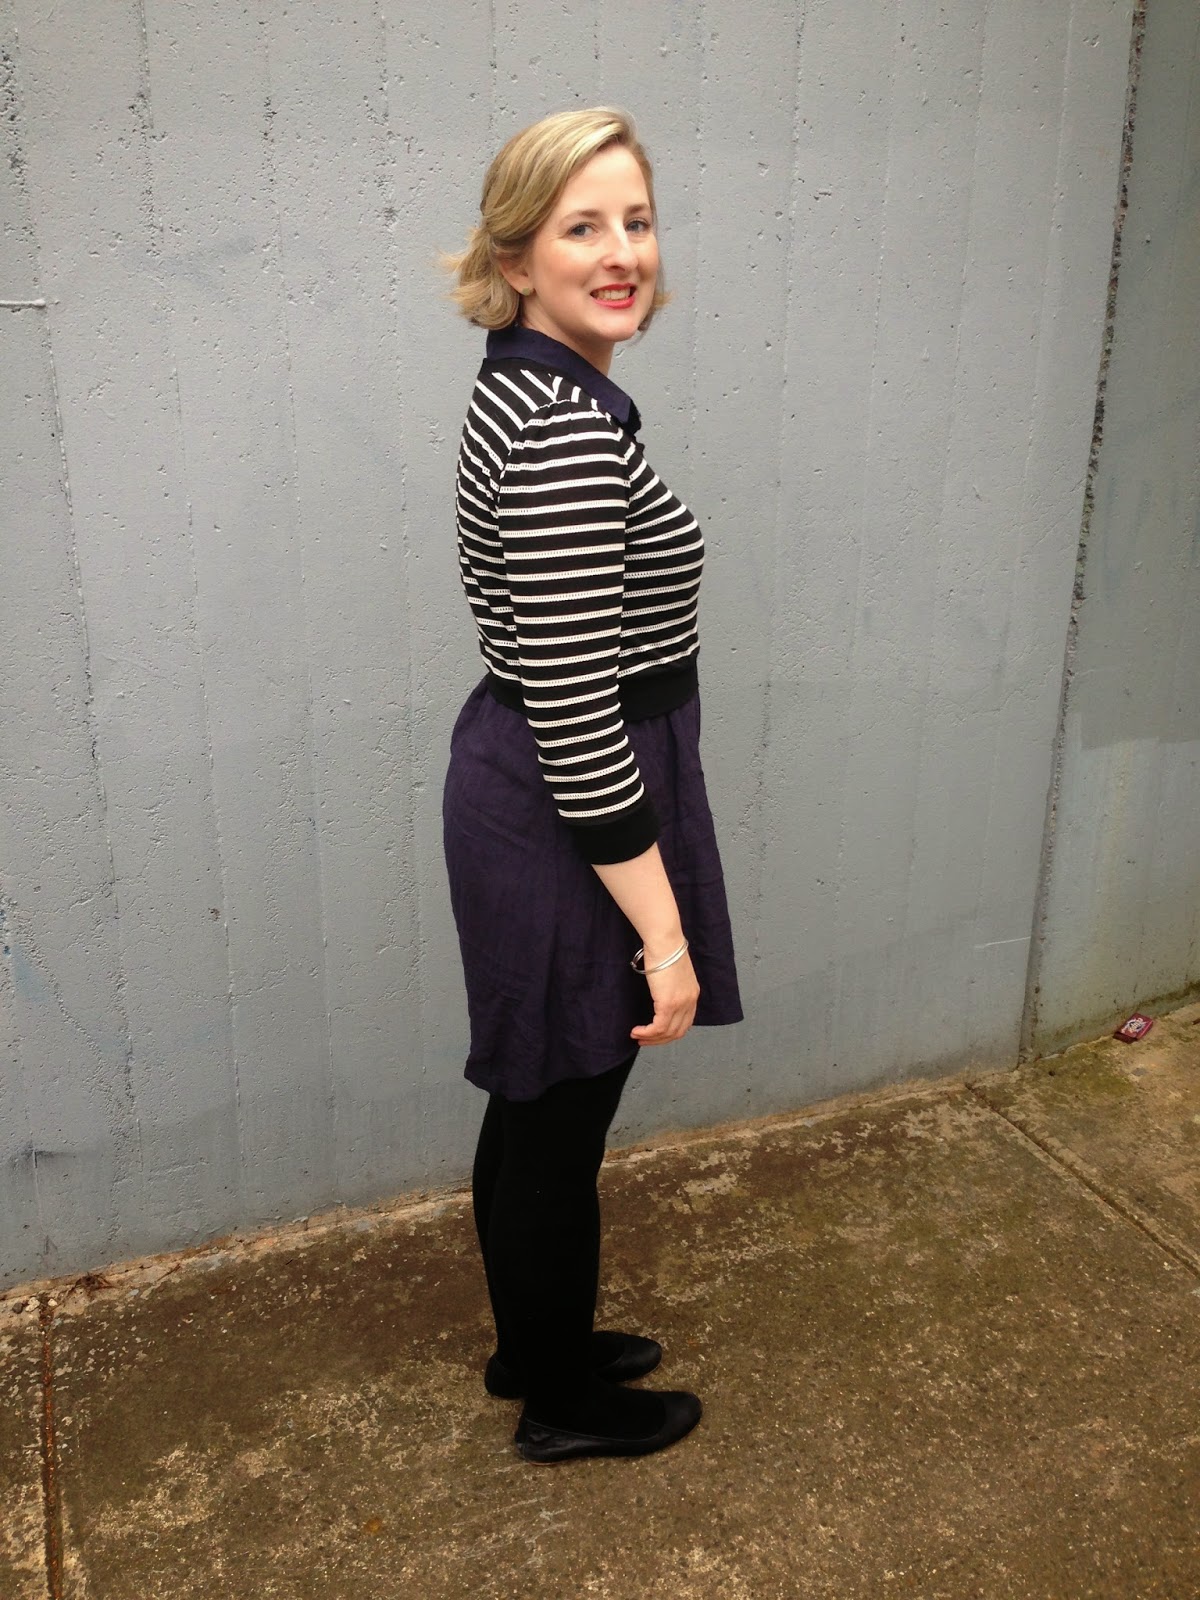
I used the Bluegingerdoll Bonnie Jumper pattern to refashion a cropped, long sleeve high neck jumper from the old Vneck jumper. I was able to cut around the neckline holes but I did darn up the elbow hole. I also reinforced the holey area with some black lightweight interfacing.


I cut the pattern pieces so the old ribbed bodice and sleeve hem could be selvedge. I took 1" of the bodice pattern as I like the Bonnie jumper a little more cropped and then aligned the bottom of the bodice pattern pieces (where you'd attach the ribbing/waistband) just above the ribbed hem. Because a cropped jumper uses a lot less fabric than a mens jumper I was also able to cut a strip of fabric to use as the neckline band.


I've made the Bonnie top before, cutting a size 10 grading to a 12 at the waist. This time I cut a straight 10. I loved my first sewn bonnie top but the low neckline makes it less versatile over different style dresses and shirts. I wanted this version to have the high neck so it didn't matter what I was wearing it over. I used Version A for the neckline and bodice length but view C sleeves.  I was able to sew the jumper completely on my overlocker. Not having to hem the sleeves and waistband made this a super quick project.


I really like the fit of this jumper and the cropped length is perfect. However, I find the back neckline sits a little low and I couldn't tell which bodice piece was front and which was back. I sewed the old country road tag into the back neckline to help. I'm going to get plenty of wear out of this jumper and I'm hoping to claim a few more of Tim's jumpers in the future.
  

Wednesday, 18 February 2015

Bluegingerdoll Alicia Shorts

I pattern tested the Bluegingerdoll Alicia Shorts which were recently released as part of the "A team" collection. I really like shorts, in particular high waisted shorts that flare out at the leg and finish mid thigh. Based off the line drawings I adore these shorts.


I made up a size 12 in some slightly stretchy blue and white striped twill fabric from GJ's. I love how the fabric looks on this pattern. Very summery (speaking of Summer, please come back!)


The instructions are clear and the shorts came together incredibly quickly as there are no tricky closures (just an invisible zip) or any pockets or belt loops to construct. I think belt loops would be a sweet addition however so you can keep a belt secure around the waist.


The fit around the waist and hips is spot on and I love the look of my shorts on the hanger. Unfortunately, I don't love the way they fit around the crotch. There seems to be excessive fabric around the front region which is being pulled every which way and bunches up as I walk around. The crotch curve seems like it fits well but I wonder if I dropped the crotch lower it could help the fabric sit better at the front.


Above and below is how the shorts sit after walking around for a few seconds. They really bunch up and the resulting look is very different to how they look when smoothed down.

  
Overall, I love the style of the shorts, the fabric and the fit around the waist but, sadly, I'm a little disappointed about the front fit on me. 


I received the Alicia Shorts pattern for free, in exchange for pattern testing. 

Tuesday, 9 December 2014

Bluegingerdoll Odette Dress

The Odette Dress by Bluegingerdoll was released a little while ago now and I've been meaning to blog about it for some time. The dress is a fit and flare with a lined bodice, several sleeve options and a V neckline with an optional buttoned insert.


I pattern tested the Odette for Abby and had a great experience with the pattern and instructions. I cut a size 8 bust - 10 waist/hips in version A. The fit was pretty well spot on except for needing to remove a little extra length from the hem. For the fabrics I used a stiff floral cotton and an orange cotton sateen from The Cloth Shop. I love the combination and hoped that it would be quite a quirky dress. I decided to make flat piping for the bodice neckline and use the contrast for the inset as well.


First, let me talk about what I love about this dress. The design is incredibly sweet. I love the contrasting inset but love the dress equally with it removed. 


The bodice is a great fit and the fabric is so fun. The lack of drape meant it was perfect for a fitted bodice compared to a full skirt for example. While my neckline binding is slightly dodgy I don't think it's too noticeable. I'm not normally one to wear gored skirts but I love the fullness it adds to this dress design. 


Okay, here comes the not so great part. For some reason, I cut corners on this dress and felt the "need for speed" sewing. I had quite a bit else going on at the time of making it and I pumped out the dress way too quickly, not taking the time to make good decisions about the quality of my stitching. 


From afar this dress looks pretty darn cute. Up close it is a total red hot mess. The hem of the skirt and where I attached the skirt to the bodice by stitching in the ditch is just plain gross. I'm embarrassed to even show this sewing. The zipper insertion was a case of good enough for now. But it is truly not good enough. It's a good 1/4"out at the waist seams. What was I thinking?


What's worse is the fit is great, I really like the design and the fabric is so fun! So, why oh why didn't I take the time to make this dress wearable with out being totally embarrassed about my shoddy sewing? This make taught me a lot about what I want out of sewing and that it's not just about ticking another garment off my list.

Monday, 6 October 2014

Bluegingerdoll Bonnie Knit Top

I'm pretty quick off the mark blogging this one. Abby, from Bluegingerdoll, only released Bonnie this morning! I pattern tested the Bonnie knit top for Abby and have been living in it since. I got photos straight after making it in case it showed signs of wear by the time the pattern was released.

Bluegingerdoll Bonnie top

Bonnie is a fitted knit top with 3 variations: A) cropped length with short flutter sleeves; B) cropped with 3/4 sleeves and scoop neckline; C) long sleeved hip length boat neck top. I found view B particularly appealing. I make and wear so many fit and flare dresses (have you noticed?!) but don't have many cropped cardigans or jumpers to wear with them. View B Bonnie fills that gap perfectly.

Bluegingerdoll Bonnie top

I made Bonnie up in a size 10 grading to a 12 at the waist. I made two changes to this version: 1) I removed a little length from the bottom of the bodice as I'm a little short waisted and I wanted the waist band to sit right on my natural waist. 2) Added cuffs to the sleeve as my sewing machine twin needle wasn't playing nice and this meant I could construct the whole garment on my overlocker.

Bluegingerdoll Bonnie top

I used a gorgeous striped jersey from Tessuti for the main bodice and sleeves. The black is solid while the white stripes are actual lacey. I used a solid black jersey for contrasting bands.

Bluegingerdoll Bonnie top

Bonnie was incredibly simple to make and the instructions are spot on. The pattern would be a great intro to knits while still being a little different from many other knit patterns out there. I already own plenty of knit top patterns but Bonnie fills a gap and has enough options to make it versatile.

Bluegingerdoll Bonnie top

I love my new cropped jumper and see more in my life. The fit is great: fitted while being roomy enough to fits under layers. I think the cropped length is perfect. Although my sister asked if my jumper had shrunk so perhaps I took too much length off? 

Bluegingerdoll Bonnie top

Thursday, 19 June 2014

Simplicity 1419 Round Trip Dress: A Wearable Muslin

Earlier in the month I posted about my Simplicity 1419 Round Trip Jacket. I like the look of the dress included in this pattern just as much as the jacket and have plans to make one from some beautiful Japanese cotton from Tessuti. But first, I decided to make a wearable muslin dress out of some fabric scraps to check the fit.

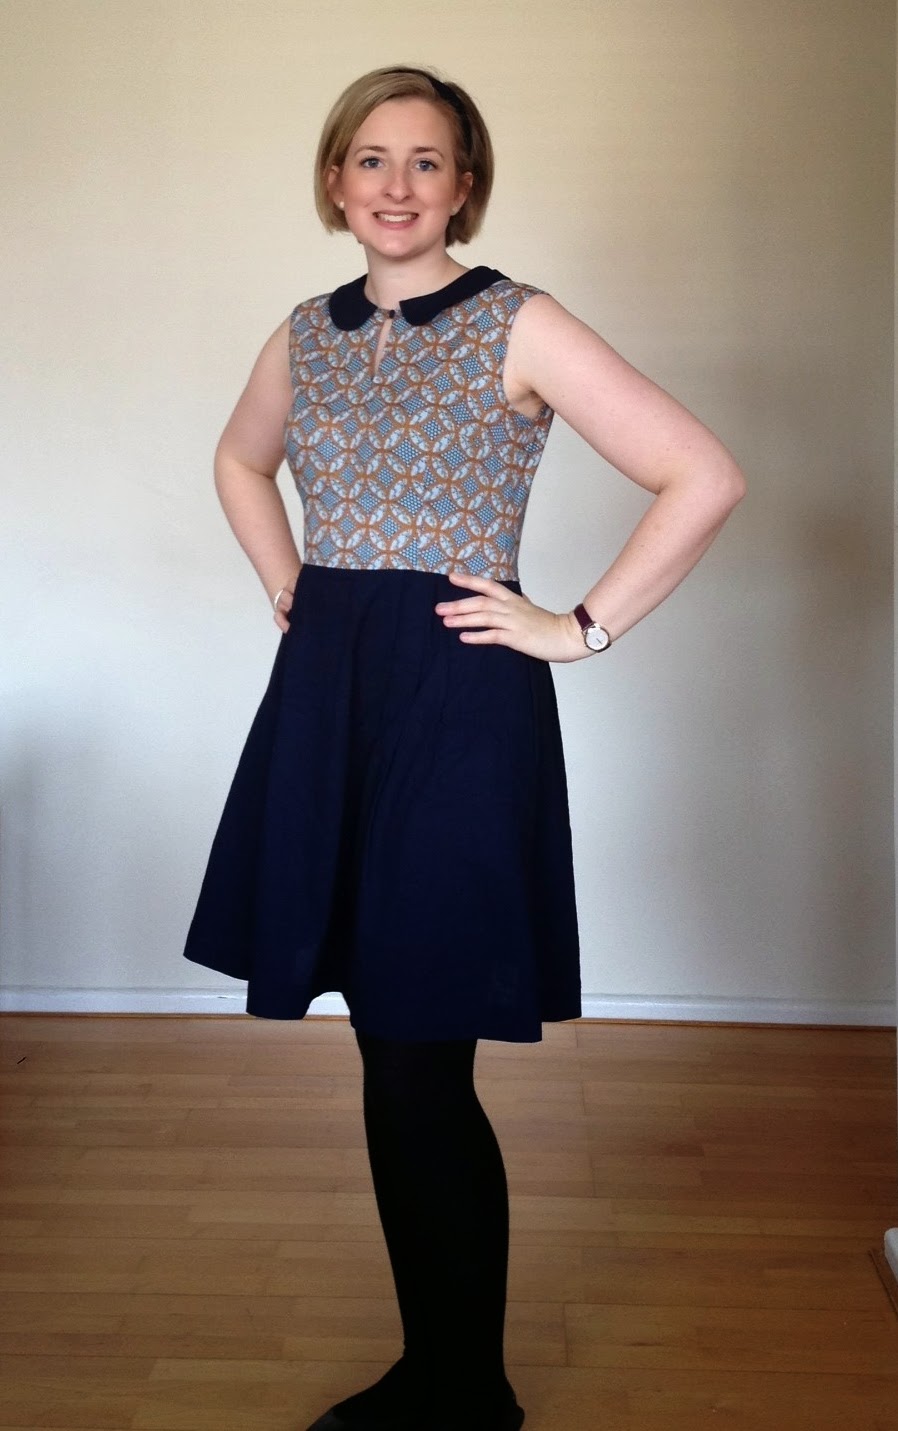
The design of this dress is actually very similar to the Emery dress but with a pleated rather than a gathered skirt, and a front neckline slit and button. I made version B which is sleeveless and has a peter pan collar. I cut a size 12 grading out to a size 14 from the waist onwards.

Simplicity 1419 round trip dress

For the fabrics I used a left over Japanese lawn from Spotlight for the bodice and pockets, and leftover navy broadcloth for the skirt and collar. I used these fabrics last year to make my sister and I BHL Polly Tops. The broadcloth wrinkles like crazy but I love the two contrasting fabrics together.  I made the dress following the instructions precisely and made no adaptions to the pattern (other than grading). I found the neckline a little confusing  as the facing and front bodice are cut without the neckline slit. The slit is cut into the neckline after you sew the facing to the bodice in a diagonal shape with the two sides meeting at a centre front point. It seemed a little confusing at first, but the instructions were spot on. Next time I wont doubt the instructions.

Simplicity 1419 round trip dress

The dress came together very quickly. The bodice has neckline facings and uses binding for the arm hole finishing's but you could easily use the bodice pieces to line it instead. I overlocked all the edges to finish the dress.

Simplicity 1419 round trip dress

I love the final dress, but now have an idea of the changes I want to make for the second version. I definitely need to take some length off the bodice so that the waist sits a little higher. Maybe just half an inch. My next version probably wont have a collar so I hope the neckline doesn't look/feel too high without it. I can always lower it a little.

Simplicity 1419 round trip dress

I just got my hair cut after making this dress. I hate getting my hair in my face so I decided to make a matching headscarf using Bluegingerdoll's free PDF pattern. The pattern is just a glorified rectangle with rounded edges but it was late and it was easier to follow the pattern than take my head measurements etc. I made it double sided to match the dress and I wear it folded over. I think I'll make a few more in different colours.

Simplicity 1419 round trip dress

This is how I actually wore the dress today (sans Jacket). Winter has really set in now. Apologies for more indoor shots but there's not much I can do with the very shorts days we're having. I have some more makes I'll try and get photographed on the weekend outside.   

Monday, 16 June 2014

Wool Wrap Besty Skirt

I bought this divine wool rayon blend fabric at The Fabric Store earlier in the year with a pencil skirt in mind. I'd been planning to try and perfect Gertie' s pencil skirt but was soon distracted by Bluegingerdolls Betsy Skirt. I made up version A for pattern testing/blog tour, and version C for a wedding. I saved what I thought was the best for last for this beautiful wool: Version B, a buttoned wrap pencil skirt.

Bluegingerdoll Wrap Betsy

My two previous Betsy's were a simple sew that came together well. Unfortunately, I had a few problems with Betsy number 3. I had Office Works re-print one of the pattern pages (size AO) and I combined pieces cut from this newly printed piece with some of the pieces I'd already cut from one of the old pages Abby sent me. I told officeworks to print it actual size, but the waistband and facing pieces were both a good 4" too long for the skirt. I assume it was printed incorrectly. Because of this issue I couldn't follow the notches on the waistband and instead just "winged it" and then trimmed off the excess. I did the same with the wrap facing.

Bluegingerdoll Wrap Betsy

Due to the above issues I ended up putting aside the instructions and just doing my own thing. The fabric was a dream to cut out and sew. However it doesn't press well at all so the hem and facings bubble up. I'm thinking about stitching down the facing of the inner skirt front completely. Strangely it wrinkles well despite not pressing!

Bluegingerdoll Wrap Betsy

I again cut a size 12. As this fabric has little stretch the fit is pretty spot on though my legs. The waist is a little roomy at the top and I think the skirt could be improved (for my body at least) by drafting a curved waistband so that the top tapers in with my waist.

Bluegingerdoll Wrap Betsy
 
The foe wooden buttons I used are from Tessutti. They are a little bigger than recommended so I played around the with button hole distances. I love the contrast of the tan button on the bright blue skirt.

Bluegingerdoll Wrap Betsy
 
Overall, I really like my final Betsy and know I'll get good wear out of her. The fabric is heavenly but something crisper, more easily pressed, might have been a better option. Big thanks to my work colleague Adriana for taking these photos in the cold and windy weather.

Bluegingerdoll Wrap Betsy

Tuesday, 10 June 2014

Giveaway Winner: Bludginger Doll PDF Pattern Winner

The winner of the Bluegingerdoll Pattern PDF provided by Indie Stitches is the Lovely Ruth Procter of Nightingale & Dolittle. Congrats Ruth!


Ruth, like many others, asked for the Winifred dress. It's now coming right your way miss! I'll be in contact to organise.

More interviews with fab locale and/or small Indie Pattern design companies coming to the blog soon :)

Saturday, 7 June 2014

Floral Bluegingerdoll Betsy

After finishing my first Bluegingerdoll Betsy Skirt I was quick to cut out a second!

Bluegingerdoll Betsy Skirt

Given the recent pattern testing discussion online I'd like to note the following: Firstly, I love pattern testing for all the reasons I listed in this post. I sure as hell don't get paid to pattern test (wouldn't that be the dream!), other than with free access to the pattern being tested and the fun and valuable communication with the designer. When I pattern test I declare it as such and everything I say about the pattern is an honest representation of my opinion of the patterns. Finally, I made this skirt outside of the testing period, did not discuss it with Abby (owner/creator of Bluegingerdoll), and I have another one in the works. If anyone is wondering whether I really like this pattern then let that speak for itself! 

Bluegingerdoll Betsy Skirt

The details: This is version C of the Bluegingerdoll Betsy Skirt, a highwaisted pin up style with a front V and a pleated accordion back vent. I  cut a size 12 out of the absolutley stunning cotton sateen I won in a fabric giveaway put on by the lovely Neeno of Sew Me Love. Neeno intended the fabric to become a dress, but with such a loud print I really liked the idea of a fitted skirt to be paired with a neutral top. 

Bluegingerdoll Betsy Skirt

The only change I ended up making to the skirt was to take in the side seams a further 1/4". I think the size 12 is a perfect fit in a non stretchy fabric but this has some real stretch to it and after wearing it all day I wonder whether I may need to take it in a little further. I hand stitched the hem and the waistband facing.

 Bluegingerdoll Betsy Skirt

My favorite part of this skirt, other than the amazing fabric,  is the gorgeous pleated accordion back vent. During constructing I was a little confused by the pattern/instructions and unsure how the fabric would become the vent. I had faith, followed the instructions and it turned out perfectly. It reminded me of inserting a zipper fly back to front - I don't know how it works, it just does!

Bluegingerdoll Betsy Skirt

Not much more to say about this beauty, other than I love it! Reminder: My giveaway for any Bluegingerdoll PDF listed by Indie Stitches closes on Monday. If you're keen to be in the running get over to my previous post and follow the giveaway instructions.

Monday, 2 June 2014

Sew Indie Interview: Bluegingerdoll Patterns

Over the past year of sewing with Indie Patterns I've been blown away, not only by the patterns but also, by the designers incredible generosity and approachability. I've been keen to learn more about these companies and the designers who created them. I assume others are interested too so I thought I'd invite a few of these wonderful and creative people to tell us a bit about themselves. I'm particularly interested to hear more from pattern designers whose companies are new initiatives or are locals (Australian). I'll post the interviews as they come along and hope to include the occasional giveaway where possible. *See end of post for a fabulous giveaway on behalf of Indie Stitches*

First up is the wonderful Abby, owner and creator of Bluegingerdoll Patterns who is based in my home town Melbourne, Australia. The first Bluegingerdoll pattern was released a little over a year ago, and already 6 further patterns have been released. Abby creates vintage inspired patterns which flatter the curvy figure. Her patterns have been well received throughout the sewing community. 


Abby, could you tell us a little bit about yourself and the role of sewing in your life?
Sewing is an all consuming force in my life at the moment, although its more in respect to creating sewing patterns for others to sew. I haven't actually sewn much for myself for quite sometime.
When/how did you decide to take the plunge in beginning an indie sewing pattern company?
Early 2012 i decided to take the plunge into making Bluegingerdoll a reality. I have previously studied Fashion design & Technology and I had been creating patterns for myself and others before I started down this road. The transition into creating patterns for Bluegingerdoll was easier in my mind than it turned out to be. There was a lot of trial and error beforehand with designs as well as working out how to run Bluegingerdoll smoothly on the side whilst still working a 9-5 day job.  


Your very first pattern, the gorgeous Billie Jean Dress, recently turned 1. You have since released 6 (!) more patterns. This is incredibly prolific. Whats the secret to your success?
This may sound cliche but there aren't any secrets (sorry) just a lot of hard work. I am learning a lot as I go, and Bluegingerdoll continues to evolve with each new pattern release. I guess, maybe i'm getting better at handling it all. I absolutely love what I do and the hard work that comes along with Bluegingerdoll  is something I get a real kick out of too. I also have a very supportive partner who helps me out big time, especially with the business side of things.

Could you tell me a little about your design process? How does an idea grow to be a physical pattern? (Are you a computer based designer or a pen and paper kinda gal? Flat pattern or draper?)
I'm a mixture of all of the above but to be honest more old school. I prefer to be more hands on when designing. It also depends on the design itself finding the right method to work with to get the idea out of my head and into a working form, so sometimes I do move into different methods of pattern making.

Source: http://bluegingerdoll.com/
What is the inspiration behind your patterns? How were Ava and Betsy dreamed up?
I've always been a fan of a fitting and flattering pencil skirt. I have a little too many in my wardrobe. I love that there a simple staple but so 'Va va voom' in a subtle way. Betsy in particular I wanted to design, so it could be a pencil skirt that could be worn in varying styles as well as be flattering on a curvy figure. In my mind, I  wanted to create an outfit such as Betsy & Ava  that would try to capture the femininity and glamour that was so prevalent in the 50s era, and also pieces that aren't just for special occasion wear, for everyday. 
What have you learnt over your 1+ in business with Bluegingerdoll Patterns and what advice would you give home sewers and wannabe pattern designers?
I've  learnt so, so much since starting Bluegingerdoll and not only about running a small business, but myself as well. Patience (still working on that one), your only one person, you do need to sleep and take care of yourself properly. Copious amounts of coffee and junk food do not make for a 100% functioning person. As well as accepting that the hard work is just part of it all. My advice for others is to learn as much as you can, hone those sewing/pattern drafting skills or whatever the skill may be before moving onto the next. Read, read and read and then read some more, sewing books, blogs absorb yourself in it all. Just never stop learning. Also, get involved in the awesome sewing community, they're a great supportive bunch. 
Any hints about what's to come from Bluegingerdoll Patterns?
At the moment I have a few new designs in the works and am working towards broadening the horizons of Bluegingerdoll in the coming months.


Thanks so much to Abby for sharing her story with us. I cannot wait to see what "broadening the horizons of Bluegingerdoll " entails - what a teaser!

Giveaway... (Closed)

To celebrate the release of Bluegingerdoll's new Patterns and also the first of hopefully many interviews with Indie Sewing Pattern designers, I'm holding a giveaway for any one Bluegingerdoll PDF pattern available on the Indie Stitches Website. This giveaway is open internationally and a winner will be randomly drawn on Monday the 9th of June. To enter: Visit Indie Stiches, choose which Bluegingerdoll PDF pattern you'd like to win, and leave me a comment letting me know. If you like, also tell me what question you'd ask your favourite Indie Pattern Designer. Please also provide a contact email. Goodluck! 

Sunday, 1 June 2014

Pattern Testing & Blog Tour: Betsy & Ava

I'm thrilled to be a part of Bluegingerdoll blog tour for Abby's new patterns Betsy and Ava. When Abby contacted me to pattern test I was beside myself and these patterns did not disappoint! I've been itching to share them and the hardest part of the whole thing was twiddling my thumbs waiting for the patterns to be released. To ease my pain I sewed up this Belcarra Blouse to match my outfit. Get ready for a lot of photos! Also, a big thanks to Tim for taking these shots. Betsy and Ava brought the diva out in me...

Betsy and Ava Bluegingerdoll

First up is Betsy, a classic pencil skirt with some fantastic design features which set the pattern apart. For pattern testing I made Version A which has a back vent and buttoned waistband tabs. Version B is a gorgeous wrap variation which I have plans to make very soon. Version C is a little bit different, it's a high waisted pin up style with a beautiful pleated kick pleat.
  
Betsy and Ava Bluegingerdoll

For Betsy I cut a size 14 which is one size larger than I'd normally go for. In the past I've found BGD patterns very fitted and I like a little more ease (so I thought). I made Betsy and Ava up in a lovely medium weight wool blend with a slight amount of stretch from Darn Cheap Fabrics. From a distance the fabric looks gunmetal grey/blue but up close it actually a tiny black and teal houndstooth. I choose mustard as a contrasting fabric for Ava's lining and also for the buttons on Betsy.

Betsy and Ava Bluegingerdoll

Other than minor teething problems with the original instructions, Betsy sewed up like a dream. The pattern itself was spot on. I'd recommend the pattern for a confident beginner. I made no changes to the pattern other than to cut approx. 1"of the hem AND to take the side seams in approx. 1/2"on both sides! I then trimmed down my pattern pieces to a size 12 so I wouldn't make the same mistake next time. With the taken in sides the fit is perfect.

Betsy and Ava Bluegingerdoll

Because I took my hem up a further 1" I find that my back vent is a little playful. It's shorter than intended and doesn't want to sit flat. For those intending on shortening their skirt I'd recommended you alter the pattern to increase the length of the back vent a little.

Betsy and Ava Bluegingerdoll

Ok, on to Ava. Ava is a fully lined drapey jacket will a shawl collar, turned up sleeves and a generous amount of ease. She's a glamorous thing!

Betsy and Ava Bluegingerdoll

I went with my chest measurement and cut a size 8 for Ava. The jacket is a simple design and totally beginner friendly. However the collar attachment can be a little confusing and there is a lot of hand stitching to be done! Seriously, Ava really whipped my hand stitching skills into shape. It would be lots of fun to use contrasting fabric for the collar and cuffs. I used the mustard fabric for my under collar which is a bit of a treat. Unfortunately I didn't get a photo of it.

Betsy and Ava Bluegingerdoll

The fit is intended to be generous and boxy. A light weight drapey fabric is ideal so as not to be drowned by a stiff boxy jacket. I think my Ava turned out  great and I don't feel overwhelmed by it. Together, Betsy and Ava have come together to be a lovely suit. When I first started blogging I talked about making a conference cambie (never happened!!). I can totally see myself wearing my Betsy and Ava suit to a conference or other important meetings. I'd like to make another more casual Ava in a fun lightweight fabric to pair with jeans. Betsy will be on high rotation in my work wardrobe.

Betsy and Ava Bluegingerdoll

Ok, that was a long one! I hope you're following along the blog tour and falling in love with Betsy and Ava as much I have. Check back in tomorrow as I'll be sharing a bit of a treat (read: giveaway!!).

Betsy and Ava Bluegingerdoll