Showing posts with label Hand Made 2015. Show all posts

Tuesday, 3 May 2016

A Belated Tessuti Sydney Jacket

A post that's been half written since last winter:
I love the Tessuti aesthetic. The designs are modern, minimalist and often offer comfort through oversized, boxy or flowy styles. There are a few bloggers on my feed who make just about all Tessuti patterns and they look stunning wearing them. I'm not so sure about these boxy, flowy, often lengthened garments on my body. I generally admire these patterns on others and avoid them for myself.


This was true of the Sydney Jacket initially. And then these amazing coats kept popping up all over my blog feed. I went to a Frocktails fabric shopping get-together last year and I saw four different ladies in four equally gorgeous coats in one morning! About an hour in to the day I was convinced I'd give it a go.

I bought my fabric (wool/poly blend) from The Fabric Store and cut a size S. Due to fabric wanting to fray a little I excluded the exposed pockets and cut the front piece along the selvage. I didn't both about pattern matching because the pattern is a little origami like at first and I didn't want to stuff around figuring out the perfect match only to get it wrong. Especially as I wasn't convinced I'd even wear the coat.

The sewing was pretty darn quick. I found it helpful to mark in chalk the overlapped seam lines on the fabric when lining up pattern pieces. I really like the look of the exposed seam lines but they can get a little messy if you're not careful. On the edges of the coat I sew a line of stitching parallel to the raw edges and then purposeless frayed the edges a little.

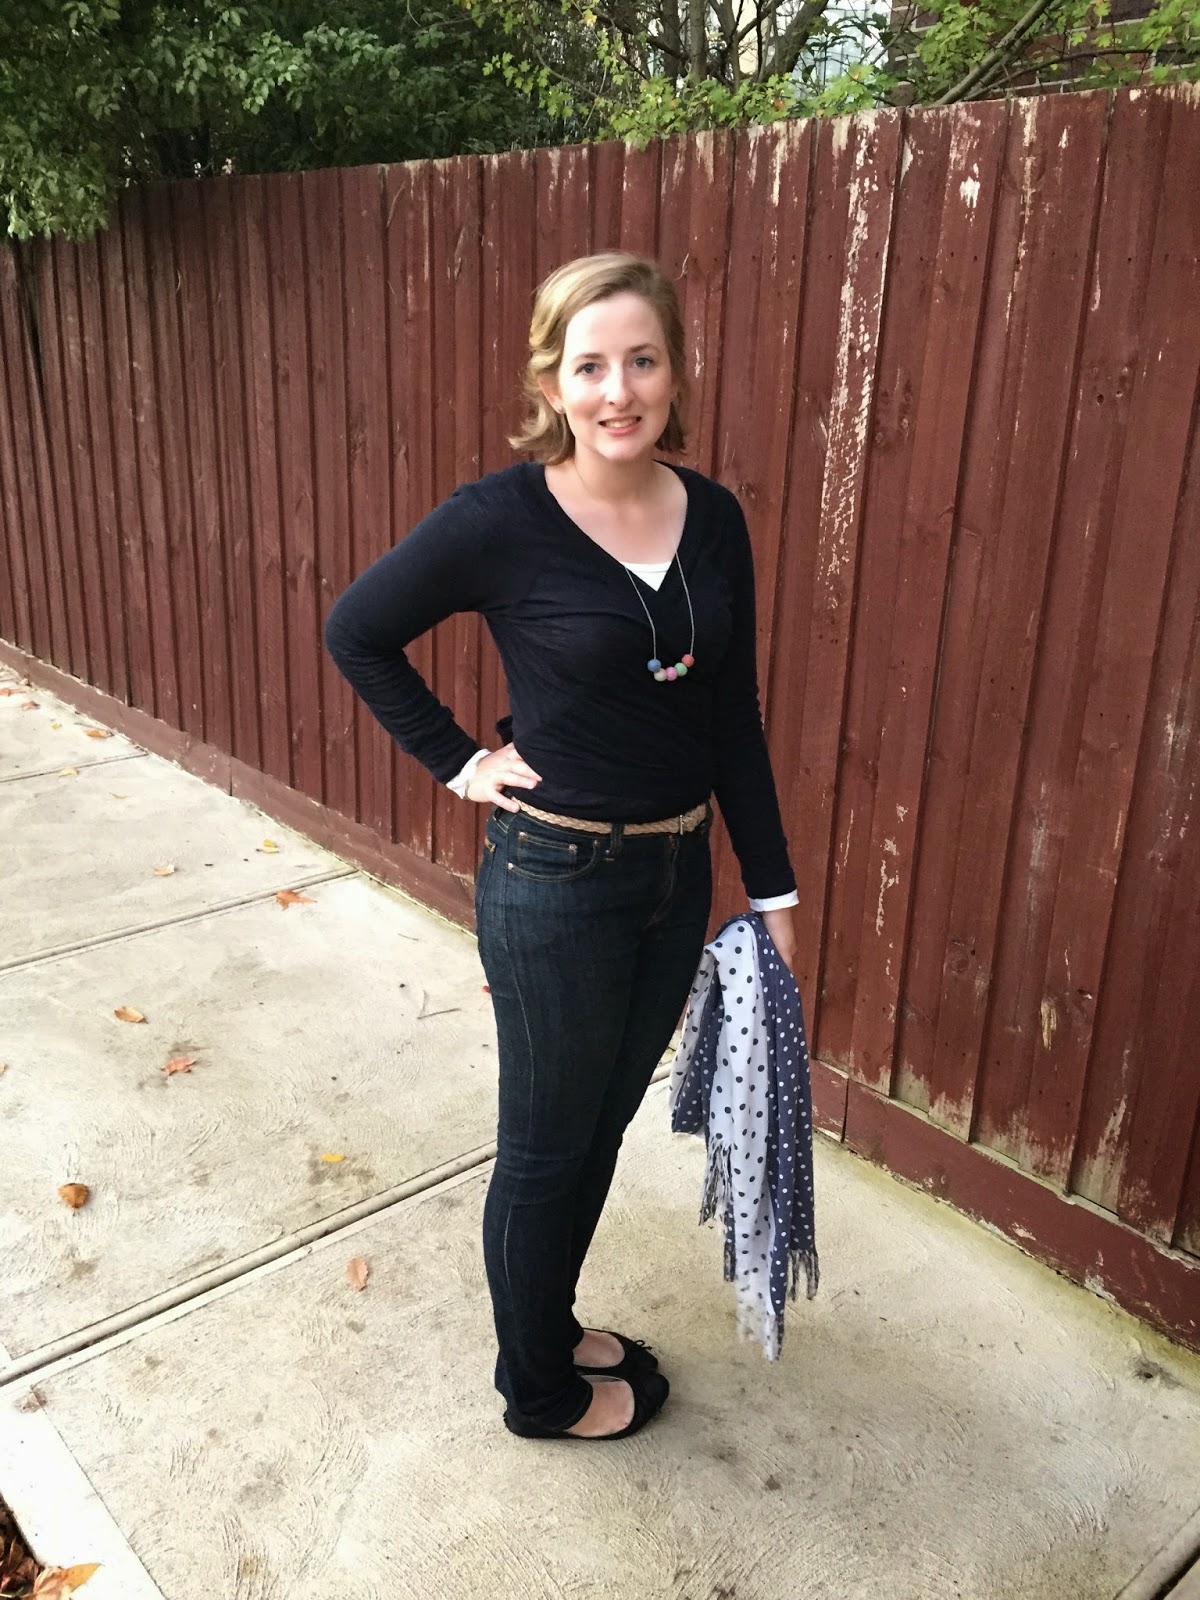
These photos are from last winter, wearing the coat over Jeans. But since, I've been more likley to wear it over another drapey long sleeve cardigan with a fitted skirt. I wouldn't say I feel totally myself in it and I think I look a bit like I'm just wearing a blanket, but it's very warm and comfortable. I've been considering making another version but can't decide between a colourful tartan I've been dyeing to cut into and a basic black or tan.  I wonder also if a slightly thicker fabric would give it more structure and remove some of the blanket look?

Wednesday, 7 October 2015

Itty Bitty Baby Clothes

My sister and brother-in-law recently had twin girls! I wanted to make something for their arrival and the free Made by Rae Itty bitty baby dress pattern came to mind, along with the free MADE diaper cover bloomers. There are so many free patterns out there for kids, but especially for newborns to 12 month old's. Aren't we aunties lucky?!


I made two 0-3 month old dresses using small pieces of liberty of london fabric and bias binding I found in my stash with contrasting pink and white gingham cotton I cut from an old dress that I no longer wear. The cotton is lovely and soft. The dress came together very quickly! Baby clothes are so quick to sew, being tiny and all.


For the bloomers I used the old MADE diaper cover pattern as I already had it printed. However, the pattern and tutorial have since been revised to improve the fold over leg holes that the leg elastic is threaded through. I made the bloomers as per the instructions except for adding a few strips of ruffled fabric on the backsides. I cut stripes around 1.5" by 10". I used my overlocker to finish the edges before attaching.


Congratulations parents Steph and Damian, and big sisters A & A,  on you're two beautiful new daughters/little sisters!

Friday, 25 September 2015

Tim's Birthday shirt 2015

It's been a couple months between posts. I haven't been sewing much and when I have been sewing I haven't felt like blogging. I've really enjoyed a break for Instagram, blog reading and my sewing-related social networking. But, with the weather warming up, I'm getting ready for some spring/summer sewing. In the meantime, some catch up posts with average (at best!) photos.


In August last year I made my first men's shirt for Tim's birthday; a Colette Patterns Negroni shirt. I made him another for his birthday this year, which marked the fifth shirt made in the last 12 months. All of his shirts are in high rotation and I love rushing out of the house each work morning realising we're both wearing clothes I've made us.


I bought this blue and white small gingham cotton shirting from Tessuti earlier in the year. I love the italian cotton shirting Tessuti have been stocking and look forward to buying more when they receive more stock. The fabric is soft with a slight sheen and it presses really well. For the contrasting sleeve plackets, under collar, and inner collar band I used salvageable fabric from one of Tim's worn out shirts. I also reused all the buttons of the old shirt.

Why yes, that is my finger at the bottom of the photo...

I was hoping to make a long sleeved version of the Simplicity 1544 I'd made Tim this summer, which has a nice traditional collar and button placket. However, Tim prefers the fit through the body of the Negroni shirt, which means I have to stick with my Negroni Archer Shirt pattern mash up to get all the shirt features his likes. For details on mash up process see my previous posts: 1, 2.

Before I attached the buttons

I didn't do anything differently this time around. I double interfaced the collar to make it extra crisp. I overlocked the edges and sewed the S/A to one side to create faux flat fell seams. for some reason this verson seems a little tighter around Tims under arms, but it doesn't bother him.  The one main difference with this shirt is the amazing fabric which, I think, makes it look much more professional.


Tim loves his new shirt and wore it the day of his birthday. We started the day off well, filling our bellies with with nutella french brioche before heading off to work. Delicious! 


Friday, 3 July 2015

Maxi Ilsley Skirt

One last garment made and photographed in Vietnam: a maxi Marrila Walker Ilsley Skirt. The Ilsley skirt is a free pattern (woo hoo!) which, because of the elastic easy fit style, is very easy to modify into a number of different looks. My first version mostly followed the instructions and the pattern apart from changing the elastic casing method and style. This time round I made quite a few super simple modifications.


I wanted a maxi version which was very easily achieved. I just measured my desired length against my legs from where I wanted the skirt to sit at my hips; cut the pattern in three (although two would be fine) and inserted the additional inches between the top and bottom of the skirt pieces. 

Given the fabric was a drapey viscose (bought from Darn Cheap Fabrics) I wanted a bit more gathering in the skirt to "go with the flow". So I added 2" at the centre front and centre back fold. I'm not a huge fan of pockets on very drapey garments so I placed the pocket pattern piece under the front skirt pieces when cutting out the fabric to effectively remove the pocket.

I also made a few adjustment to the waistband. I still don't have any 5cm elastic on hand and I wanted this skirt to sit on my hip wear a wide waistband would be unflattering. Changes: I took about an inch of the waistband width when cutting out the fabric and sewed two button holes at the centre front to be used for the drawstring. After attaching the waistband I inserted a 3/4" piece of elastic, squished it right down toward the skirt and sewed a line of stitching right above it. This made the elastic channel the perfect width and created a nice gathered top to the skirt, kind of paperbag-esque. It's hard to describe, but it's a feature I've seen on lots of floaty maxi's in summer/surf clothing stores.


I made this skirt in a bit of a rush and the quality of the seaming at the curved hems is pretty average. None the less, I love the way it turned out and it was perfect for Vietnam. Light and cool and conservative enough for any temples we decided to fit into our day. Having a few maxi items in the luggage also helped when my white skin was struggling with the sun.


Here's a "how you doing" photo outtake. Sadly, my posts will consist of winter wear from here on out. I'm well and truly back to the reality of post-holiday life.


Monday, 29 June 2015

Scrappy Spotty Alice Top

In preparation for Vietnam, and while avoiding more time intensive winter sewing, I made another Alice top. There's not much to say this time round. See my frst, and the two I made for family here (1,2).


This time round I made the XS, but shortened the hem by 2" as the previous versions were long. Otherwise I didn't make any changes to the pattern or instructions.


I made this scrappy spotty version using various fabrics left over from other projects. I used white and blue cotton voile for the back skirt and front yoke; navy and white large spot silk crepe for the back bodice and sleeves and the small navy and white spot for front skirt. I used all these fabrics previously when sewing tops for my sister.  I lined the the front bodice pieces with a scrap of white cotton/silk blend and the back bodice with the Navy cotton with small white spots.


I wore this top heaps in Vietnam. The breezy lightweight fabric was perfect in the heat and it went really well with my denim Tap shorts. The Alice Top is a great pattern to use up scraps. 


Friday, 26 June 2015

A Maxi Emery Dress

Tim and I just came home from a 2 and a bit week holiday in Vietnam. It was absolutely amazing and we can't wait to start planning our next holiday. Before we left I made a couple of summer items for the trip. First up, a maxi version of the Emery Dress pattern by Christine Haynes.


I've made this pattern quite a few times  (1, 2, 3, 4).  I find the bodice really comfortable and easily paired with various skirt styles. A few of temples in Vietnam require conservative dress and my summer wear is mostly sleeveless tops and shorts so I thought a maxi dress (with a scarf over my shoulders when needed) would fill a luggage gap of conservative as well as evening wear.


I made the dress up using some $2 table Darn Cheap Fabric Viscose that you'll have seen around the blogosphere (here and here). The fabric seemed perfect for the tropical weather - bright and summery but cool and flowing.


I made an unlined sleeveless version in size 6 as usual. I took 1.5 cm off the arm holes at the shoulders grading to nothing at the underarm, scooped out the neckline a bit and took another .5cm from the centre back seam which I'd already modified in a previous iteration. Viscose has more stretch to it than other fabrics I've used for this pattern before and unfortunately I distorted the fabric at the centre back seam a little when inserted the zipper. For the skirt I used all the fabric I had left from the bodice, including selvage edges. I simple cut four rectangles and sewed them together before gathering and attaching at the waist. The width of the rectangles isn't substantial so I including leg slits to allow more room to move.


Excuse the dark photos. These were taken at the Sky Deck in Ho Chi Min City on our last evening in Vietnam. We went just before sunset and stayed to see the city lights after dark.  I also wore this dress, along with a scarf over my shoulders, to Ho Chi Min's Mausoleum in Hanoi on what was one of the hottest days of our trip. It was a great dress to have on the trip and I look forward to wearing it again once summer comes around in Australia.

Tuesday, 9 June 2015

Megan Nielsen Brumby Skirt

I pattern tested the Brumby Skirt for Megan Nielsen and I have nothing but positive things to say about the just released pattern. It's a gathered skirt with deep curved pockets, an exposed back zip and various length and fullness options.


I made up version A in a size M out of some gorgeous lightweight black denim from The Cloth Shop with a 7" zip and liberty offcuts for the facing and pocket lining. I love the length of version A. It's mini without being too revealing. I also like that this pattern has a curved waistband, it's absolutely necessary for such a wide waistband.


The instructions were clear and detailed. I found the instructions for the exposed back zip really interesting and thorough. I'll definitely use them again for other patterns as they made for a lovely and easily inserted zip.


I did a lot of top stitching on this skirt and it was my first time using topstitching thread. In some places the thickness of the denim and the thread threw the tension off so it's a bit bubbly on the wrong side. But, I love the way the tan thread looks against the denim.


This is a super fun pattern to make and wear and I'd really like to make a midi version despite knowing that it just wouldn't suit me. Especially as I rarely wear heels. I look forward to seeing others versions pop up all over the web to see how they wear the midi style.


I've previously made up two patterns by Megan Nielsen (Tania Culottes and the Cascade Skirt), both skirts that are just a little bit different and special. I wear them both, but the simpler design of the Brumby skirt means it fits more into my everyday lifestyle. It's a go to option on the weekend in winter (with tights) or summer. I took the pattern testing photos in summer but I've got a heap of wear from the skirt since the cooler weather hit. 


* I received the brumby skirt pattern in exchange for  pattern testing. It was my choice to blog the final garment*

Sunday, 31 May 2015

Grainline Studio Cascade Duffle Coat

I love winter coats. I have four that I wear regularly (including my Jackie Coat), but my favourite is a threadbare black hip-length hooded duffle coat with two missing toggles. My mum bought it for me over 8 years ago and it's been a staple ever since. It's some sort of magic coat that goes with every outfit and some how fitted me perfectly across three different dress sizes during this time. I desperately needed a new perfect coat.


Enter the Grainline Studio Cascade Duffle Coat pattern, which I bought from Indie Stitches. View A is an almost perfect replica of my favorite coat except that it needed View B's hood.  I cut size 6, grading out the to 8 from the waist down. It took for freakin' ever to trace and cut out all 27 pieces required. There were a few pieces that I didn't trace because they weren't multi-size or could be folded.


It took some time to gather all the material. I used leftover black wool felting from my Jackie coat, and bought some gorgeous grey speckled wool from the cloth shop for the contrast. I couldn't find any premade toggles I liked so I purchased these from M Retch. The delivery was super quick, but I'd prefer a courier service that drops the product to the local post office if the recipient isn't home rather than having to reorganise a time with the courier for pick up. Searching for the leather was frustrating. I couldn't find any soft textured black leather in my local fabric stores. I hunted for leather handbags in opshops but didn't find anything quite right. In the end my sister gave me some scrap leather used to cover their kitchen chairs with - it was perfect.


I wanted the coat to be quite warm and thick so I interlined the bodice pieces with leftover PJ flanelette (pea pods and wolves). I did this by tracing the whole bodice pieces, without the yoke/bodice seam allowances, basting the main and interlining fabric together and treating them as one.


This Jacket was a labour of love. Every time it seemed close to being done I'd be shocked to see how many more steps there was in the instructions. Thankfully the instructions were really well written. The process of the sewing and attaching the lining can be a little confusing but a quick glance at the sewalong was all that was needed to confirm what you are doing.


My only complaints about the coat are the size of the pockets (not a big deal, but I'd make them smaller next time) and that the hood and hem lining wants to pull down and sit strangely. Because there is excess ease in the lining (to allow for movement) the hem facing and hood facing have the tendency to fall out of place (even after a good press). I fixed this by tacking the facings down. I simply stitched in the ditch of the side seam (hem) and centre seams (hood).


I love the style and fit of the coat. It definitely fills the hole of my old perfect coat. It is on the short side, but I'm short torsoed so it doesn't both me. I find the sleeves slightly too firm given the number of layers I'll be wearing under the coat, but hopefully the interlining will mean less layers. Overall, I'm incredibly happy with how my Cascade Duffle Coat turned out and I've promptly filled the (massive) pockets with tissues and spare gloves.  

Saturday, 16 May 2015

Blue Merino Coppelia Cardi

My pink and black Papercut Patterns Coppelia Cardigans have got to be some of the most worn garments in my cupboard. I wear cropped cardigans a lot and their neutral tones are perfect for just about every occasion. Unfortunately my pink merino cardi has a few holes (which I'll sew up) and the cheap black fabric has pilled.


I bought some ribbed navy merino from The Cloth Shop with plans to sew another Coppelia in the hopes that more will mean extending the life of all of them. This fabric is a gorgeous colour, lightweight and stretchy. In fact it may be a little too stretchy, lacking the recovery needed for a tight fitting wrap around cardi. I'm just going to have to be extra careful not to stretch it out.


I once again made a size XS upped bodice/Sm waist. While it is cropped, this pattern still uses up quite a bit of fabric with the long wrap around ties and front bodice ribbing.  


I made the cardi almost completely on my overlocker. I following the instructions with two exceptions: 1) I didn't leave a space in the bodice side seams to pull the wrap ties through as I never use the hole on my pink cardi. 2) I attached the hem wrap ties differently so as to avoid having to use the sewing machine as much as possible. I pinned and sewed the ties wrong sides out after folding the cardi inside the ties as much as possible. I left a small gap at the centre back to pull the cardi right side out and attached this section using the sewing machine. It's a bit difficult to explain, but Sophie has a photo tutorial which shows something very similar (steps 6,7,8).


Nothing more to say, other than that I'm glad to add another Coppelia Cardy to my wardrobe and there's always room for more. I couldn't be more in love with this pattern and absolutely recommend it to others who like cropped cardigans. 

Sunday, 10 May 2015

Refashioned Merino Bonnie Jumper

Tim wears these Country Road Merino jumpers over work shirts in various neutral colours. He has a stack of them and I regularly sew up holes in the elbows for him. The fabric is great quality but quite thin. His dark grey jumper had a hole in the elbow but also around the neckline so he decided to replace it and I claimed the holey jumper for myself!


I used the Bluegingerdoll Bonnie Jumper pattern to refashion a cropped, long sleeve high neck jumper from the old Vneck jumper. I was able to cut around the neckline holes but I did darn up the elbow hole. I also reinforced the holey area with some black lightweight interfacing.


I cut the pattern pieces so the old ribbed bodice and sleeve hem could be selvedge. I took 1" of the bodice pattern as I like the Bonnie jumper a little more cropped and then aligned the bottom of the bodice pattern pieces (where you'd attach the ribbing/waistband) just above the ribbed hem. Because a cropped jumper uses a lot less fabric than a mens jumper I was also able to cut a strip of fabric to use as the neckline band.


I've made the Bonnie top before, cutting a size 10 grading to a 12 at the waist. This time I cut a straight 10. I loved my first sewn bonnie top but the low neckline makes it less versatile over different style dresses and shirts. I wanted this version to have the high neck so it didn't matter what I was wearing it over. I used Version A for the neckline and bodice length but view C sleeves.  I was able to sew the jumper completely on my overlocker. Not having to hem the sleeves and waistband made this a super quick project.


I really like the fit of this jumper and the cropped length is perfect. However, I find the back neckline sits a little low and I couldn't tell which bodice piece was front and which was back. I sewed the old country road tag into the back neckline to help. I'm going to get plenty of wear out of this jumper and I'm hoping to claim a few more of Tim's jumpers in the future.