Saturday 29 April 2017

Peppermint Patterns Peplum Tops

In 2014 I set myself a goal to review 12 free patterns over the year. I still have a penchant for sewing on the cheap by using free patterns, refashioning and using scrap fabrics. There are some excellent free patterns available online. In particular, I love the selection on Peppermint Mag, including the Peplum Top Pattern


I've sewn two of these tops. The pattern is easy to follow with no darts of closures. Smoothing the bias binding flat is a little tricky. Especially at the back v neckline. 

This is a  great pattern to use up fabric remnants. The peplum flounce uses quite a bit of fabric, but I found that I didn't need it to be as full as the patterns asks for. The flounce on the black version is about 1/3 short. The floral version is a cotton silk remnant I had left over from this dress. The black spotty silk version i refashioned from this skirt. I found the skirt frumpy. The fabric was too good to be wasted on something I rarely wore.

I love the boxy cropped style of the top and the deep V back neckline. The top is incredibly comfy and goes well with my high waisted skirts and jeans. It's tricky to see, but in the photo below I'm wearing the top over a long-sleeved tee. Yay, for versatile clothes! This is a fantastic free offering and I absolutely recommend it.

I don't have many photos wearing these tops- strange, given I wear them all the time! These two photos are from this weekend. Tim and I stayed in the city to celebrate our wedding anniversary. 

Tuesday 25 April 2017

Sparkly 2015 Frocktails Dress

In August 2015 I attended the famed Melbourne Frocktails event organized by Kat. It was about that time that I fell off the sewing/blogging wagon and I never got around to blogging my dress. So here goes. My frocktails dress was definitely not a priority the months, weeks, or even days leading up to the event. I was, however, very excited about catching up with all the lovely sewers attending.


I considered all of my patterns carefully and sorted through fabrics for inspiration.In the end, I decided to make a quick and nasty Tessuti Gabby dress and hide behind the sparkle! I made a size small, as my medium version is on the big side. I sewed a lining and a sequin outer and joined them at the neckline. The lining is a terrible black poly satin that felt awfully hot to wear, even on a cold winter's night. The outer was a black mini sequin. Both fabrics were from GJ's discount fabrics. I inserted a back slit neckline closure and hemmed the outer fabric with black bias tape.


This dress was very fun to wear on the night. But it is hot and heavy to wear. I haven't worn the dress since. But I'll keep it in the wardrobe - you never know when a black mini sparkly number will be called for.


Friday 21 April 2017

Tessuti New York Cape

Hello again my blogging friends! It's been almost 12 months since my last blog post. As the old saying goes, "how time flies when you're... finishing a PhD". I've sewn a few bits and pieces in the past year, but I finally feel motivated to blog again. This renewed energy is partly inspired by a good friend Jess who has just launched a fantastic blog spotlighting women who cook, create and curate food for a living. I definitely reccomend a look - especially if you're a local (Melbourne, Aus).

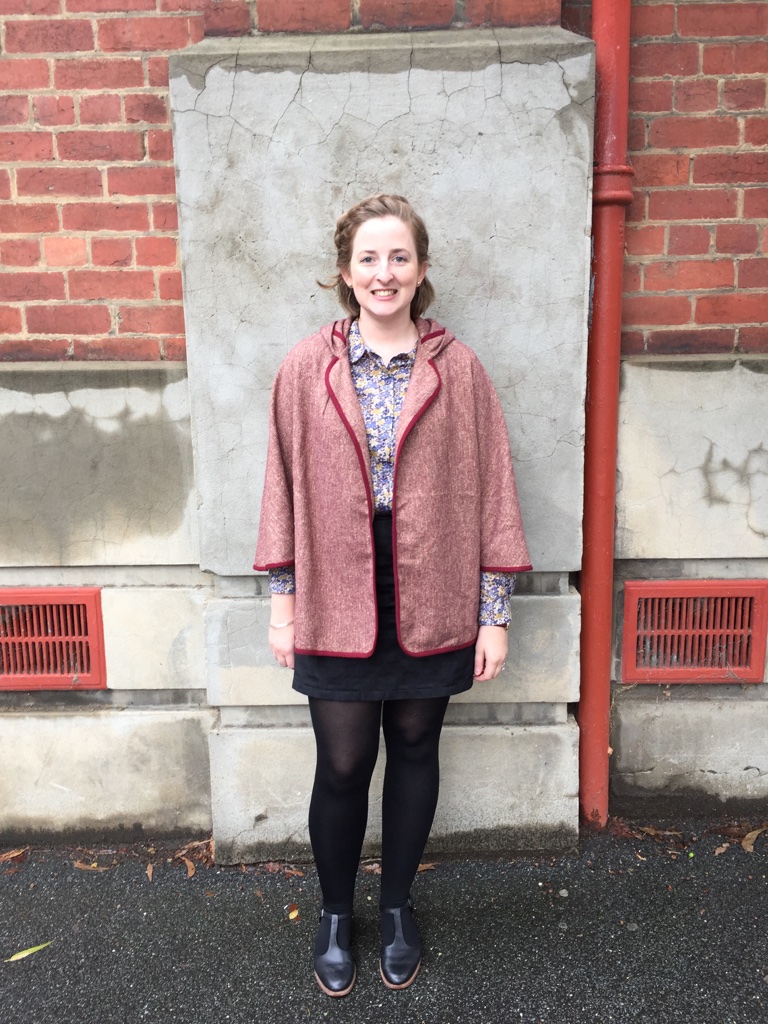
Ok, onto my lovely Tessuti New York cape. I bought this pattern and cut out my fabric close to three years ago. It then sat unsewn until I picked it up earlier this month. I was intrigued but not absolutely in love with my fabric choice - hence the delay. But I'm really happy with how it's turned out.

The pattern instructions were detailed and the pattern surprisingly simple to put together. The only change I made was to cut an 1" from the bottom of the cape. Given the lack of shaping, I felt a slightly shorter cape was best for my height and proportions. The pattern was a pleasure to sew and I'd definitely make another in grey/black shades.

To brighten up the insides I used a navy floral tana lawn bought from Spotlight to bind the seams. External edges were bound with a luscious wool binding from Tessuti. This stuff is pricey but worth it. I don't think any other binding would work as well for this pattern. I machined sewed on the wool binding. Other bloggers (1, 2)have recommended hand sewing. I'm sure this would have prevented the slight tension puckering I'm getting in the front of the cape. But it's not bothering me enough to fix it. Another good steam might resolve the issue.

My cape currently lacks buttons. After traipsing around the city and trying to convince myself that several different buttons look "fine", I've decided to just go without. At least temporarily, until the perfect button finds me! In the meantime, I've tacked the undersleeve together. I'm not sure I'd wear the cape closed very often anyway as it's a fairly lightweight coat.

Thanks for reading. It's great to be back!