Wednesday 30 April 2014

Bonus Sew Cheap Pattern Review: Simplicity PJ's

This month I'm posting a bonus sew cheap pattern review. I'm not counting this as one of my challenged 12 as I made it for Tim, not me, and I've actually already made this pattern before. The Simplicity Easy PJ Pants are a freely available multisize pattern for men and women.

Simplicity PJ Pants

Last year I made up a pair for Tim's birthday out of orange and white robot flannelette. They turned out super cute. I cut him a Size M and the fit was good, but we agreed that the waistband sits much higher than necessary. 

Simplicity PJ Pants

This time I again used size M but increased the waist band size. The pattern says to turn down the waist band 1/4"and again 7/8" (total 1&1/8"), sew and insert 1/2"elastic. Instead I turned down the waist band a total of 2": about 3/4" under and then again a 1 &1/4". I also used 1"elastic. This removes some of the excess length in the waist and also creates a more substantial, sturdy waist band. I used brown twill tape from the draw string.  Otherwise I followed the instructions. Except that I sewed up all my seams on an overlocker (Thats right! I bought an overlocker!! More on that another time) barring the hem and waistband. 

Simplicity PJ Pants

I bought this animal flannelette from Spotlight. How freakin' adorable is it? I have a small amount left so I might make myself some PJ shorts or perhaps make PJ pants from nephews. Tim's really pleased with his new PJ pants. I'm not so sure he's pleased with me posting picture of them online...

Simplicity PJ Pants

The pattern instructions are very thorough and, in my opinion, a bit overly wordy. By following the pictures/diagrams you will be happily on your way to sewing yourself some jammies, no need to get bogged down in the text. This pattern is perfect for beginners and also for those wanting to whip up some PJ's quick smart.
  
Simplicity PJ Pants

If you like this post, check out my Sew Cheap: Top Tips Sew Cheap: Free Patterns and previous Sew Cheap posts. 

Thursday 24 April 2014

Me-Made-May'14: The Goal

This will be my first year participating in Me-Made-May'14. I loved following everyone's outfit updates last year and I'm very excited to be getting involved this year. Check out So, Zo...what do you know? for  info on Me-Made-May'14.


I've set myself  two goals which will hopefully help me with a little sewing  problem of mine. Winter is coming....and I'm not prepared. I'm guilty of refusing to buy knit or woven basics because they're so simple to make, but avoiding making them because they're so boring. Thus, I own like 2 basic t-shirts, no leggings, and only scummy old long-sleeves tops. Thankfully I have a draw full of tights, and most pairs have no holes. 

So, I, Liz of Sewn By Elizabeth, sign up as a participant of Me-Made-May '14. 
I endeavour to: 
 1) wear at least one item of hand made clothing each day for the duration of May 2014. 
2) sew at least two layering knit/stretch clothing items for myself. 

The second goal is an obvious push to force myself to make more basics, but I think the first goal will help, as well. Most of my me-makes are more appropriate for summer/spring. If I'm going to wear them every day then I will definitely need more warm basic layers to go under/with my many floral skirts and dresses in the coming cooler weather.

Sewn By Elizabeth Summer/Spring wardrobe

So,  the above clothing items (and many more) now need to be integrated into a warm and woolly wardrobe. Any advice? Obviously there will be a lot of tights. I'm going to finally try and the Deer and Doe Plantain top, perhaps get my hands on the Sewaholic Renfrew top and maybe try sewing leggings. Wish me luck.  I'll post weekly roundups of my outfits and basics sewing progress.

On the other hand, maybe May will be full of sunshine and I wont have to worry about keeping warm....

Monday 21 April 2014

Sew Cheap April Free Pattern Review: Wrap Around Dress

Right off the bat, this is my favourite Sew Cheap monthly make yet!

Peppermint Wrap Around Dress

April was getting away from me and all my planned free pattern makes just weren't inspiring me. Then I found this amazing dress! My April Sew Cheap Free Pattern make and review is the Peppermint Wrap and Roll Dress. This dress is described as a light weight woven wrap dress perfect for summer. The dress is designed to be fully lined or even reversible. The armholes, bodice and skirt opening are finishing with bias binding and the dress closes with button across the front. See below the dress photo from Peppermint website.

Peppermint Wrap Around Dress
(Source)
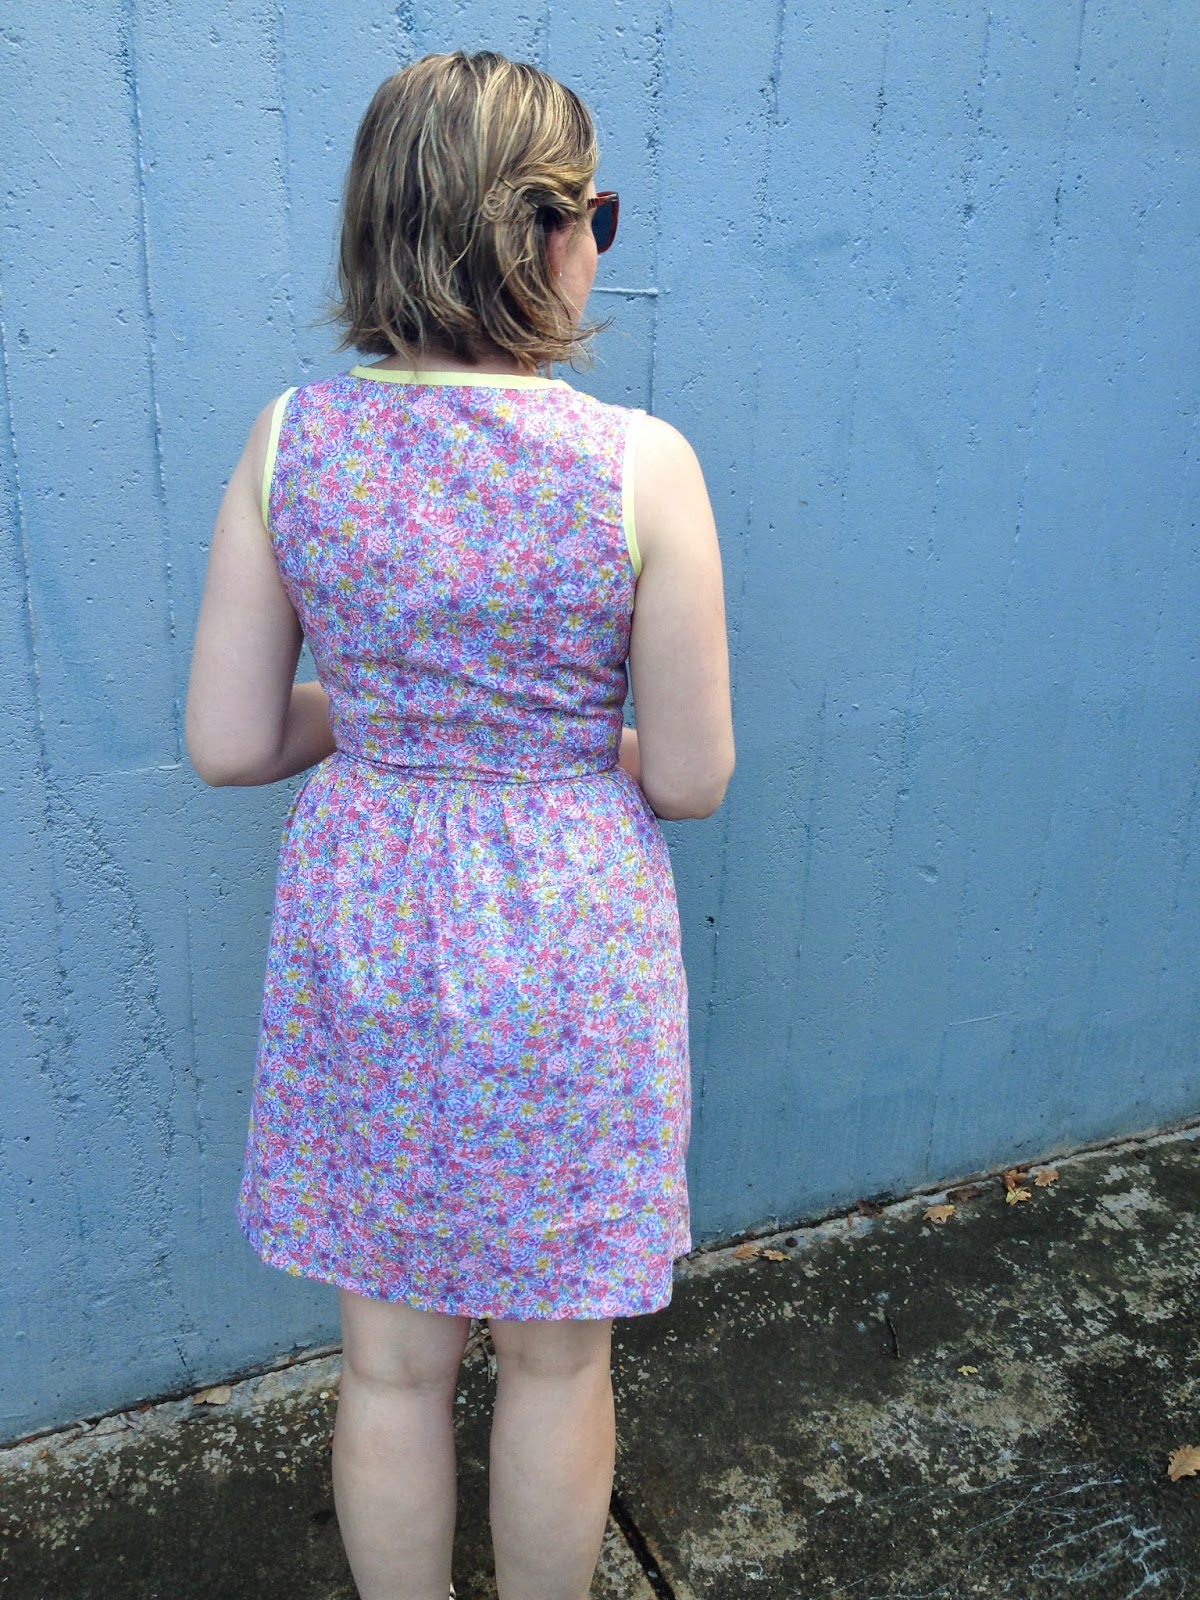
The dress comes with a bodice pattern and measurements to cut the skirt (e.g. 3 rectangles). Unfortunately there are only three sizes available (Aus 8,10,12). There is no size guide on the website so I had to take a gamble. In the bodice I can range anywhere from any Aussie 8 to 12 but decided to go with the 12 as it's easier to size down than up once cut. The fit is actually pretty spot on. The only adjustment I made was to take up the shoulder seams 1/4". This improved the dart height and waist length on me but made the arm holes a little high. There is also a bit of excess fabric at the lower back. But neither of these issues are bothering me. 

Button down Wrap Around Dress

As there was no size guide and I couldn't find any online reviews I didn't want to make the dress out of any precious fabric and I still had 4 meters of the floral I used for my Emery Dress Skirt hack. I used yellow bias binding I picked up from an opshop (took about 4m) and a selection of non-matching plastic two holes buttons that looked cute together (also from an opshop). I decided not to line this dress, or make it reversible. It seemed unnecessary.  So, all up this dress probably cost around $5. 

Button down Wrap Around Dress

The dress came together from start to finish in about 4 hours. The most time consuming part was the bias binding. It is an incredibly easy make if you are comfortable sewing button holes (Tip: interface under where you'll place the button holes if using light weight fabric). If you don't make your dress reversible than you only need 7 button holes/buttons: 6 down the diagonal front and one on the opposite waist. the instructions recommended 14 if making reversible. The right front bodice and skirt wraps fully over the left. 

Button down Wrap Around Dress

While I found the dress a really easy make, the instructions are incredibly brief. If I was following them word for word I probably would have been a little confused. Thankfully the pattern is quite intuitive. If you have made a dress before, can sew buttonholes, darts, and bias binding, well you'll know how to make this dress! The only troublesome component might be figuring out your size, or potentially grading up. 

Button down Wrap Around Dress

I absolutely love how this dress turned out! I'm so sad it wont get much wear during winter. But, I love that I've found a fun new dress pattern. I think I'll make a winter version out of a bold navy, black or grey with fun contrasting binding and buttons to layer over tights and long sleeve tops. So what do you think? Would you give this pattern a go? 

Button down Wrap Around Dress

If you like this post, check out my Sew Cheap: Top Tips Sew Cheap: Free Patterns and previous Sew Cheap posts. 

Friday 18 April 2014

Teach Me Fashion Draped Skirt: The Second

As soon as I finished my first version of the Teach me Fashion Draped Skirt, I knew I needed to make another one. One that would fit! The first I made in a medium out of cotton sateen and it fits a petite friend really well.  But, I couldnt get it past my knees. So, for this version it was time to try a knit fabric. I bought a cheap heavy polyester knit from Darn Cheap Fabrics. It's tricky to photograph, but it has a great textured diamond pattern. These photos were taken in direct sun which makes for crappy pics overall, but hopefully helps you see the skirt details a little better?

Teach me Fashion Draped Skirt

I thought a lot about what size to make. I considered going up a size. However, my research background kept me from changing too many variables at one time, and my lack of paper kept me from printing out another PDF pattern to cut in a larger size. Thus I made another medium with no changes.

Teach me Fashion Draped Skirt

Once again, the skirt came together super quickly. I didn't both finishing any seams as I wasn't sure how the fit was going to be. Also, I'm stubborn and refuse to finish seams on knits until I get an overlocker. It was a little tricky sewing on the waistband as the fabric is quite thick and my machine struggled with the four layers at the front piece. I also notice a little bulge in the fabric under the waistband when I'm wearing it, which really isn't an ideal spot for fabric bulge.

Teach me Fashion Draped Skirt

As this fabric has much more stretch and drape than my cotton sateen version the drape is much less structured/obvious. I suppose less of a pleat and more of a drape?

Teach me Fashion Draped Skirt

So, as you can see, this size medium polyester knit skirt DOES fit! My recommendation on choosing fabric would be to definitely use a knit. If you really want to go with a woven stretch than consider going up 1 or 2 sizes and maybe even inserting a zipper. Even then, the shape/fit might be off around the waist.

Teach me Fashion Draped Skirt

Will I sew the pattern again? Well, this is my first fitted knit skirt (ever). I love the style but feel a little self conscious in it. I think I'll wait to see how much wear it gets and perhaps make more if I feel I can pull the look off. Colette Patterns just released a basic fitted knit skirt (Mabel) which I know many curvy and less curvy will love and look amazing in. Mary's, from Idel Fancy, version of Mabel is so freakin beautiful and she looks divine in it. But still, I know I'd feel self-conscious, and even a bit naked, in something that figure hugging without any distracting details. I think the front detail in the Draped Skirt pattern draws attention away from the thighs/belly. Note: this is my crazy insecurity and I'm totally pro curvy ladies flaunting there booty! I'm interested to hear others thought's on  fitted knit skirts. Are they a wardrobe staple for you (I wish this was me), or are you just a little afraid of them (like I am)?

Teach me Fashion Draped Skirt

*Teach Me Fashion generously offered me the Draped Skirt Pattern for free. Of course, all opinions are my own. *

Tuesday 15 April 2014

Floral Skirt Hack

On the weekend Tim and I visited the North Melbourne Market. Apparently one little old lady had won the sewing competition: "she who dies with the most fabric wins" and her family were selling her enormous and beautiful fabric stash at the Market. There were boxes and boxes and boxes. Due to limited space only a few (like, 10) boxes were opened at a time. I went with the goal of buying knit fabrics but there wasn't any displayed at the time. Instead, I bought two great floral pieces: a pink, yellow and mauve cotton/poly blend (about 5m) and approx 2m of a white blue, and green cotton which is much softer than the first. This cost me $6 total!!

Floral Skirt

I wanted to make something from the fabric straight away. I decided on a full floaty, high wasted and pocketed skirt. I didn't have a pattern that matched my idea, but it was so simple I knew I could improvise. I decided to use the pink fabric as I had more of it and it wouldn't bother me as much if I screwed it up.

Floral Skirt

I cut a waist band 31 1/2" long (my waist plus + 5/8" S/A plus 1/2"ease) by 5 inches wide. I finished one long edge with bias binding. I was going to just cut some rectangle pieces around twice the width of my waist and gather for the skirt pieces. Instead, I decided to use the skirt and pocket pieces from the Emery dress as I loved the shape on my first version in particular.

Floral Skirt

I sewed the the skirt and pocket pieces together, attached the waist band, attached a regular zip (because I had one in my draw), folded waistband down and stitched in the ditch to attach the waistband facing.  Finally I hemmed the skirt and that was it. A finished skirt in a few hours.

Floral Skirt

I'm starting to get more confident and willing to make up simple patterns with a mix of self-drafting and pattern hacking. It's lovely to have an idea and make it happen within a few hours. I love how it turned out. It's sweet but super comfy. It's probably not the most flattering look on me, but I'm  loving it anyway. Thankfully the sun has come out this week so I've been able to wear it. It pairs really great with my Modified Colette Hawthorn blouse. I probably wont have many more chances before it's put away for next spring/summer. I can see myself making more of these skirt next spring.

Floral Skirt

Apologies for the indoor pics! Daylight savings is over and Tim isn't around much in day-light hours during the week. Hopefully during Autumn/Winter I'll still be able to mostly post OK quality outdoor pics. But, every now and then indoor shots will have to do.

Sunday 13 April 2014

Sewing Ironing Board Covers

Apologies, but this is going to be a photo heavy, boring post about sewing ironing board covers...
I've noticed heaps of tutorials for sewing ironing board covers in the past. I never read them with much interest. I like sewing dresses not inexpensive practical stuff, or so I thought! I mean, I sew my own knickers now - and I love it. On Saturday I found myself cross at my badly fitting Elisalex dress (I'll blog eventually) and needed a quick pick me up. The stained cover on my Ikea mini ironing board was driving me bananas, so I decided to replace it. I could have looked at any number of tutorials, but I decided to wing it instead.

DIY Ironing board cover
The finished product, and the naughty Elisalex dress. 
First I unpicked the my old cover. It had a round of thin elastic sewn into a casing. I removed the casing and noticed that the elastic was in great nic so I could re-use it. I used the the unpicked scummy cover as a pattern for my new cover. 


The recycled elastic
I decided to make two, this way I can swap them over regularly to pop in the washing machine. I cut one out a quilting cotton (red and black diamond pattern) and the other out of some bright pink linen.


I used the recycled elastic in the pink cover. I didn't want to cut the elastic in half prior to insertion as it was already the perfect size for the cover. I cut a long strip (around 2"wide) of a contrasting fabric for the elastic casing. I attached the casing right sides facing to the cover with the elastic inside the casing. As I sewed around the cover I pulled the elastic tight towards me.


DIY Ironing board cover

 It looked like a giant shower cap upon completion, but fit perfectly.

DIY Ironing board cover

DIY Ironing board cover

 For the second cover I used some wide bias binding for the casing and piping cord to tighten the cover around the board. I first made up the piping as you would normally, but making sure not to sew over the cord as it needs to be loose to tighten properly. I then attached the casing right sides facing to the cover, finished the raw edge and that's it.
 
I popped it on the board, tightened and tied a bow.  

DIY Ironing board cover

DIY Ironing board cover

That's two new ironing board covers made in around an hour or so. Now that I know they're so easy to make I'll be on the look out for some sewing themed fabric or perhaps polka dots to match my chair. 

Teach Me Fashion Draped Skirt

Teach Me Fashion are a relatively new pattern company. They first released the free Two Tone Top pattern which I reviewed here. Very unexpectedly Heather and Harrison from TMF got in touch to thank me for reviewing the top and let me know that they'd since made some improvements to the pattern/instructions. They also offered to send me another pattern free of charge. Of course, I said yes, please, and thank you! I chose the Draped Skirt which I really liked the look of when it was first released.

Draped Skirt Teach Me Fashion

This skirt is a no dart figure hugging shape with a draped front and elastic waist. I feel like this is a style skirt that every woman should have in her wardrobe, and I couldn't wait to have one in mine! The pattern model wears a version of the skirt in a knit fabric, and in the accompanying instructional you tube clip the fabric used is also a knit. I should have used a knit! However the pattern instructions recommended either a knit or woven fabric and I was really keen to have a fitted stretchy cotton sateen pencil skirt. I bought 1m of this beautiful navy print stretch sateen from spotlight. It's a nice heavy weight which I thought would hide lumps and bumps. I cut and made up the medium which fit my measurements perfectly.

Draped Skirt Teach Me Fashion
Back

This was the quickest and easiest skirt I've ever made. I didn't make any attempt at pattern matching. Less than 2 hours from fabric cutting to completion. At this point I was very exited and wanted to make many of these skirts. I LOVE how it turned out.


Draped Skirt Teach Me Fashion

Just one small problem, I couldn't get it past my knees... Fortunately I have some rather petite friends. I gifted this skirt to a friend who, among other awesomeness, just happens to wear pencil skirts fantastically. She is approx two sizes smaller than me in RTW and the skirt fits her like a dream.

Draped Skirt Teach Me Fashion

After my experience I sent an email off to TMF detailing my troubles. They replied saying that they are continuing to develop and improve the instructions and thanked me for the feedback. While I'm shattered the skirt doesn't fit, I'm glad it fits a friend and also that Heather and Harrison were so receptive of my feedback. I will definitely try this skirt again. Next time I'll use a heavy knit and try the size large. Another option might be to go a size larger and insert a side zip if using a woven fabric. 

Thursday 10 April 2014

V1247 Staple Black Skirt

I love skirts. My go-to outfit is a skirt and t-shirt on the weekend or blouse during work hours. In winter, add tights. There are many versions of the Vogue 1247 skirt on the internet but after seeing seeing Amy's Hipster Deer version I knew I had to have this pattern! Coincidentally I thought it was the perfect shape and style to make for a friends birthday present. Thus, a reason to buy!

Vogue 1247 Skirt

The skirt is a very simple one pleat style but with the added interest of back and front yokes and front pockets. The instructions are written so that all exposed seams are encased in binding making for very fun and pretty insides.

Vogue 1247 Skirt

I decided to make myself the skirt first to iron out any issues before making my friends. I cut a size 12. My measurements actually put me in the size 14 but I think this style skirt should be much more fitted than shown on the pattern. This also meant that I could buy the smaller sized pattern which would cover the size I needed for my friends itty bitty frame. In hindsight, a little more ease would have been nice. Next time I might use slightly smaller seam allowances or otherwise use a fabric with a bit more give.

Vogue 1247 Skirt

I made up this first version  in a very cheap black drill. It photographs badly, has no give and marks under an iron. For future makes I might use heavier weight fabrics or perhaps line the skirt. I'd also like to try it in a fabric with a bit more stretch. While the pattern instructs you to bind every exposed seam, you could use an overlockers/zig zag instead. I knew I wouldn't have enough pre-made bias on hand to bind all the seams so I decided to encase the pocket, front and back yoke and hem seams and zigzag the side and centre back seams. For the closure I used a stray red and white gingham button for a pop of colour. Upon seeing the back of my skirt Tim said: "Is that a button at the back? That's funny!". I didn't realise back closing skirts were funny?

Vogue 1247 Skirt

I think the A-line shape of this skirt calls for an above the knees length, but it is very short. To keep as much length as possible I hemmed it using bias binding (e.g. 1/4" hem). For my future makes I'm going to add at least an inch , maybe more.

Vogue 1247 Skirt

The skirt was fantastically quick make! From cutting the pattern to finishing it, it only took an hour here and there. I love how it turned out, but the length makes it a skirt only to be worn with tights! I can see myself making many more of these skirts, but first, a navy cord version to be gifted. 

Vogue 1247 Skirt

Sunday 6 April 2014

Gertie's Bow Tied Blouse

A couple of weeks ago a VERY generous friend bought me the Gertie's New Book For Better Sewing, a book I'd had on my sewing wish list for an age. The book is fantastic! It has great detail on vintage and hand sewing techniques as well as vintage inspired patterns and variations. I wanted to try out a simple pattern to begin with to get a feel for the sizing, instructions and techniques. On Friday I sewed up Bow Tied Blouse to wear to a Melbourne sewing outing the following day.

Gertie's Bow Tied Blouse

I sewed up a straight size 6 which equates to approx one size too big in my chest but the right size at the waist and hips. I made up the shirt from a Darn Cheap lightweight cotton that wrinkles like crazy. I love the fabric and eyed it off for a while before I found it in a bargain bin and bought a few metres.

Gertie's Bow Tied Blouse

In terms of construction, I made the top up following the instructions but avoiding the vintage techniques. As this was my first attempt and I didn't both making the bound buttons holes or hand sewing the kimono sleeve and bodice hems. The only hand sewing I did was sewing on the buttons and attaching the inside collar. 

Gertie's Bow Tied Blouse

My two favourite aspects of the shirt are the bow and the button back. The bow is a separate piece of fabric which you cleverly thread through a a 'hole' between the centre front bodice top and collar.

Gertie's Bow Tied Blouse

The centre back closes with 5 buttons. I used self-covered buttons and I love them! 

Gertie's Bow Tied Blouse

I ended up adding a 6th button just below the waist. While I'm not against a little lower back flashing the lowest button stopped right on my waist and the fabric pulled out at my belly (as seen in the left photo below). By adding the 6th button below my waist the shirt sits nicer (right photo) in my opinion. 

Gertie's Bow Tied Blouse

The fit of the shirt turned out a little firm around my waist. Unfortunately I don't have a 1950's tiny waist and I don't wear belly sucking corsets, briefs or spanks. Many bloggers have said that the collar is very tight and had to widen the neckline. I found the collar firm but not uncomfortable. I noticed the shoulder seams creeping towards the front of my shoulder which might be due to the tight collar requiring more room at the front of the neck. I'll definitely be making this top again. It's such a great dress up/dress down blouse. Next time I'll be reducing the seam allowance from just below my chest down to provide just a bit more waist room. I'll also widen the neckline slightly at the front and definitely try the bound buttons holes.
 
Gertie's Bow Tied Blouse

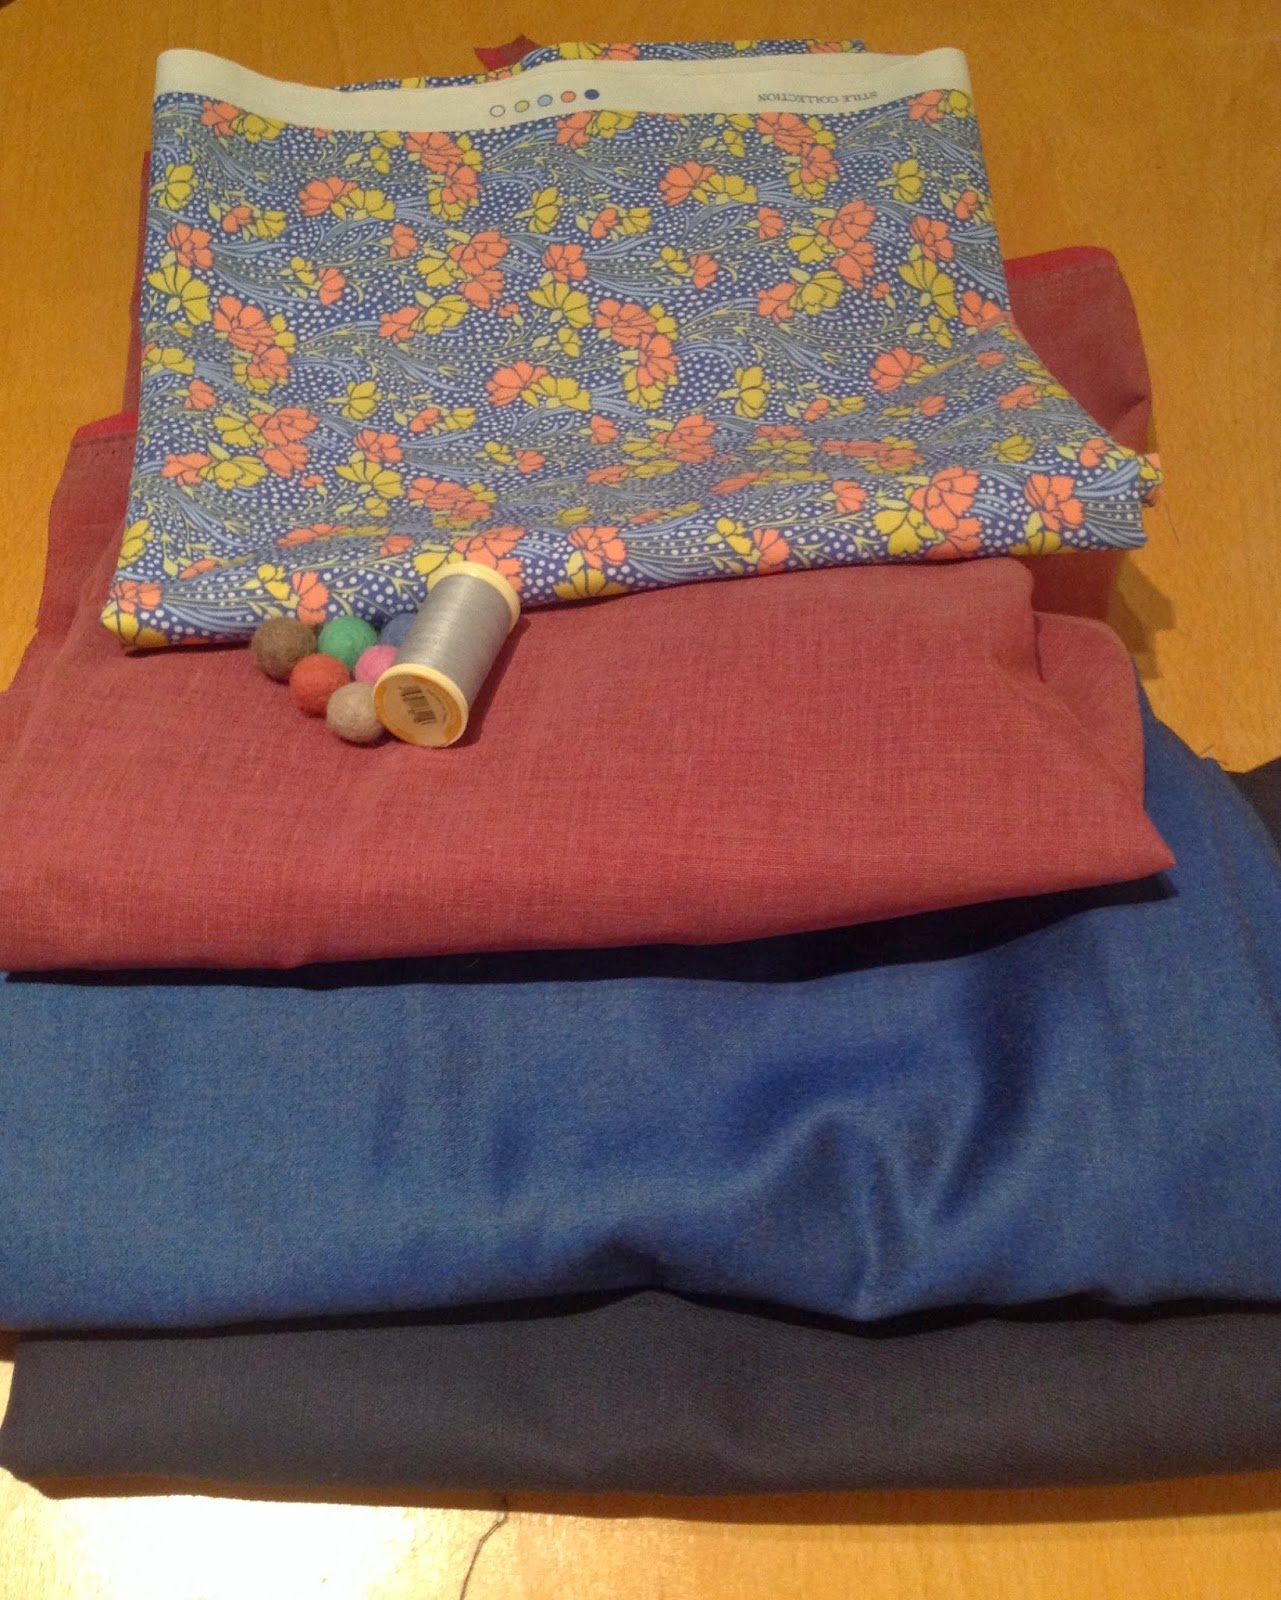
I had a lovely time at the sewing outing. Met a few favourite Melbourne bloggers for the first time and got to know some other wonderful sewing ladies. I love shopping with others (fabrics, clothes, whatever) because I love a bit of peer pressure and enabling others purchases. From the Fabric store I bought a beautiful shiny suiting weight blue wool which is destined to become a pencil skirt. From Clear It I picked up some red Chambray (no plans) and navy drill (test pencil skirt fabric). I was too overwhelmed in Buttonmania to buy anything. I know I'll end up regretting that. Finally we went to Luccello. Wow! what an amazing store. I bought a metre of on-sale medium weight Liberty fabric. I'd never been Buttonmania or Luccello before, boy was I missing out. I can't wait to start sewing!