Thursday, 30 January 2014

Colette Hawthorn Blouse: A Very Wearable Muslin

I have a limited number of lovely day-to-work shirts in my wardrobe. So, when I received the Colette Hawthorn Dress pattern from my sis and BIL (Thanks again Nat and Ben!) I knew I wanted to try out the blouse version (V1) first. I also thought making up this version would act as a muslin for a later dress as the dress is, in essence, just a bigger peplum (with many more scary buttons). My first hawthorn blouse was intended to be a wearable muslin so I made it up in some left over fabric from my Edelweiss Colette Truffle Dress.

Colette Hawthorn Blouse

Note: if in these photos I look like I'm sweating bullets, my shirt is all wrinkled and my hair is a frizz ball. Well, that would be because it was 41 degrees outside! Tim took these photo's at 6.45pm and it was still that hot. The day after was 25 degrees. 

Colette Hawthorn Blouse

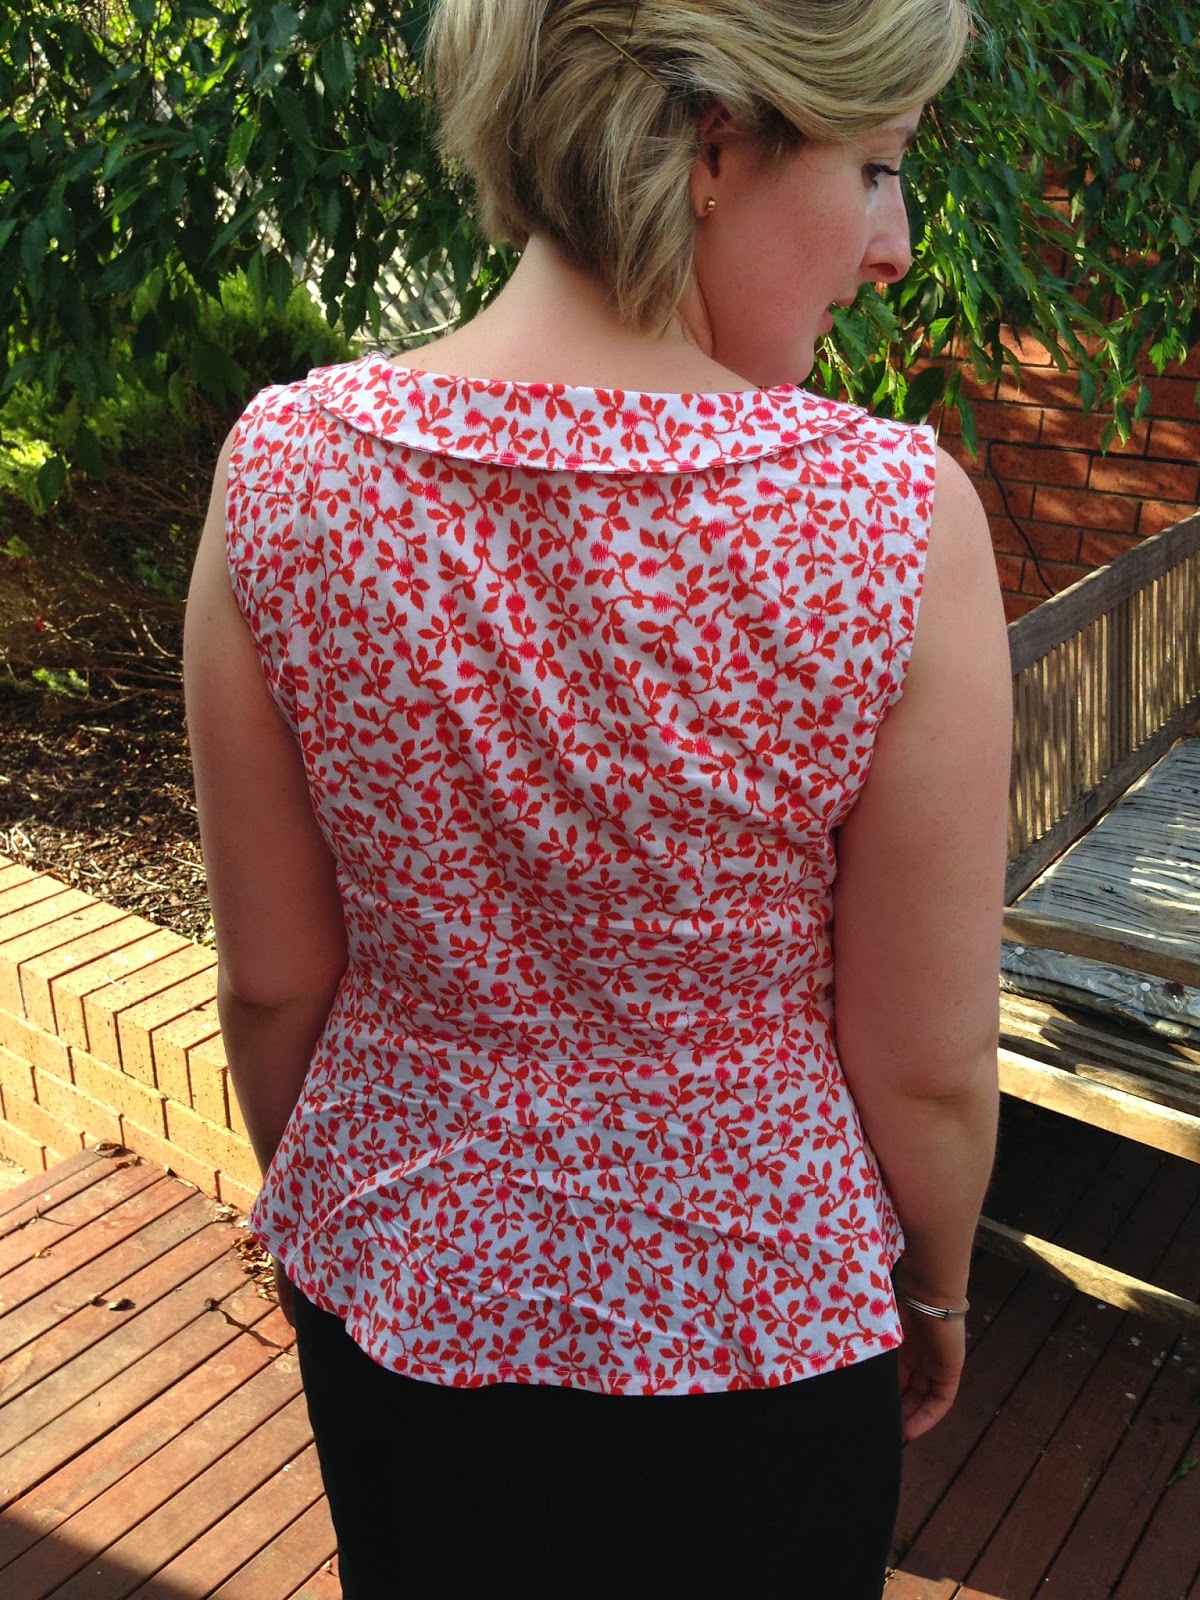
Back to the top. I cut a size 4 bust, grading out to an 8 at the waist and hips. I knew the size 8 bodice would just be too long so I kept the size 4 bodice length and dart placement. I was a little intimidated cutting out all of those little collar and facing pieces. But, following the instructions was super simple. I followed them exactly except for sewing a 1/4" S/A for the collar short sides to ensure the collar met round to the blouse front as intended. I knew to do this from all of the great Hawthorn reviews before me. Speaking of which I really love Hawthorn blouse versions from Ela Sews and Miss Crayola Creepy

Colette Hawthorn Blouse back view

I ended up making this version sleeveless, after much deliberation and a unanimous Instagram vote (apparently I was the only one deliberating!). I did what I was told and it turned out great. The fit is not quite perfect, but pretty damn close. There is some excess room around my waist but that might just be from the slight stretch in the cotton. There is also some excess fabric around the sleeves near my bust and the arm holes are a little smaller than I would prefer.


Overall, I am really impressed with this top. It has a really sweet collar and peplum AND 6 buttons (I omitted the top button as I only had 6 on hand). It actually is very simple to make but all those pretty touches make it look more impressive than it is. I will give myself some credit for the button holes though. I had a this awful feeling I would get to making the button holes and end up putting it off and never finishing the blouse. I faced my fear and got on with the job and the button holes are fine. Next time, they will be even better! 

Colette Hawthorn Blouse

I plan to make two more versions of the blouse. One will be a sleeveless white seersucker version (already cut out) which I am planning to hack just a little bit (details to come). The other will be a short sleeved version made from a slinky white green and orange small bird print vicose from Darn Cheap Fabrics. I often get bored when sewing the same pattern up multiple time, so lets see how I get on. I have also cut out the very tempting Papercut Patterns Rigel Bomber Jacket and have a few other pieces high on my list! And I have some Liberty cord on it way from the UK. Feeling excited and overwhelmed by the amount I want to sew.

Saturday, 25 January 2014

Sew Cheap January Free Pattern Review: A Two Tone Singlet

This year I've made myself a sewing goal: make 12 new-to-me free patterns, one for each month, and review them here. For my first monthly Sew Cheap:Free Pattern make and review, I chose the newly released simple Teach me Fashion's Two Tone Singlet. Teach me fashion release PDF patterns with accompanying YouTube video tutorials to teach home sewers varying techniques. The Two Tone Singlet is freely available and sent via email upon request. The singlet is a boxy floaty top without darts or closures. The shaping is created through the separate peplum pieces, the back piece with tucks, and square panel bodice pieces. The neck and armholes are finished with bias binding. Light to medium weight fabrics are suggested.

Teach Me Fashion Two Tone Top

For this top I used two stash fabric, one is a very sheer wide-weave floral print John Kaldor Fabric Maker cotton I bought at an op-shop. The other, i think, is very light pink a viscose I bought for linings. Not the best fabric choices I've ever made. I underlined the sheer floral fabric pieces with the pink fabric, but had to work quickly as it frayed at the speed of lightening with a mere breeze unraveling it. The underlining fabric was quite slinky. I used the underlined floral for all top pieces/panels except the rectangular under arm pieces.

Teach Me Fashion Two Tone Top

The PDF pattern came together quickly with my only confusion being which underarm line to cut for the side panels. I think I ended up cutting the largest size for the underarm hole but it turned out fine, no drama. I cut a size small. My hip measurements didn't match the small, but being such a boxy top it's best to go with the bust size.

Teach Me Fashion Two Tone Top

I began to sew the pattern up using only the written instructions. They were very brief; at first I thought there were steps missing. I tried to wing it. I began to insert the panels into the front and back bodice pieces but couldn't for the life of me figure out how to piece the square corners perfectly. After much seam ripping I finally remembered that there was an accompanying YouTube tutorial! The video was clear and fully explained the steps involved in inserting a square corner. But with this temperamental fabric I still added a little fray stopper to the inside of my square panels seams for some added just-in-case protection. After you sew up these corners side panels the rest of the top goes together easily without the instructions.

Teach Me Fashion Two Tone Top
On trying on the top pre hemming and finishings, I could only just squeeze my head through the opening, while the rest of the top fit loosely. I cut into the very high neckline just enough to get the top over my head. I cut slightly deeper into the front of the top than the back. But as you can see it is still a very high neckline on me. I finished the arm holes and neckline with bias binding. I also used bias binding for the hem as it was on the short side and I wanted to keep as much length as possible but the underlined fabric wasn't playing nice enough for attempting a super skinny hem. 

Teach Me Fashion Two Tone Top

I'm reasonably happy with the final product in terms of the finishing and fabric choice. I really like the back of the top with the sweet peplum tucks. But, I find the front a bit boxy and unflattering. Not really my style. In saying that, if you like loose summer tops which don't restrict your tummy this is a great choice which could be made up in some really fun and flirty fabric combinations. I would recommend the pattern for beginners who already have a few garments under their belt. With the YouTube video it come together quickly and teaches some useful techniques (e.g. French seams, piecing corner seams, sewing with slippery fabric). But be ready for the possibility of having to lower the neckline.

John Kaldor Fabric Maker

While I like how the top turned out I really can't see myself using any more of the sheer floral fabric. I have approximately 1.4m by 44" wide left, plus 2 x 0.7m by 0.3m scraps. In the spirit helping others Sew Cheap I would be happy to post the left over fabric free of charge to anyone in Australia who would like it. Comment, or shoot me an email (sewnbyelizabeth at gmail dot com) with your mailing address and I'll post within a few days.

Teach me fashion Two Tone Singlet
If you like this post, you might also like my Sew Cheap: Top Tips and Sew Cheap: Free Patterns posts. 

Wednesday, 22 January 2014

Scarf Turned Laurel Dress

This dress is my last make of 2013. I had my eyes on the Colette Laurel Dress for some time before my sister and brother in law gifted it to for my birthday (Thanks Nat and Ben!). I was ready for a quick sew at the time and I thought the simple sleeveless shift dress would do the trick and that I might even be able to wear it on Christmas day.  How wrong I was.

Colette Laurel Dress

I chose to sew it up using a silk Country Road Scarf that was just a bit too big and bold for around my neck but had a BEAUTIFUL pattern. This was my first mistake. I knew I would need to underline the dress as the scarf was very sheer. As soon as I started cutting into the scarf, it started to fray. I was quick to underline all the pieces to prevent further fraying. I also used french seams to enclose the ratty frayed seam allowances.

Colette Laurel Dress
When the dress was a scarf
I traced the Pattern size 4 at the shoulders and bust, grading out to an 8 waist and hips. The dress came together very quick. When I tried it on, pre zipper insertion and finishing's, I had a few fitting issues. The dress was too big from the hips down while the arm holes were a real squeeze. I also noticed that I could easily get the dress on and off without the zipper. I mentioned my struggles with this make on Instagram and read that others had had similar troubles. Abbey, from Sew Charleston, even posted tutorial on widening the arm holes (must remember for next time!). I left it alone, not being quite the quick make I was hoping for, and didn't attempt to fix it until after Christmas.

Colette Laurel Dress

Eventually, I took the side seams in about 1.5 cm from the waist down and for the armholes I took 1cm from the shoulders grading it out to 2cm under my arm. That's just a guess though. I was being more methodological in my trimming to begin with but sometimes hacking just works better (or, at least as well as)! I had intended on hand sewing the bias finishing and hem but wasn't as motivated after the fitting issues.  I sewed up the centre back seam leaving about 6" for a back slit to easily pop the dress over my head. but, as you can see, it gapes and I will have to remove some excess fabric from the centre back neck next time. I hemmed the dress by machine using contrasting red thread with a wide hem.

 Colette Laurel Dress


The final fit is a still a little loose around my hips, but I really like length and I think this scarf is much more wearable now. The fabric and the length feel just that little bit fancy, which I love. I will definitely sew up another Laurel dress and perhaps a blouse too. I would like a simple cotton summer dress and also a sleeved version for winter layering. Overall, I like Laurel very much. But, I do have a few fitting issues to keep in mind next time. 
  
Colette Laurel Dress 

Friday, 17 January 2014

Sew Cheap: Free Patterns

There is an absolute abundance of free patterns and sewing tutorials online. They vary in type, quality, size range and ease of access. Free patterns are often basic wardrobe fillers and are a great way to keep the cost of sewing down. I've already sewn quite a few free patterns for myself and also for Tim and other family members.These include, but are not limited to:

1. Colette Sorbetto Top: Very popular multi sized pattern with instructions and room for customisations. Great basic summer blouse. See my 6 versions and review here
2. Skirt As Top Scoop Tee: One-size (small) knit tee pattern with instructions. My version & review. This is a great beginner project for those new to stretch fabric (like me!).
3. By Hand London Polly Top: Multi sized sweet sleeveless top. I look forward to making another version as my last is little big. BHL have also posted variations on this pattern.
4. Simplicity Unisex Easy PJ Pants: I made these up for Tim for a birthday gift last year. They are a good fit, but next time I would lower the waistband. I will be making some for myself this winter.

Sew Cheap: Free Sewing Patterns

So, I've made myself a sewing/blogging goal this year:
Make 12 new-to-me free patterns during 2014, one for each month, and review them here.
To get myself started I wanted to post some of the patterns I am considering making up and others I would like to make if I could just learn to grade a pattern properly or sew stretch fabrics. I haven't yet planned enough patterns to get me through the year, so if you know of something special pass it on and I'll add it to the list!

1. Teach Me Fashion Two Tone Singlet: A floaty boxy 2 tone top released by a new-to-me designer with complementary you tube videos.
Teach me Fashion two tone singlet
Source: Teach me Fashion http://www.teachmefashion.com/
2. Dixie DIY Hot Coco Sweater: One size only knit jumper with a hi-low hem. Hopefully by winter I'll be ready to tackle knits again (eek!)
3. Colette Madeleine Bloomers: Multi-size bloomers. These will be a pair of PJ shorts for me. 
4. Honigdesign Garden Party Dress: A multi-size dress with sleeve, hem and collar variations. THIS is the future make I am most excited about! It looks like a great winter OR summer dress depending on the variation and fabric.
Honigdesign Garden Party Dress
Source: Honigdesign http://honig-design.blogspot.co.uk/2013/03/garden-party-dress-pattern-free.html#.Utd39vRvZ8G
5. The Selfish Seamstress Coffee Date Dress: A lovely multi size dress pattern. The only reason I haven't already made this up is because it doesn't include  seam allowances. Time to suck it up and start sewing!
6. House of Pinheiro Brasilia Dress: What a beautiful dress! However, it's one size only. I am hoping that I'm up to learning how to grade it out later in the year. I know it would be worth it!
7. Tilly and the Buttons Bow Belt: This is more of a tutorial than a pattern, but I'm including it anyway!
Tilly and the Buttons Bow Belt
Source: Tilly and the buttons http://www.tillyandthebuttons.com/2010/06/bow-belt-tutorial.html
8. Marfy Free Patterns: This is actually three patterns, a skirt, jacket and a blouse. Going off the sketches none of them really appeal to me. However there is a sew-along going on over at a challenging sew so I'm hoping it will spark my interests. 
9. By Hand London Circle Skirt App: This totally counts! The BHL girls are taking the math out of drafting your own circle skirt pattern for FREE. Both free of cost and free of stressful calculations. 
10.Tilly and the Buttons Picnic Skirt: Tutorial for a button front gathered skirt. 
11. So,Zo...Panties and Camisole: I'm being optimistic in thinking I'll be able to sew these and other knit projects. Worth a shot!

Updates:
12. Deer & Doe Plantain t-shirt: Thanks Renee for suggesting this one! It's multi sized 3/4 sleeve scoop neck tee. I'll definitely be making this one up!
13. Pattern Runway Easy Gathered Skirt: Thanks to Mel (a.k.a Miss Piggy) for this suggestion. Looks like a fun, flirty and easy make for later in the year.

Have I missed anything?

Lastly, I must say a huge thank you to the bloggers and designers who make free sewing patterns available. The Colette Sorbetto Top was my first 'real' hand made garment and now I'm coo-coo about sewing! That free pattern was just the thing I needed to get started with my sewing. Thanks!

Tuesday, 14 January 2014

Sew Cheap: Top Tips!

I love a bargain when it comes to my sewing - I am a student after all! I am happy to spend big if I can guarantee an outcome, but i'm still new at this so each pattern and fabric purchase is a massive gamble. What if I screw it up royally?!

I know I'm not the only one who loves a bargain, or even a good freebie, so I thought I'd put together some tips for sewing on a budget and also review some great (or not so great) free patterns. After a few inital posts, I plan to blog one free pattern review per month. Hold your horses, this isn't a blog series or anything!! I'm just dabbling in the 'theme' of how to Sew Cheap! Below are some tips and tricks I've come across as a beginner sewer. BUT, I first must declare that many many other bloggers have similar tips on how to sew on a budget or similar. My tips are not ground breaking, but they're what I do and what I find helpful

Top Tips For Sewing Cheap

1.  Build your stash by buying second hand fabrics from op-shops, online sellers or friends trying to clear their stash out. My first few sewing projects were sewn up using fabric remnants from savers, at a couple of $'s each, including two of my Sorbetto's and one Miette. I have also found old patterns in opshops but haven't been confident enough to sew them up yet.
Colette Sorbetto Tops


2. Refashion old clothes from your own or your families closet. Another two of my Sorbetto's are made from refashioning an old dress and an old shirt.

Fabric waiting to be refashioned: a top, nighty and two summer dresses
3. Do an informal fabric swap with friends or join a more formal swap such as 2014 Stash Diet Swap.

My messy Stash!
4.Go online for free sewing patterns and/or tutorials. In my next 'Sew Cheap' blog I'll document some of my very favorites that I've either made or plan to make soon.

5. Enter sewing competitions such as giveaways. You never know when and what you might win!

6. Have a go at designing your own patterns by tracing favorite store bought clothes. This is especially easy with simple t-shirts/blouses and elastic waist pant or PJs. But, if your confident, the sky is the limit!

7. Source patterns, fabric, notions from local distributors to cut shipping costs. For example, I buy all the patterns I can from Indie Stitches. They stock many of the big name independent pattern designers I like and deliver for FREE(!) within Australia.

Today was a good mail day!
8. PDF patterns are another option for cutting shipping costs as they are usually cheaper than paper patterns. But to make this option cheap you need a printer with reasonably priced ink cartridges.

9. Repeat sew patterns and customise to make different looks. Who needs 5 patterns that are almost, but not quite, identical?

10. Stock up on notions, fabrics basics, and patterns when there are sales. Sales are a reason to shop, my friend!

11. Make Sewing Friends! Sewing buddies may be happy to make fabric swaps, loan you patterns or gift unused fabric and patterns. They will provide invaluable sewing advice, whether it be how not to fudge up that new pattern you bought (on sale!), or where the local cheap-as-chips fabric stores are. Equally, sewing buddies might be a bad influence in fabric stores - peer pressure! Regardless, making friends who sew, whether online or in real life, will bring you a great deal more than just a few bargains.

12. Remember you don't need the absolute the most expensive of everything, but do your research and know when it is important to spend a bit of money.

And that's all I can think of for now, but I'll add to the list as I continue to learn how to sew cheap. I should also note that Tim (bf) would probably disagree with me if I was to tell him I kept my sewing spending to a minimum budget. It goes to show than even a girl who loves a bargain is tempted!

Friday, 10 January 2014

Grainline Studio Moss Skirt(s)

I loved the look of the Grainline Studio Moss Skirt from the minute I first I saw it. But, I didn't sew it up until I sadly sent my very similar, and beloved, wear-it-for-every-occasion skirt to the op-shop due to weight loss. The weight loss was a happy time for me, loosing that skirt was a super bummer! Enter the Moss Skirt.
Grainline Studio Moss Skirt

I've made three Moss Skirts to date. The first a size 8, the second a 12 the third a size 10. The first, just a little too snug, went to my sister Nat. The second remains in my wardrobe, but is just two loose. And as the fable goes, the third was juuuuuuuust right!


Grainline Studio Moss Skirt


My first Moss was very early in my sewing journey and I found the pattern quite tricky but I got there in the end and learnt so much. My main troubles surrounded the zipper insertion, but Jen's great photo tutorial got me through. I made the skirt to my measurements but it turned out skin tight. I freaked out and made the next version 2 sizes up. The fit on the second Moss was just too loose, it slid down my hips as I walked. Thankfully I made both V1 and V2 out of thrifted fabric and the PDF pattern means I could just print another copy of it.  Note, I made V1 & V2 using the Version A pattern (no hem band) and had to add about 1.5" in length to make it a not too mini, mini skirt. 

Grainline Studio Moss Skirt

I've learnt and sewn so much between my second and third version of the Moss Skirt. The things I found tricky earlier now seemed so simple. I made my third version out of a dark denim remnant from Rathdowne Fabrics & Remnants. The fabric was very thick so I knew I would have use something else for the pockets, hem and waistband facings. Scraps left over from my day-to-night Colette Sorbetto and matching PJ shorts did just the job! I really wanted the inside to look as beautiful as the out and the moment I decided that I started to make mistakes! The stitching from the inside looks awful. I realise only now that, given how thick the denim was, I should have loosened the stitch length. 

Grainline Studio Moss Skirt Insides

The denim was a beast to work with, particularly around the zipper. I think it turned out fine but I have a weird bulge of fabric at the bottom of the fly where the fly cover joins with the center front seam. Any tips on why this is happening? How to avoid it?
Grainline Studio Moss Skirt

I made this third version with the hem band and really like it, although I may consider shortening the main skirt a tad on future makes. My ideal skirt length is a fine line between scandalously-short and conservatively long. Mistakes aside, this third Moss fits so well. I can totally see this skirt being my new and improved wear-it-for-every-occasion skirt! I have some navy cord stashed away for a winter version later in the year. I can see myself going back to this pattern again and again.  I loved this skirt so much I inserted one of these beautiful woven tags, that my sister Nat bought me, that are otherwise reserved for gifts.
Sewn By Elizabeth Tags

Friday, 3 January 2014

Edelweiss Colette Truffle Dress

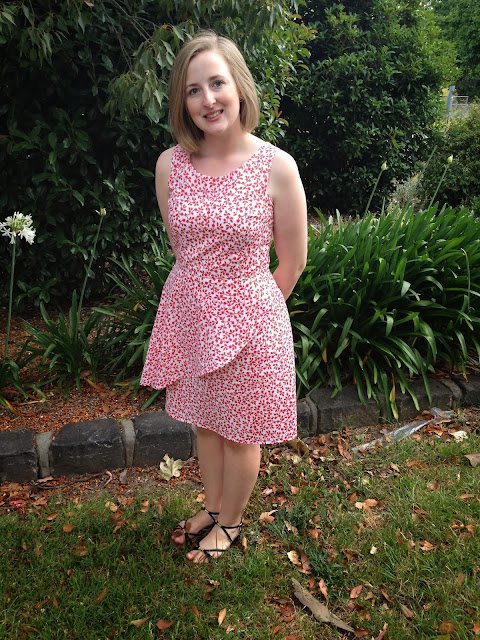
My first make for 2014: Colette Truffle Dress from the Colette Sewing Handbook, a Christmas gift from my parents. I made the dress out of a cotton stretch fabric from Darn Cheap Fabrics which I'd been eyeing off for some time. My sister thoughtfully bought it for me for my birthday.The fabric is called Edelweiss, which makes me love it even more as it's the name of my favorite song from the Sound of Music Soundtrack. It's constantly stuck in my head (go on, have a listen!). 


From the line drawings and included photo's, this dress was my clear favorite from the handbook and my first choice for a holiday sewing project. I traced the pattern according to my measurements: size 4 at the bust grading out to an 8 in the waist and hips. In semi-keeping with my 2014 sewing goals I slowed down and basted the bodice together first to act as a 'muslin'. I had a huge neck/back gape but otherwise the bodice fitted well (so I thought). I adjusted the bodice center back seams using the BHL tutorial which removed around 7/8" from each side only at the top grading down to the normal width at the bottom. 

Edelweiss Colette Truffle Dress
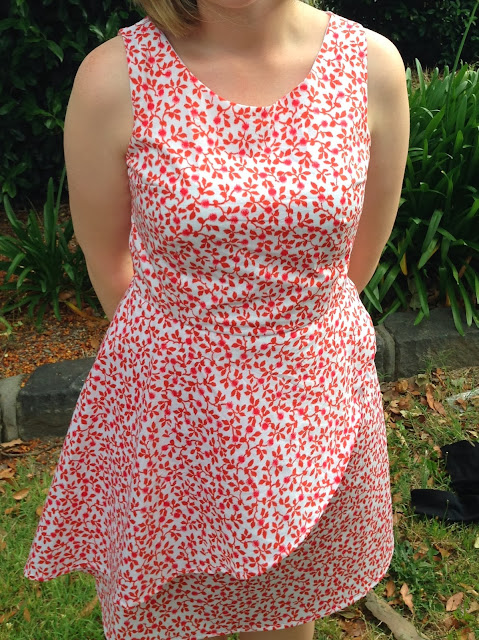
I then sewed up the dress in full. On trying on the dress I promptly slapped myself on the wrist for not basting together or muslining the entire dress. In the above photo you can see that the front of the dress is OK but the darts are a little low and the waist line is below my natural waist and the back view is all sorts of wrong... I've got some of back bodice zipper bulge/creases as well as a lower zipper bulge and excess fabric across my backside. I made two adjustments. Firstly I shortened the zipper from a 24" to a 20". This helped the skirt sit a little better across my bum and is still plenty long enough to easily step in and out of the dress. I also took up the dress at the shoulders removing 1" on each side. This improved the length of the bodice and the bust dart placement, but, as you can see, the back bodice and skirt still fit rather poorly. For now, I'm calling it 'good enough'. 

Edelweiss Colette Truffle Dress
A close up

Edelweiss Colette Truffle Dress
Don't get too close!
I love this pattern. It's very simply to sew, and the flounce is really fun. Made up in a variety of fabrics the dress could  suit many purposes, from work to party. I will definitely use the pattern again if I can just improve the fit. For my next attempt I will again shorten the zipper and make the back gape adjustment. I will shorten the bodice at the lengthen/shorten lines rather than at the shoulders. I may go down a size in the bodice as it isn't as fitted as I would normally wear, but perhaps that is because of the slight stretch in the fabric? But, I'm really not sure what is going on with my backside and how to fix it. Is it to tight or too loose? I looked for my fitting problems in the Colette Sewing Handbook but none quite matched, or at least I couldn't figure out which best described my problematic backside. Any advice would be greatly appreciated!

Edelweiss Colette Truffle Dress

Overall, I am happy with my first make of 2014. I took it slow (kind-of) and learnt how to insert an invisible zipper without an invisible zipper foot (don't look too closely). Fitting issues aside, I love this version and I will wear it! I think it will transition well through the seasons (or a typical four-seasons-in-one-Melbourne-day). And, wearing a cardigan covers up my bulgy back and bum - win!  I still have a few meters of the fabric left and I would love to make another piece of clothing with it. Perhaps it would be a bit weird to have two items made out of the same fabric in my wardrobe?

Edelweiss Colette Truffle Dress
Typical Melbourne Summer Day 


Wednesday, 1 January 2014

2013: The Year That Was

Many sewing bloggers are joining Gillian from Crafting a Rainbow in documenting their Top 5 of 2013. Others are reflecting in their own way. I think this is a fantastic idea! But, since I've only been blogging since October 2013 and sewing since November 2012 I don't have so many finished makes to reflect on. I've decided to join the party but do it a little differently.

What I've Sewn
Since beginning sewing late last year I've sewn 43 pieces of clothing. I'm pretty proud of that given I had to teach myself how to sew and I started with absolutely no fabric, sewing supplies, patterns or anything else other than my wonderful sewing machine gifted to me by my wonderful man. So, what's the break down?
I made 18 items for myself:
  1. Two Miette Skirts
  2. Five Colette Sorbetto tops
  3. Grainline Moss Skirt (unblogged)
  4. Two Wiksten Tanks (unblogged)
  5. Two Sewaholic Saltspring dresses
  6. Self-drafted PJ shorts
  7. Sewaholic Hollyburn Skirt (unblogged)
  8. By Hand London Polly Top
  9. Sewaholic Alma Blouse
  10. Skirt As Top Knit Scoop Top
  11. Colette Laurel Dress (unblogged)
And 25 items for others:
  1. One Miette Skirt for sister
  2. Two Colette Sorbetto tops for sister
  3. Reversible Pinafore (unblogged) for niece
  4. MADE Diaper Cover (unblogged)
  5. Grainline Moss Skirt (unblogged) for sister
  6. Flannel Simplicity PJ bottoms for Tim (unblogged)
  7. Sewaholic Saltspring top variation for sister (unblogged)
  8. Twelve pairs of MADE Kid Shorts for nieces and nephews
  9. By Hand London Polly Top for sister
  10. Thread Theory Jedediah Shorts for Tim
  11. Skirt with built in diaper cover for niece
  12. CINO Wraparound Reversible Tie Top for niece 
  13. See Kate Sew Envelope Clutch for friend
  14. Flannel pj pants for nephew
I sewed ALOT for others! I plan on being much more selfish in 2014 (sorry family). There have been a few items I made for myself that I never blogged. Generally, these were makes that didnt quite work out (the 'misses'). I feel quite guilty about this given that this blog is supposed to be documenting my triumphs AND challenges. BUT I fully intend on making these patterns 'hits' in 2014 and blogging them (so watch this space)!

Highlights Of 2013

Sorbetto Top
Sorbetto Top
My most worn item was my blue and white gingham Sorbetto top. Its comfy, can be layered, and work appropriate so it's on weekly rotation. 

Thread Theory Jedediah Shorts
Tim in Jedediah Shorts
My favorite make of the year was Tim's Jedediah Shorts. They were my most complex make of the year, but once I broke each step down using the thread theory tutorial they were actually quite simple. I think they turned out really well! I can definitely see myself make more of these shorts. Tim loves the shorts and wears them regularly. There is something really special about making something for someone else and them being willing, and even wanting, to wear it!

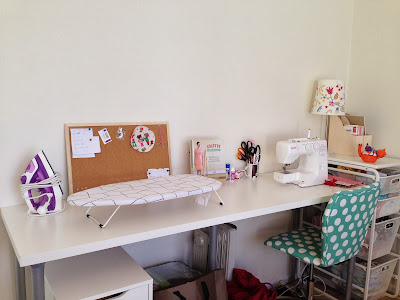
My sewing space
Beautiful sewing space
My absolute highlight of the year has to be the planning and setting up of my new sewing space, which was finished only a few days ago. I love being in this space and know how lucky I am to have all this room for my hobby!

Reflections & Goals
I'm always in a rush and I like to do things the quickest way possible. Sewing has slowed me down and taught me some patience (although I don't know that it extends beyond sewing). But I'm not patient about every aspect of sewing. For example, I'm more than happy to be the last person in the world to buy the new pattern so that I can see others versions, but I hate making muslin's. I'm happy to put a project on hold if I'm not 'feeling it', but I hate hand sewing. In 2014 I'm going to try to work on taking it slow and enjoying each stage of sewing projects. I hope that as my sewing skills develop I will begin to enjoy other aspect of sewing too (e.g. the fitting process). 

Source link 
When I began sewing late last year I was engrossed by blogs and tutorials; nothing has changed there. I am genuinely interested and inspired by what others have to say about patterns, trends, fabrics and sewing skills. Each time I go to sew up a new pattern I first read what others have experienced being sure to incorporate this invaluable advice. I soon realised that I too wanted to share my experiences in learning to sew, and, even more than that, I wanted to be part of this amazing sewing-blogging-instagramming community. I’m so glad I took the plunge, and began Sewn By Elizabeth in October!There are many talented Australian's blogging their sewing projects and it's been fantastic connecting with some of them via blogging and Instagram. One of my goals for 2014 is to attend some social sewing events and meet at least a few of these wonderful ladies in person. 

My final goals for 2014 are to sew more often and take part in Me-Made-May. First up for 2014 the Colette Truffle Dress (check out Instagram for a sneak peak).