Saturday, 25 October 2014

Sew Cheap October Free Pattern Review: 1950s Prom Dress

I'm so glad it's warm enough in Melbourne to sew and wear summer frocks again. This month for my Sew Cheap Make and Pattern Review I chose the 1950's Prom Dress featured in Peppermint Magazine. The pattern features a fully box pleated skirt, a V-cut back bodice neckline, facings around the neckline and a cute collar. The pattern comes in sizes S to XL (bust measurement: 33"to 39.5"). 

Peppermint mag Prom Dress

As per my measurements I cut a small bodice grading out to a large at the waist. The fabric is a lovely grey and off-white cotton lawn with a textured pattern woven through the fabric almost like a brocade. 

Peppermint mag Prom Dress

The PDF pattern is a little unusual. The back bodice, collar, facings are designed to be cut on the fold / double layer of fabric but the front bodice pieces, collar, facings and skirt are full pattern pieces to be cut on a single layer of fabric, despite the pieces being completely symmetrical. My kitchen bench just isn't wide enough to cut on a single layer and I prefer to keep off the floor so I cut the skirt and front pieces down the centre front and cut them on the fold.

Peppermint mag Prom Dress

I made a couple of changes. First, I left off the collar as I didn't think it would look nice with my fabric choice. Second, I added a skirt lining. I decided late in the piece that the fabric was just a little sheer. I had some white silk cotton floating around my stash so I cut a rectangle gathered it up and attached it at the waist seam.  I didn't bother attaching it to the zipper. The lining gives the skirt a little more volume which I really like. I also interfaced the facings and tacked them down which wasn't included in the instructions.

Peppermint mag Prom Dress

This pattern has the most box pleats I've ever sewn and all those nothces and pleat directions did get a little confusing. Thankfully it all worked out, but you do have to be very precise so that the skirt waist ends up the same width as your bodice.

Peppermint mag Prom Dress

The instructions are very brief. For example: "pleat skirt and sew waist seam". Step 10 around the zipper insertion is a bit of a mystery to me. I couldn't get my head around it so I just inserted the zipper using my normal method. As such, I would rate the pattern at advanced beginner level. You need to be comfortable completing each step without having to rely on the instructions. Despite the instructions this dress pattern is a great free building block for so many fit and flare dresses and could be easily modified by changing the neckline and skirt.  

Peppermint mag Prom Dress

I'm quite happy with how this dress turned out. There is some excess room around my waist and next time I will cut a straight medium, but otherwise the dress fits quite well. The dress is not easily taken in at the sides as the skirt has no side seams, only a CF and CB seam. The extra room wasn't such a bad thing though as I wore this dress to a high tea at the Windsor Hotel with Tim. It was delicious! There was ridiculous amount of delicious food.

Peppermint mag Prom Dress

If you like this post, check out my Sew Cheap: Top Tips Sew Cheap: Free Patterns and previous Sew Cheap posts. 

Friday, 24 October 2014

Elephant Cambie Dress

I mentioned ages ago that I promised my sister Gen a Sewaholic Cambie Dress. This promise happened around Christmas time. I made one for myself in June to practice, and I finally got my act together in September so that the dress was ready for her 18th.

Elephant Cambie Dress

For Gen's Cambie I cut a straight size 2 in version A. Gen had chosen a large scale elephant print canvas fabric from Spotty. I didn't bother lining this dress because, well, canvas! The Cambie goes together quite easily and very quickly without lining. I used pre purchased white bias binding to finish the neckline and sleeves.

Elephant Cambie Dress

As the print was quite loud I wanted to use a constrasting fabric to tone it down a little. For the pockets and the waistband I used the wrong side of some denim chambray. I'm really pleased with how the contrast looks.

Elephant Cambie Dress

Elephant Cambie Dress

I didn't muslin the dress so the fit was quite a gamble. I made no alterations other than bringing in the shoulder 1/4" as I expected them to be too loose on her, given that they were on me and a lot of others in the blog world. Before inserting the zipper I got her to try on the dress and wow what a lovely fit!

Elephant Cambie Dress

I didn't make any effort to match the print anywhere. I probably should have matched up the back but chances are I would have stuffed it up anyway.

Elephant Cambie Dress

I must admit that I was pleasantly surprised by this dress. I really didn't think the white and grey giant elephant canvas would translate well into a dress. I was wrong! It looks super duper cute and the shape of the dress skims Gen's body so nicely. Before next winter I plan on making myself a version A Cambie in some lovely grey wool. I'll be stoked if it fits half as well as Gen's.  

Elephant Cambie Dress

Thanks for letting me post photos of you in your elephant Cambie dress Gen, and for bringing some fresh new poses to the blog! Good luck with your exams this week. x

Wednesday, 15 October 2014

Marilla Walker: Maya Top

Happy hump day everyone. The year is flying by, and I'm so enjoying sewing for the coming summer. Marilla Walker recently released her first for sale pattern, the Maya Dress and Top Pattern pattern. Marrila has great style and isn't afraid to delve into what I consider to be "scary sewing". For instance, check out here gorgeous Shibori Maya Dress and amazing red leather handbag. The Maya Dress and Top fit pretty perfectly into my current obsession with boxy tops and shirt dresses so I was thrilled when Marilla asked me if I'd like the review her new pattern.

Marilla Walker Maya Pattern

Maya  is a kimono/cap sleeve dress or top which hangs from the shoulders. The pattern includes heaps of variations: button or plain front; curved or straight hem; pockets; various lengths; as well as an option for a sash belt. The pattern is designed to include sleeve and neckline facings that are top stitched down and French seaming so that final top / dress has no internal raw edges.

Marilla Walker Maya Pattern

For my first Maya I chose the top variation with a curved hem. I went with my bust measurement and cut a size 12. I decided to use polkadot chambray left over from my 2nd Alder Shirtdress  for the back, and for the front some soft white linen cut from a hand-me-down dress. The instructions are thorough but I suggest reading all the way through first as you need to know which parts of the instructions are relevant to the version of Maya you are making.

Marilla Walker Maya Pattern

I decided not to use French seams as the linen and chambray felt a little thick when folded over each other. After attaching the facing you are instructed to press under the outer seam allowances and top stitch around. I love the clean finish. However, you can see the facings through the white linen and the folded over edge really stood out under the white. I ended up serging the edge of the facing instead before topstitching down.

Marilla Walker Maya Pattern

I know some people prefer to use facings over bias bindings or vice versa, so I really like that the Maya pattern includes facings as it gives you the option of using them or instead using bias binding around the neckline and hemming the sleeves. In the instructions, Marilla suggests hemming the bodice pieces first if sewing the curved hem option as it can be fiddly sewing around the curve at the side seams. This is a great tip and really improves the finish of the hem.

Marilla Walker Maya Pattern

I really like how this top turned out. I think it will be another high rotation summer top. My favourite features are the kimono sleeves and curved hem. I often have trouble fitting sleeves properly but kimono sleeves are so effortless and comfortable. I'm also pretty in love with the contrasting back and front. I'll definitely be making up a few more of these tops for summer. I want to try the cropped variation next, oh and also the button up version. How cute is this version made by Jenna! 

Marilla Walker Maya Pattern

Disclosure: Marilla provided me with the Maya Pattern for free in exchange for a pattern review. All opinions are my own and I was pretty darn keen to try out the pattern regardless.

Sunday, 12 October 2014

Ulooop Noelle Top

For one week Tianfei from Ulooop Patterns was offering blog readers the Noelle Top pattern for free. Of course, I jumped straight on it! While I always jump at a free pattern I don't always sew it immediately, but Noelle fits right into my current sewing plans of loose fitting casual summer tops. The pattern has dropped shoulders and a curved high-low hem. The linen versions Tianfei posted are absolutely gorgeous and I was really inspired by her colour blocked gathered version. The Noelle Top pattern is now available for purchase.

Ulooop Noelle Top

I cut a size 12 and made a few adjustments. I cut the back piece in half just below the sleeve notch. After adding seam allowance, I cut the top back bodice in main fabric, and the bottom piece in contrasting fabric. Noelle seamed on the short side so I added more length at the back (around 1.5"). I wanted the contrast piece to be slightly gathered so I added 2"to the centre back. For the front piece I created an inverted rounded hem- leaving the centre front as is but grading it out 1.5" longer at the side seam.

Ulooop Noelle Top

In the below photo you can see how the hem curves around the body. I love this look. Although, when I put my arms up or move around a sliver of belly can be seen. So, for future versions I'll probably add an 1" to the front hem.

Ulooop Noelle Top

I sewed the sleeves a little differently than described in the Noelle Sew along post. To hem the sleeves they are simply serged / zig-zagged and then turned and stitched, before sewing the side seam. Instead, I sewed the side seam first, stopping at the sleeve notch. Then pressed the seam allowances away from the seam pressing all the way up to and around the sleeve. I then pinned and stitched 1/4" from the bottom hem up the sleeve allowance, around the sleeves and back down to the other hem. Finally, I reinforced the seam just below the sleeve.  

Ulooop Noelle Top

Ulooop Noelle Top

The fabric is gorgeous Tessuti linen left over from Tim's Negroni/ Archer shirt. It was again, beautiful to sew with and I'm so glad to have a tiny piece of the blue left to make another summer top. 

Ulooop Noelle Top

 I adore this top! I love the fabric combo, the easy-to wear shape and the curved hem. I will absolutely be making more of these tops for summer. Noelle is going to be the perfect pop over during a summer afternoon at the beach (Anyone else hanging out for summer holidays?). Noelle came together super quickly. The pattern was fun to sew and hack! Thanks Tianfei, for offering the pattern to blog readers for free last week :)

Ulooop Noelle Top

Saturday, 11 October 2014

Ulooop Lotus Top #2

After sewing up my first Lotus Top, Tianfei from Ulooop got in touch to say she'd drafted a slight variation on the sleeves/ armscye allowing for more arm movement (brilliant!). She sent me through the revised pattern and I whipped up another version. The pattern file is a layered PDF. I'd never used this function before and,to be honest, I didn't take any notice, just printed off the file as usual. My top turned out quite a bit different to my first so I wonder whether I muddled up the cutting lines after incorrectly printing the file. Thankfully, it's still wearable!


For this version of the Lotus Top I cut straight into some Liberty fabric. I won this fabric in a giveaway months ago. I adored the print on screen, and in person, but the the background colour doesn't do much for my skin tone. It makes me feel quite washed out. For these reasons I felt ready to risk the fabric on the top. 


The top came together quickly and easily. I made some self bias binding to bind the neckline. Over-locked the hem and sleeves before turning up once and stitching. French seamed the side seams.


The top turned out very wearable. There is definitely more room in the sleeves, and more arm movement possible. The scooped back is cute as ever and with a tad more sun the fabric will hopefully look a little nicer on me. There is some excess room in the centre front and back and the neckline on this version is a higher than my first Lotus. However, I suspect this is caused by my print/layered PDF issues. 


I'm really enjoying sewing up some quick and easy woven tops for summer. I cut out another Alder shirtdress at least a month ago but I can't bring myself to get started on it. I'm all about the afternoon make at the moment, and I have quite a few more to share.


Monday, 6 October 2014

Bluegingerdoll Bonnie Knit Top

I'm pretty quick off the mark blogging this one. Abby, from Bluegingerdoll, only released Bonnie this morning! I pattern tested the Bonnie knit top for Abby and have been living in it since. I got photos straight after making it in case it showed signs of wear by the time the pattern was released.

Bluegingerdoll Bonnie top

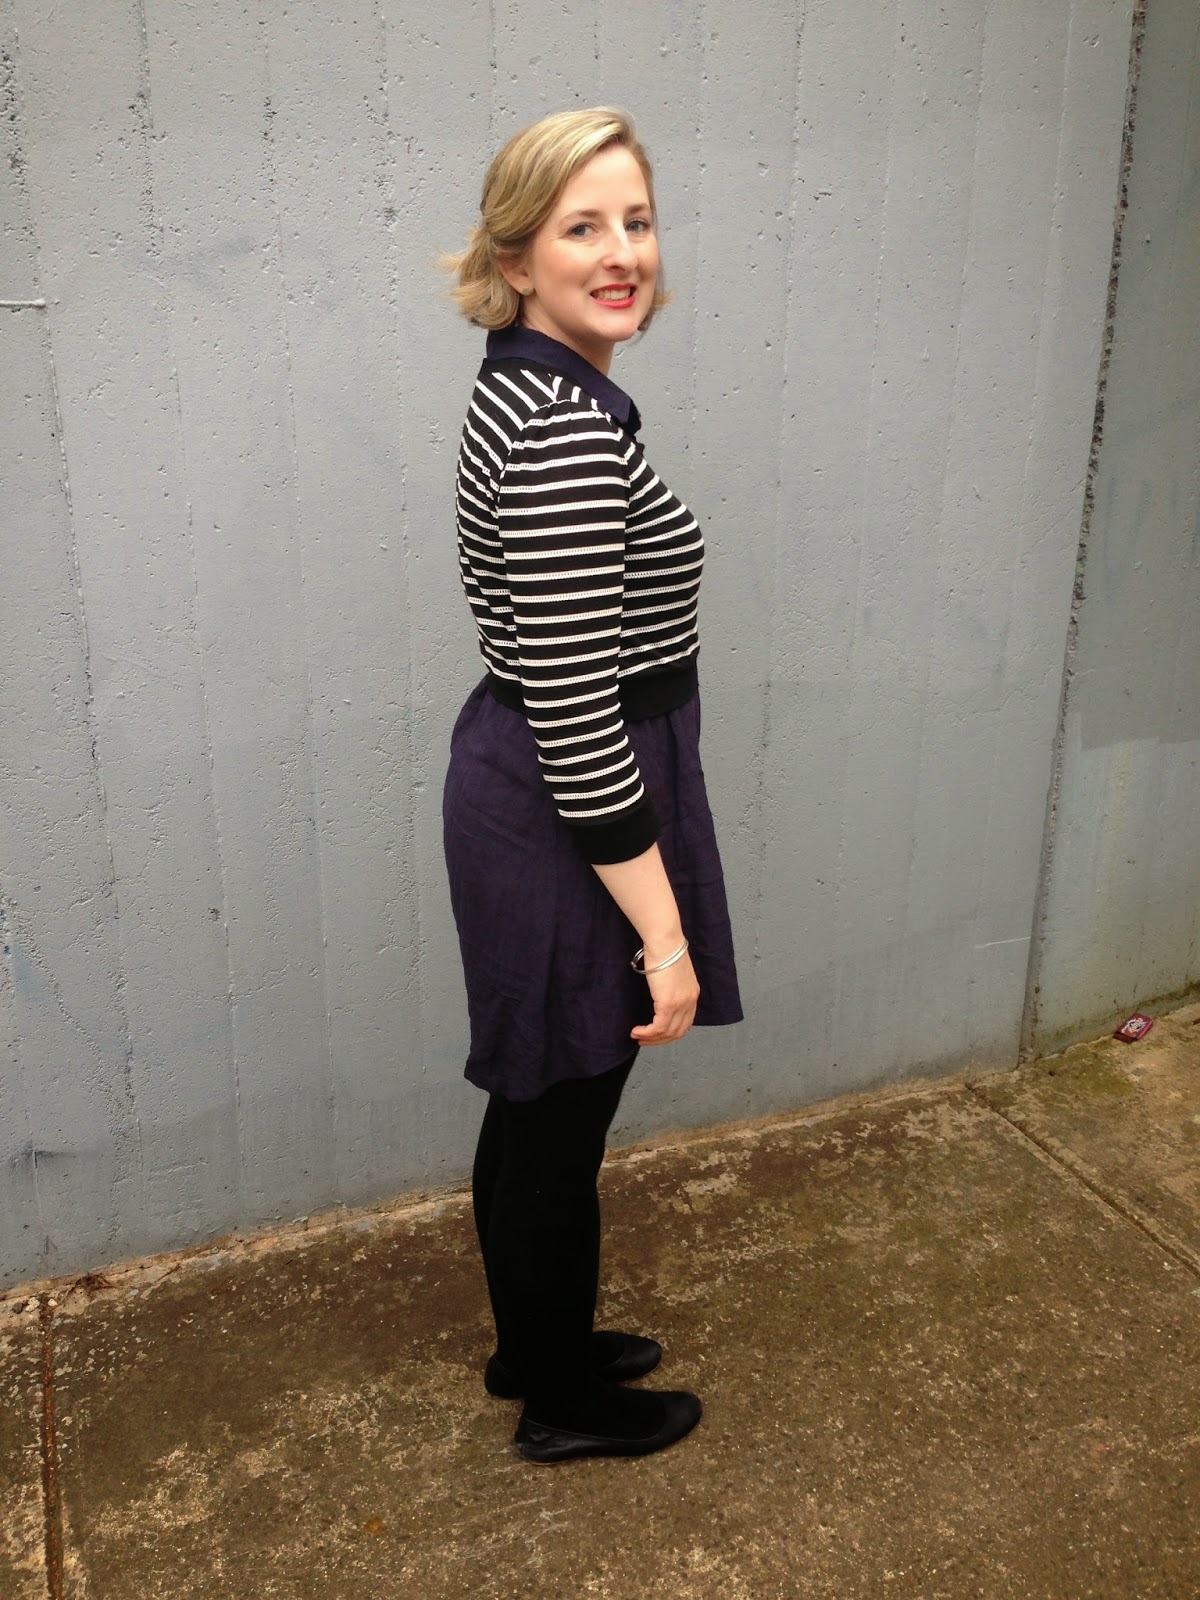
Bonnie is a fitted knit top with 3 variations: A) cropped length with short flutter sleeves; B) cropped with 3/4 sleeves and scoop neckline; C) long sleeved hip length boat neck top. I found view B particularly appealing. I make and wear so many fit and flare dresses (have you noticed?!) but don't have many cropped cardigans or jumpers to wear with them. View B Bonnie fills that gap perfectly.

Bluegingerdoll Bonnie top

I made Bonnie up in a size 10 grading to a 12 at the waist. I made two changes to this version: 1) I removed a little length from the bottom of the bodice as I'm a little short waisted and I wanted the waist band to sit right on my natural waist. 2) Added cuffs to the sleeve as my sewing machine twin needle wasn't playing nice and this meant I could construct the whole garment on my overlocker.

Bluegingerdoll Bonnie top

I used a gorgeous striped jersey from Tessuti for the main bodice and sleeves. The black is solid while the white stripes are actual lacey. I used a solid black jersey for contrasting bands.

Bluegingerdoll Bonnie top

Bonnie was incredibly simple to make and the instructions are spot on. The pattern would be a great intro to knits while still being a little different from many other knit patterns out there. I already own plenty of knit top patterns but Bonnie fills a gap and has enough options to make it versatile.

Bluegingerdoll Bonnie top

I love my new cropped jumper and see more in my life. The fit is great: fitted while being roomy enough to fits under layers. I think the cropped length is perfect. Although my sister asked if my jumper had shrunk so perhaps I took too much length off? 

Bluegingerdoll Bonnie top

Saturday, 4 October 2014

Ulooop Lotus Top

It's warming up quickly in Melbourne and I'm noticing some serious wardrobe gaps including loose fitting summer tops. I've had the Ulooop Lotus top pattern for months and decided to give it a shot when I picked up a black cotton eyelet remnant from Darn Cheap Fabrics.

Ulooop Lotus Top

My measurements fell between a size 12 and 14, but I cut the 14 for a little extra hiding room post winter binges. I'm glad I did! The pattern only has three pieces and took just under 1.5m of fabric. It was a very quick sew - only a couple of hours from printing off the PDF to wearing the top. I looked over the instructions which seemed thorough and included lots of pictures. However, it's easily enough made without the instructions. 

Ulooop Lotus Top

Things I love about this pattern include the low scooped back neckline, the curved two-piece back, and that it's a comfortable easy to wear top. Things I don't love are the sleeves/armsyce. The sleeves are tight around my "biceps" and the way the armsyce is cut in combination with the sleeve is creating drag lines across my front. I also didn't achieve as nice and neat easing in of the sleeves as usual.

Ulooop Lotus Top

I really love how this top turned out and I'll definitely wear it, but I'll be making some adjustments to the pattern before making again. I think this top would be gorgeous in mismatching but coordinating fabrics à la Bloggless Anna. Check out her Liberty Nani Iro scout and Liberty Gabby Dress. I mentioned this idea to Tim and he wasn't convinced. We'll see. 

Ulooop Lotus Top

I made this top to fill a gap in the wardrobe only to find this morning that I have few bottoms to where with it. Because of the back detail it wouldn't look right tucked in. Next on the agenda is shorts and hip sitting skirts. Who else is gearing up for Spring/summer sewing?